Master Custom Function Buttons: Set Up One-Touch Access to Your Most-Used Camera Settings
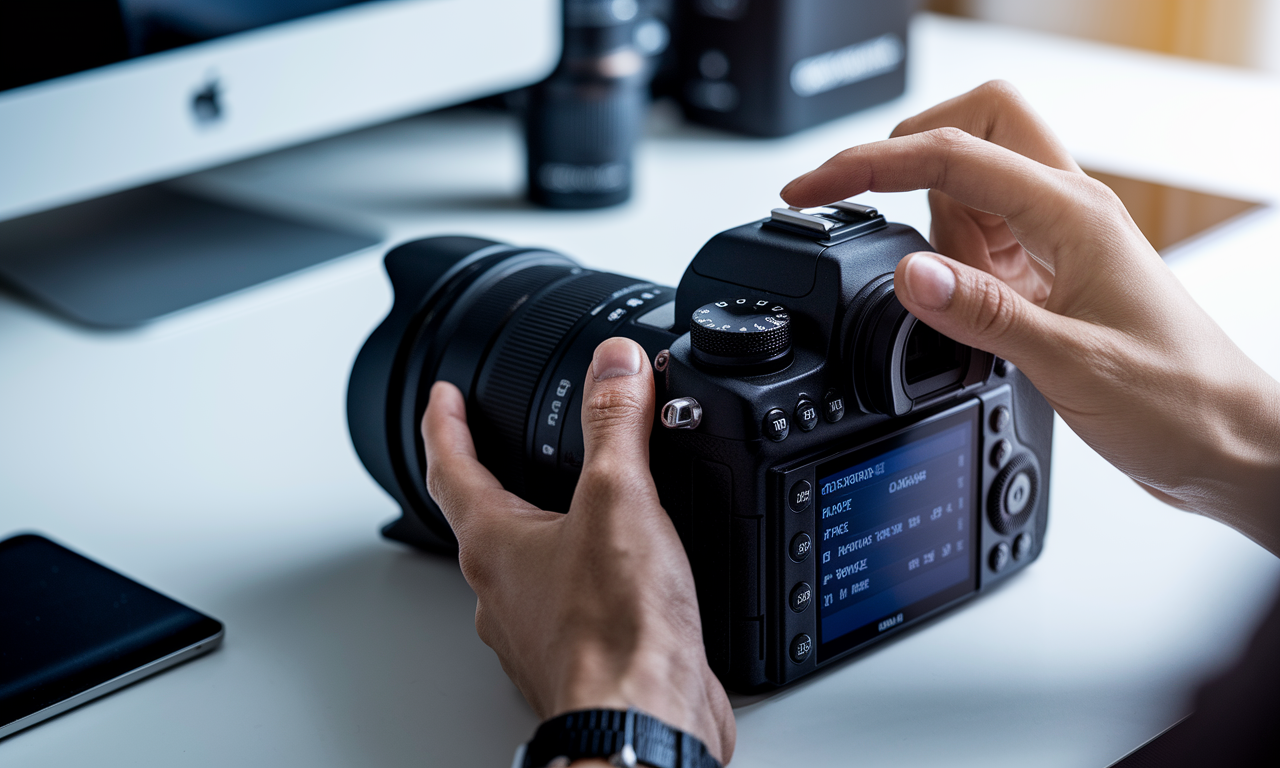
Every photographer knows the feeling of missing the perfect shot. You fumble through menus while your subject moves. The light changes while you hunt for camera settings. Custom function buttons solve this problem by giving you instant access to key controls.
Modern cameras offer multiple programmable buttons that you can set up for your shooting style. These custom camera controls transform your workflow. They eliminate menu diving and reduce setup time between shots.
This guide shows you how to program these buttons for maximum shooting efficiency. You'll learn which settings to prioritize and how to organize them logically. Master this camera customization technique and watch your photography speed improve.
Step-by-Step Guide
Finding Your Camera's Function Button Setup
Start by locating your camera's function button menu. Most cameras place this in the main settings or controls section. Look for terms like "Custom Controls," "Button Assignment," or "Function Settings."
Canon users will find these options under "My Menu" or "Custom Functions." Nikon cameras typically list them under "Controls" or "Custom Setting Menu." Sony cameras group them in the "Custom Key Settings" section.
Each brand uses different terminology but the concept remains the same. You're looking for a menu that lets you assign functions to physical buttons.
Identifying Available Buttons
Your camera likely has more programmable buttons than you realize. Common options include dedicated function buttons marked "Fn1" or "Fn2." Many cameras also let you reprogram existing buttons like the AE-L/AF-L button.
Check if your camera allows programming of direction pad buttons or the center OK button. Some models even let you customize the lens function button or control ring. Mirrorless cameras often provide additional touch screen function areas.
Write down all available buttons before you start programming. This helps you plan your function button setup more effectively.
Programming Your First Custom Function Buttons
Access your camera's function button menu and select the first button to program. You'll see a list of available functions that varies by camera model. Popular options include ISO adjustment, focus modes, metering patterns, and exposure compensation.
Choose a function you use frequently and assign it to your most accessible button. Press the button to test the assignment immediately. Most cameras show a confirmation or display the current setting value.
Repeat this process for each available button. Start with your most-used settings first. Save your configuration when prompted to avoid losing your custom setup.
Practical Applications
Portrait Photography Setup
Portrait photographers benefit from quick access to focus mode switching and eye detection controls. Assign single-point autofocus to one button for precise focus placement. Use another button for face or eye detection modes.
Set up exposure compensation on an easily reached button for quick lighting adjustments. Portrait work often requires subtle exposure tweaks between shots. Having instant access prevents missed expressions while you dig through menus.
Consider programming white balance adjustment if you shoot in mixed lighting conditions. Studio photographers might assign flash exposure compensation or modeling light controls to available buttons.
Sports and Action Photography
Action photographers need instant access to autofocus modes and tracking settings. Program one button for continuous autofocus (AI Servo/AF-C) and another for single-point focus. Quick switching between these modes captures different types of action.
Assign burst mode controls to a function button for rapid switching between single and continuous shooting. Some cameras allow you to program different burst speeds to separate buttons. This flexibility adapts to varying action speeds.
Set up quick access to ISO adjustment since lighting conditions change rapidly during sports events. Automatic ISO with exposure compensation override gives you creative control while maintaining proper exposure.
Landscape and Nature Work
Landscape photographers should prioritize hyperfocal distance focusing and depth of field preview controls. Assign focus peaking or magnification to help verify sharp focus across the frame. These quick access settings ensure maximum image quality.
Program bracketing controls for HDR capture and exposure blending techniques. Quick access to different metering modes helps handle challenging lighting situations like backlit scenes or high contrast landscapes.
Timer and intervalometer controls work well on custom function buttons for time-lapse photography. Assign histogram display toggle to quickly check exposure without changing your composition or camera position.
Tips & Tricks
Memory and Muscle Development
Consistent button placement across shooting sessions builds muscle memory faster. Avoid changing your function button setup frequently once you find a configuration that works. Your fingers will learn the locations automatically with practice.
Practice using your custom buttons in good lighting before attempting to use them in challenging conditions. You should be able to activate any function without taking your eye from the viewfinder.
Create a small reference card with your button assignments until you memorize them completely. This prevents confusion during important shoots when you can't afford mistakes.
Advanced Programming Techniques
Many cameras support hold versus press-and-release functions for the same button. Use this feature to double your available custom controls. A quick press might cycle through focus points while holding the same button activates focus magnification.
Some cameras allow you to program different functions based on shooting mode. Your custom controls can automatically adapt when you switch from manual to aperture priority mode.
Explore modifier key combinations if your camera supports them. Holding one button while pressing another can access entirely different functions, effectively multiplying your available quick access settings.
Organization Strategies
Group related functions logically on nearby buttons. Place all focus-related controls on the right side and exposure controls on the left. This mental mapping speeds up operation under pressure.
Assign your most critical functions to the most accessible buttons. The function closest to your trigger finger should control your most-changed setting. Less frequently used controls can occupy harder-to-reach positions.
Backup and Multiple Setups
Many cameras allow you to save multiple custom function configurations. Create different setups for various photography types and switch between them as needed. This flexibility adapts your camera to any shooting situation.
Export your custom settings to a memory card if your camera supports this feature. This backup prevents losing your configuration during firmware updates or camera resets. Some photographers maintain identical setups across multiple camera bodies.
Sample Scenario
Wedding Photography Challenge
Sarah faced a common wedding photography challenge during the ceremony. The lighting changed from bright outdoor conditions to dim indoor venues multiple times. She needed to adjust ISO, focus modes, and white balance quickly without disturbing the event.
Her custom function button setup solved this problem efficiently. She programmed her primary function button for ISO adjustment with a simple press and release. A second button toggled between single and continuous autofocus modes for static versus moving subjects.
The third function button controlled white balance presets cycling between daylight, tungsten, and auto white balance. This setup eliminated menu navigation during critical moments. She captured every important moment without missing shots due to camera adjustments.
Results and Workflow Improvement
The custom function buttons reduced Sarah's average setting change time significantly. What previously took several seconds of menu navigation now happened instantly. Her shooting flow became smoother and more responsive to changing conditions.
She gained confidence knowing she could adapt quickly to any lighting situation. The bride and groom never noticed camera adjustments happening. This seamless operation improved the overall wedding photography experience for everyone involved.
Sarah's client satisfaction increased as she delivered more consistently exposed and properly focused images. The time saved on technical adjustments allowed her to focus more on creative composition and capturing emotional moments.
Key Do's for Effective Usage
Smart Function Selection
- Choose functions you actually change during shoots, not just occasionally
- Prioritize settings that require multiple menu steps to access normally
- Select functions that need immediate adjustment for time-sensitive moments
- Focus on controls that improve your specific photography style
Optimal Button Layout
- Place most-used functions on easily reached buttons without changing grip
- Keep related functions grouped together for logical operation
- Assign critical functions to buttons you can operate without looking
- Test button accessibility while wearing gloves if you shoot in cold weather
Learning and Adaptation
- Practice your button layout in good lighting before challenging shoots
- Start with three functions maximum and add more gradually
- Document your setup for reference during initial learning period
- Review and adjust assignments based on actual usage patterns
Common Mistakes to Avoid
Overcomplication Errors
Don't assign too many functions initially or you'll become confused during shoots. Start simple and build complexity gradually. Many photographers try to program every available button immediately and end up using none effectively.
Avoid assigning rarely used functions to prime button locations. These should be reserved for your most frequent adjustments. Wasting easily accessible buttons on occasional settings reduces overall efficiency.
Don't change your button layout frequently once established. Constant modifications prevent muscle memory development and slow down your photography. Stick with a working configuration unless major workflow changes occur.
Poor Planning Choices
Avoid programming destructive functions like format or reset to easily pressed buttons. Accidental activation during shoots can ruin your session. Reserve these functions for deliberate menu access only.
Don't assign functions that you set once per session to quick access buttons. These controls don't need instant access and waste valuable button real estate. Focus on settings that change throughout your shooting session.
Avoid duplicating functions that already have dedicated controls. If your camera has a dedicated ISO button, don't program another button for the same function. Use custom buttons to fill gaps in your camera's interface.
Learning Phase Mistakes
Don't test new button configurations during important paid shoots. Practice your setup during personal photography sessions first. Important events aren't the time to discover programming mistakes or unfamiliar layouts.
Avoid ignoring your custom buttons when under pressure. Many photographers revert to familiar menu navigation during stressful shoots. Force yourself to use the programmed buttons even when it feels slower initially.
Troubleshooting & FAQs
Button Not Responding Issues
If your programmed button stops working, check if your camera's shooting mode affects function availability. Some custom controls only work in specific modes like manual or aperture priority. Switch modes and test the button again.
Lens compatibility can affect certain function button assignments. Some custom controls require specific lens types or electronic connections. Try the function with different lenses to isolate the issue.
Reset your custom functions if buttons become completely unresponsive. Navigate to your camera's reset options and restore custom controls to defaults. Then reprogram your functions one at a time to identify problematic assignments.
Configuration Lost Problems
Firmware updates sometimes reset custom function button programming. Always document your button assignments before updating your camera's firmware. Some manufacturers preserve custom settings while others don't.
Battery removal or complete power loss can affect stored configurations on older cameras. Check your manual to understand how your specific model handles custom settings during power cycles.
Frequently Asked Questions
How many custom function buttons should I program initially? Start with three buttons maximum. Choose your most-changed settings like ISO, focus mode, and exposure compensation. Add more functions only after these become automatic.
Can I program the same function to multiple buttons? Most cameras allow duplicate assignments but this wastes available controls. Use different buttons for different functions unless you have a specific workflow requirement for duplication.
Do custom function buttons work with all lenses? Electronic functions work with compatible lenses while mechanical functions work universally. Focus-related custom controls require autofocus lenses. Check your manual for specific lens compatibility requirements.
Will my settings transfer to a new camera body? Settings transfer depends on your camera system and method used. Some manufacturers support settings export while others require manual reprogramming. Document your configuration for easy recreation on new equipment.
Bringing It All Together
Your Personal Camera Button Programming System
Custom function buttons transform your camera into a personalized tool that matches your shooting style perfectly. The investment in setup time pays dividends through faster operation and improved shooting confidence. Your photography becomes more responsive and less technical.
Start simple with three essential functions and expand gradually as you build muscle memory. Focus on settings you change most frequently during typical shooting sessions. Let your actual usage patterns guide your function button setup decisions.
Remember that the goal is shooting efficiency, not complexity. The best camera button programming feels natural and intuitive after practice. Your fingers should find the right controls automatically without conscious thought.
Building Long-Term Photography Skills
Custom controls become even more valuable as your photography skills advance. Complex techniques like focus stacking, exposure blending, and precision timing all benefit from instant access to camera functions. Your technical proficiency grows alongside your creative abilities.
Professional photographers rely heavily on customized camera interfaces to maintain consistency across different shooting conditions. Your custom function button setup becomes part of your professional toolkit. It adapts your equipment to your unique working style.
Master custom function button programming and unlock your camera's full potential for faster, more intuitive photography. The time you invest in learning this system will improve every future shooting session. Your camera becomes an extension of your creative vision rather than a technical barrier.