Camera Shake Prevention: How to Master Proper Hand-Holding Techniques and Breathing Methods for Sharp Handheld Shots at Slow Shutter Speeds
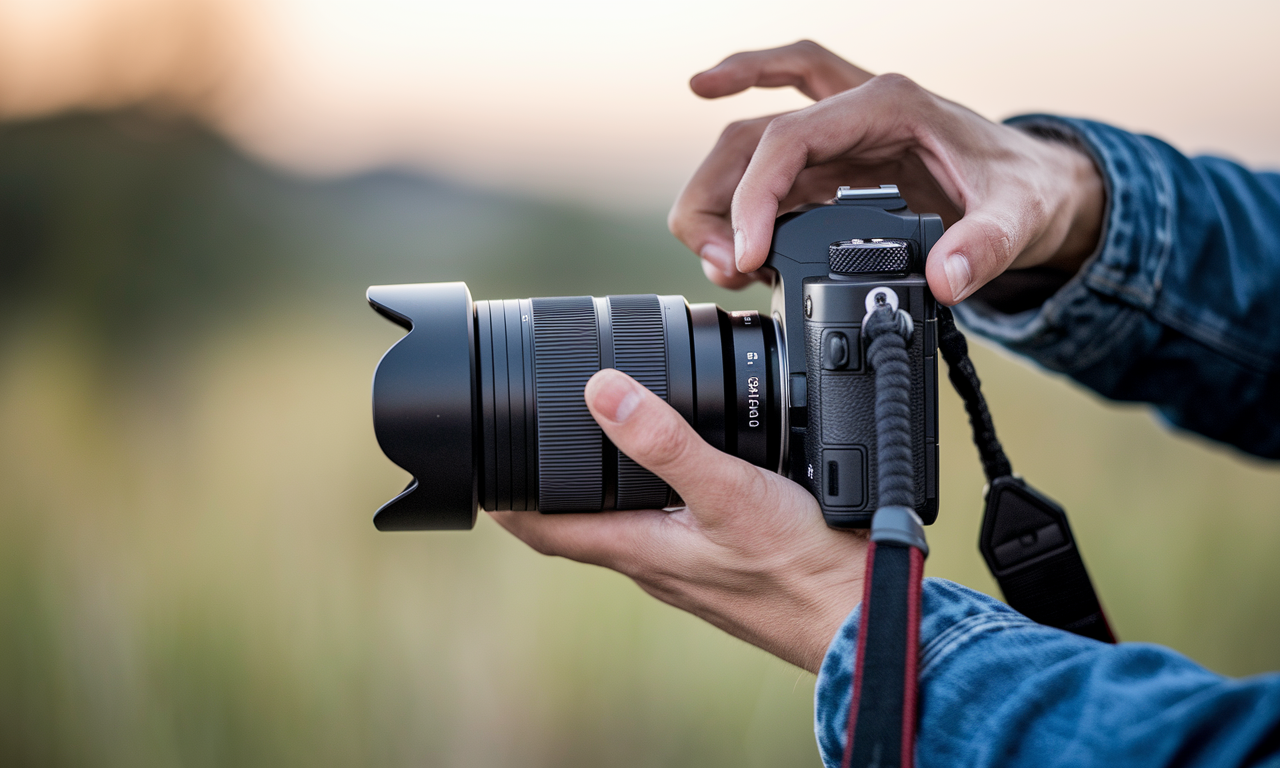
Camera shake prevention is the key to sharp handheld photography. Many photographers struggle with blurry images when shooting at slow shutter speeds. The right hand-holding techniques and breathing methods can transform your results. This guide will teach you proven strategies to master camera steadiness.
Sharp handheld shots require more than just good equipment. Your body becomes the tripod when shooting without support. Proper camera grip and breathing control create a stable foundation. These skills help you capture crisp images even in challenging conditions.
Professional photographers rely on these techniques daily. Understanding motion blur causes helps prevent it. Image stabilization technology helps, but technique matters more. Let's explore the methods that deliver consistently sharp results.
Step-by-Step Guide
Master the Basic Camera Grip
Your right hand controls the camera body and shutter button. Wrap your fingers around the grip naturally. Keep your thumb on the back of the camera for support. This creates a solid foundation for handheld photography techniques.
Your left hand supports the lens from underneath. Cup the lens barrel or zoom ring gently. Avoid squeezing too tightly, which creates tension. A relaxed grip reduces camera shake more effectively than a tight one.
Bring your elbows close to your body for stability. Tuck them against your ribs or torso. This creates three points of contact with your body. Multiple contact points improve camera steadiness significantly.
Perfect Your Stance and Posture
Stand with feet shoulder-width apart for balance. Distribute your weight evenly between both feet. Slightly bend your knees to absorb movement. A stable stance forms the base of camera shake prevention.
Lean against walls or solid surfaces when available. Use doorframes, trees, or railings for extra support. Even light contact with a stable object helps. This technique works especially well for slow shutter speed tips.
Keep your back straight and shoulders relaxed. Tension in your upper body transfers to the camera. Breathe normally and stay loose. Relaxed muscles produce steadier shots than tense ones.
Master Breathing Techniques for Sharp Shots
Take a deep breath before raising the camera. Exhale slowly and naturally. Press the shutter button gently during the exhale. This timing reduces movement from breathing motion.
For very slow shutter speeds, hold your breath briefly. Inhale, exhale halfway, then pause. Fire the shutter during this natural pause. Don't hold your breath too long, which causes trembling.
Practice this rhythm repeatedly until it becomes automatic. Consistent timing improves your success rate. Good breathing control is essential for handheld shots. It becomes second nature with regular practice.
Practical Applications
Choosing the Right Shutter Speed
The reciprocal rule provides a starting point for handheld shots. Use a shutter speed faster than your focal length. For a 50mm lens, use at least 1/60th second. This rule helps prevent motion blur in most situations.
Modern image stabilization lets you break this rule safely. Stabilized lenses often allow slower speeds. Some systems provide three to five stops of stabilization. This technology extends your handheld shooting range significantly.
Test your personal limits in controlled conditions first. Take multiple shots at different speeds. Review them at full size on your camera screen. Find your consistent sharp speed for each focal length.
Camera Settings for Maximum Stability
Use continuous autofocus mode for moving subjects. Single-point autofocus works best for static scenes. Back-button focus separates focusing from shutter release. This prevents refocusing when you press the shutter.
Adjust your ISO to maintain proper shutter speeds. Modern cameras handle higher ISOs well. A little noise is better than blurry images. Shoot in raw format for better noise reduction flexibility.
Enable any in-body or lens stabilization systems. Turn on electronic first curtain shutter if available. This reduces vibration from the mirror mechanism. Every small improvement in stability counts for sharp results.
Tips & Tricks
Advanced Grip Variations
Try the cradle grip for extra lens support. Rest the lens on your palm instead of gripping it. This works well with heavier telephoto lenses. The cradle method distributes weight more evenly.
Use the camera strap as a stabilization aid. Pull the strap taut against your neck. This creates tension that reduces movement. The strap technique works especially well for vertical shots.
Experiment with different eye positions at the viewfinder. Some photographers prefer centering their eye. Others find offset positioning more stable. Test both to see which feels more natural.
Environmental Stability Hacks
Look for natural braces in your environment. Fence posts, park benches, and car hoods work well. Even soft surfaces like sand bags provide support. Creative bracing extends your handheld shooting capabilities.
Shooting from low angles often improves stability. Sit or kneel to lower your center of gravity. Prone shooting from the ground maximizes steadiness. Lower positions naturally reduce body sway.
Timing Your Shots for Success
Wait for natural pauses in your body movement. Everyone has slight rhythmic motion when standing. Learn to recognize your steady moments. Time your shots during these brief stable periods.
Use burst mode for critical shots at slow speeds. Take multiple frames quickly. Often one or two frames will be perfectly sharp. This insurance policy improves your success rate significantly.
Sample Scenario
Evening Street Photography Challenge
You're shooting street scenes at dusk without a tripod. Available light is fading quickly. You need a 1/15th second shutter speed at ISO 1600. This scenario tests all your camera shake prevention skills.
First, find a stable shooting position against a building. Brace your back against the wall firmly. Extend the camera strap and create tension. This setup provides multiple points of stability.
Use the proper camera grip with elbows tucked. Take a deep breath and compose your shot. Exhale slowly and pause naturally. Press the shutter gently during the pause. This method delivers sharp results consistently.
Results and Analysis
Following these techniques produces sharp images regularly. The wall brace eliminates backward movement. Proper breathing timing reduces vertical shake. Good grip technique minimizes side-to-side motion.
Compare shots with and without these methods. The difference in sharpness is immediately visible. Consistent technique application improves your keeper rate significantly. These skills transfer to all handheld shooting situations.
Key Do's for Effective Usage
Essential Practices for Success
- Practice proper camera grip daily until it becomes natural
- Always brace against solid objects when available
- Use the camera strap for additional stabilization
- Time your shots with your natural breathing rhythm
- Shoot multiple frames for insurance at slow speeds
Camera Setup Best Practices
- Enable all available image stabilization systems
- Use back-button focus to separate focusing from shooting
- Set appropriate ISO to maintain safe shutter speeds
- Choose single-point autofocus for static subjects
- Turn on electronic first curtain when available
Body Position Guidelines
- Keep feet shoulder-width apart for balance
- Tuck elbows against your body for stability
- Relax your shoulders and avoid tension
- Use lower shooting positions when possible
- Look for environmental support structures
Common Mistakes to Avoid
Grip and Stance Errors
Don't grip the camera too tightly. Excessive tension creates trembling and reduces steadiness. A firm but relaxed grip works much better. Your hands should feel comfortable and natural.
Avoid holding your arms away from your body. Extended arms act like levers that amplify movement. Keep your elbows tucked for maximum stability. This basic mistake causes many blurry shots.
Don't ignore your stance and footwork. Unstable footing undermines all other techniques. Stand properly before focusing on grip. A solid foundation enables everything else to work.
Breathing and Timing Problems
Never hold your breath for too long. Extended breath holding causes trembling and shaking. Time your shots during natural pauses instead. Work with your body's rhythm, not against it.
Avoid jabbing the shutter button aggressively. Sharp button presses jar the camera noticeably. Use a smooth, gentle squeeze instead. Treat the shutter button like a delicate trigger.
Technical Setting Mistakes
Don't disable image stabilization when you need it. Some photographers forget to turn it on. Check your settings before important shoots. Stabilization provides valuable assistance for handheld work.
Avoid using shutter speeds that are too slow. Know your personal limits for each focal length. Test yourself regularly in good conditions. Push boundaries gradually, not dramatically.
Troubleshooting & FAQs
Why Are My Images Still Blurry?
Check if you're using fast enough shutter speeds first. The reciprocal rule provides good starting guidelines. Your personal limits might be different from general recommendations. Test systematically to find your capabilities.
Verify that image stabilization is working correctly. Some systems require specific settings to function properly. Read your manual to understand your stabilization features. Make sure it's enabled in the right mode.
Consider whether motion blur comes from subject movement. Camera shake and subject motion create different blur patterns. Static subjects eliminate one variable from testing. Focus on your technique with stationary subjects first.
How Can I Improve My Success Rate?
Practice these techniques regularly in controlled conditions. Muscle memory develops through repetition and consistency. Start with faster shutter speeds and work slower. Build confidence gradually with manageable challenges.
Use burst mode as insurance for critical shots. Take multiple frames quickly at slow speeds. Review them immediately on your camera screen. This helps identify which techniques work best.
What Equipment Helps Most?
Lenses with optical stabilization provide significant benefits. In-body stabilization systems also help tremendously. Both technologies extend your handheld shooting range. However, good technique remains more important than equipment.
A comfortable camera strap improves stability and security. Wider straps distribute weight better than thin ones. Some photographers prefer hand straps for extra grip. Choose what feels most natural for your style.
Bringing It All Together
Building Your Skill Foundation
Camera shake prevention requires patience and consistent practice. These techniques become automatic with regular use. Start with basic grip and stance fundamentals. Master these before moving to advanced methods.
Combine proper camera grip with good breathing technique. Use environmental support whenever available. Time your shots during natural stability moments. These elements work together for maximum effectiveness.
Long-term Skill Development
Regular practice builds muscle memory and confidence. Challenge yourself gradually with slower shutter speeds. Document your progress to track improvement. Photography skills improve through deliberate practice over time.
Study your failed shots to understand what went wrong. Learn from both successes and mistakes. Adjust your technique based on real results. This feedback loop accelerates your learning process.
Mastering handheld photography techniques opens creative possibilities everywhere. You'll capture sharp images in situations where tripods aren't practical. These skills serve you throughout your entire photography journey. The investment in learning proper technique pays dividends for years.