Master Depth of Field and Bokeh: A Beginner's Guide to Stunning Photography
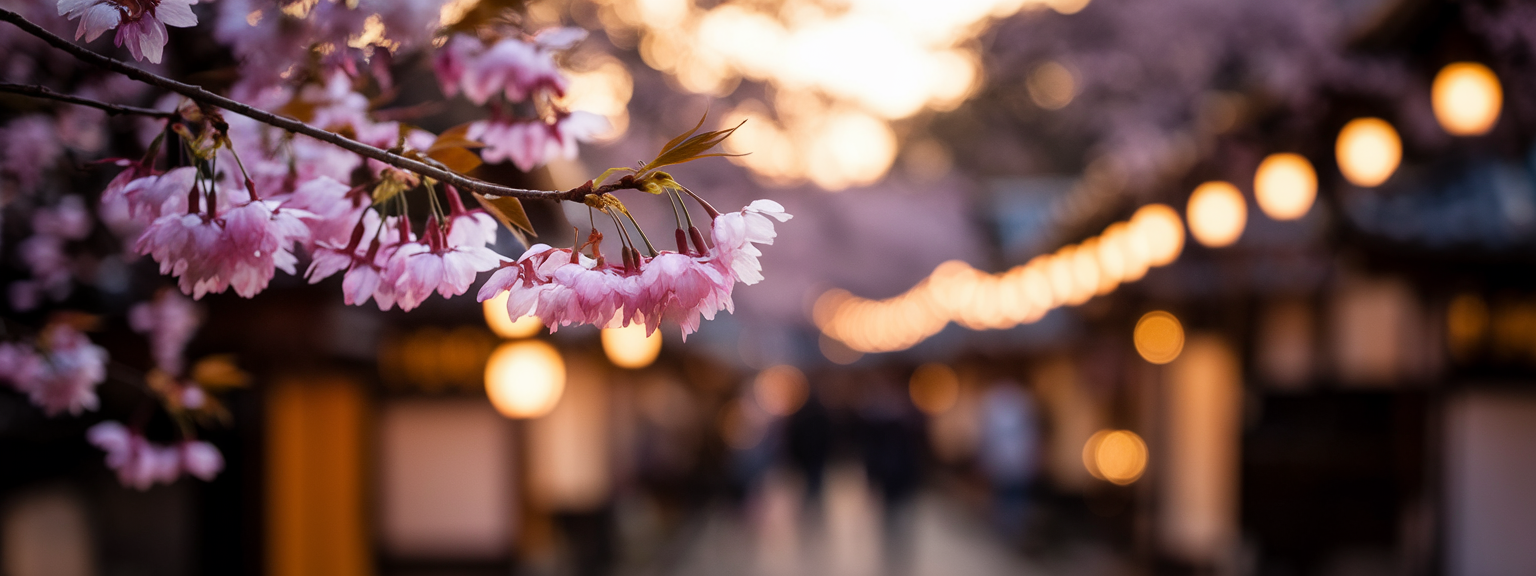
Mastering depth of field and bokeh is essential for creating professional-looking photographs that separate your subject from the background with beautiful blur. This comprehensive guide covers everything from camera settings and lens selection to advanced bokeh techniques and portrait photography methods. Whether you're using a mirrorless camera, DSLR, or even a modern smartphone with portrait mode, understanding aperture control, focal length, and subject distance will transform your photography. Learn how to achieve that coveted shallow depth of field effect that makes subjects pop while creating smooth, creamy background bokeh that elevates your images from snapshots to art.
Step-by-Step Guide to Depth of Field and Bokeh
Understanding Depth of Field Fundamentals
Depth of field refers to the zone of acceptable sharpness in your photograph, extending in front of and behind your focus point. Bokeh, derived from the Japanese word "boke" meaning blur or haze, describes the aesthetic quality of out-of-focus areas. Three key factors control depth of field: aperture size (f-stop), focal length, and camera-to-subject distance. A wider aperture (lower f-number like f/1.4 or f/2.8) creates shallower depth of field, while longer focal lengths and closer subject distances also reduce the depth of field. Modern cameras, including mirrorless systems and smartphones with computational photography, can simulate these effects through portrait modes and lens blur features.
Camera Settings and Equipment Setup
Start by switching to Aperture Priority mode (A or Av) on your camera, which gives you direct control over depth of field. Set your aperture to its widest setting (f/1.4, f/1.8, or f/2.8) for maximum background blur. Use single-point autofocus for precise control over your focus point, and consider enabling eye-detection autofocus if available. For ISO, start at your camera's base ISO (usually 100-200) and increase as needed to maintain proper shutter speeds. Prime lenses typically produce superior bokeh quality compared to zoom lenses, with popular focal lengths being 50mm f/1.8, 85mm f/1.4, or 135mm f/2 for portraits. If using a smartphone, activate portrait mode and experiment with different focal length options if your device offers multiple lenses.
Positioning and Composition Techniques
Subject distance plays a crucial role in achieving effective bokeh. Position your subject at least 6-10 feet away from the background to ensure adequate separation for blur. Get closer to your subject while maintaining focus - this increases the background blur effect significantly. For optimal bokeh, look for backgrounds with point light sources like Christmas lights, street lamps, or sunlight filtering through leaves, which will render as beautiful circular highlights. Consider the background's color temperature and contrast with your subject. Warm, golden hour light often produces more pleasing bokeh than harsh midday sun. Use the rule of thirds to position your subject, ensuring the blurred background complements rather than competes with your focal point.
Fine-tuning and Advanced Techniques
Review your images using your camera's magnification feature to check focus accuracy on your subject's eyes or key details. If the bokeh appears harsh or busy, try adjusting your position, changing the background, or slightly closing your aperture to f/2.8 or f/4. Some lenses produce "onion ring" bokeh or harsh edge transitions - experiment with different lenses to find your preferred bokeh character. For enhanced creative effects, try focus stacking for product photography or use manual focus with focus peaking for precise control. Consider post-processing techniques like lens blur in Photoshop or AI-powered background blur tools, but remember that natural bokeh from proper camera technique generally produces superior results.
Practical Applications and Creative Uses
Portrait Photography Excellence
In portrait photography, shallow depth of field isolates your subject from distracting backgrounds while creating professional-looking results. Use wide apertures like f/1.4-f/2.8 for individual portraits, or f/4-f/5.6 for group shots to ensure everyone stays in focus. Position subjects away from walls or busy backgrounds, utilizing natural separation like parks, open spaces, or architectural elements. For headshots, focus precisely on the nearest eye and use continuous autofocus for moving subjects. Environmental portraits can benefit from moderate depth of field (f/4-f/8) to include contextual background elements while still achieving subject separation.
Product and Macro Photography
Product photography often employs selective focus to highlight specific features or create artistic appeal. Use apertures between f/2.8-f/5.6 for single products, adjusting based on the depth of the item. Macro photography naturally produces shallow depth of field due to close focusing distances - consider focus stacking multiple images for commercial work requiring front-to-back sharpness. Create appealing bokeh in product shots by positioning items in front of textured surfaces, colored lights, or natural elements that compress into smooth background blur.
Street and Documentary Photography
Street photography benefits from selective focus to isolate subjects in crowded environments. Use moderate wide apertures (f/2.8-f/4) to maintain some environmental context while achieving subject separation. Longer focal lengths (85mm-135mm) allow discrete shooting while naturally compressing backgrounds. Night street photography with wide apertures can transform city lights into beautiful bokeh elements, creating atmospheric urban portraits and scenes.
Essential Tips and Advanced Techniques
Lens Selection and Quality Considerations
Prime lenses generally produce superior bokeh quality compared to zoom lenses due to their optical design and wider maximum apertures. Popular choices include 50mm f/1.8 or f/1.4 for versatile shooting, 85mm f/1.8 or f/1.4 for portraits, and 35mm f/1.4 for environmental work. Higher-end lenses often feature smoother bokeh due to rounded aperture blades (9 or more) compared to budget lenses with fewer, straight-edged blades. Consider lens-specific characteristics: some produce swirly bokeh (like vintage lenses), while others create perfectly smooth backgrounds. Test different lenses to understand their unique bokeh signature and choose based on your artistic vision.
Smartphone and Mirrorless Capabilities
Modern smartphones use computational photography to simulate shallow depth of field through portrait modes and AI processing. While effective, these digital solutions work best with clear subject-background separation and good lighting. iPhones, Samsung Galaxy, and Google Pixel devices offer adjustable background blur intensity and can produce impressive results for social media and casual photography. Mirrorless cameras have largely replaced DSLRs for many photographers, offering similar depth of field control in more compact bodies with advanced autofocus systems and real-time exposure preview through electronic viewfinders.
Lighting and Environmental Factors
Golden hour and blue hour provide ideal conditions for bokeh photography, with warm, directional light and potential background light sources. Overcast conditions create even lighting that works well for portraits with bokeh, eliminating harsh shadows. Window light offers excellent portrait lighting while allowing control over background elements. Avoid fluorescent or mixed lighting that can create unpleasant color casts in bokeh areas. LED lights and string lights create excellent background bokeh elements, especially when positioned at varying distances from your subject.
Focus Techniques and Precision
Use single-point autofocus for maximum precision, positioning the focus point exactly where you want sharpness. Enable back-button focus to separate focusing from shutter release, allowing focus lock and recomposition. For critical focus, use live view magnification (5x-10x) when possible, especially in macro or product photography. Consider focus peaking on mirrorless cameras to visualize the exact focus plane. Practice manual focus for creative control, especially with vintage lenses or in low-light conditions where autofocus may struggle.
Real-World Photography Scenarios
Urban Evening Portrait Session
During a downtown portrait session at dusk, position your subject 15 feet from a busy street with vehicle headlights and neon signs. Using an 85mm f/1.4 lens wide open, the city lights transform into circular bokeh highlights while your subject remains tack sharp. The warm street lighting creates a golden rim light effect, and the shallow depth of field completely isolates your subject from the urban chaos. Camera settings: f/1.4, ISO 800, 1/125s, with single-point autofocus locked on the subject's nearest eye. This technique works equally well for engagement photos, fashion portraits, or lifestyle sessions.
Nature Photography with Bokeh
Photographing a butterfly on a flower using a 100mm macro lens at f/2.8, position yourself so wildflowers and filtered sunlight create the background. The shallow depth of field isolates the butterfly while the out-of-focus flowers create colorful, soft bokeh. Sunlight filtering through leaves adds warm highlights to the background blur. Use continuous autofocus to track the subject and shoot at 1/500s or faster to freeze any movement. This approach works for birds, insects, and detailed flower photography where subject isolation is crucial.
Best Practices for Optimal Results
Pre-visualization and Planning
Before shooting, visualize your desired depth of field and background treatment. Scout locations during different times of day to understand how light affects potential backgrounds. Use smartphone apps like PhotoPills or Sun Surveyor to predict lighting conditions. Consider seasonal factors - autumn leaves, spring flowers, or winter frost can provide excellent background textures that render beautifully when blurred.
Technical Precision and Consistency
Maintain consistent camera settings within a series for uniform look and feel. Use custom camera modes (C1, C2) to save preferred depth of field settings for quick access. Shoot in RAW format for maximum post-processing flexibility, especially for exposure and color adjustments that won't affect the natural bokeh quality. Consider using image stabilization or proper shutter speeds (1/focal length rule) to ensure sharp subjects when using wide apertures.
Post-Processing Enhancement
While natural bokeh is preferable, subtle post-processing can enhance your results. Use graduated filters in Lightroom to subtly darken backgrounds and make subjects pop. Avoid over-sharpening, which can create artificial-looking edges between sharp and blurred areas. When using software bokeh effects, apply them sparingly and maintain realistic depth transitions. Modern AI tools like Topaz Labs or ON1 can create convincing depth of field effects, but they work best when combined with proper in-camera technique.
Common Pitfalls and How to Avoid Them
Focus and Sharpness Issues
Shooting wide open (maximum aperture) can lead to missed focus or insufficient depth of field for your subject. If your subject's eyes are sharp but their nose is soft, you may need to stop down to f/2.8 or f/4. Use adequate shutter speeds to prevent camera shake - when using wide apertures, even slight movement can ruin the shot. Consider using a tripod for static subjects or enable image stabilization when available.
Background Selection Mistakes
Busy or conflicting backgrounds remain problematic even when blurred. Avoid backgrounds with strong vertical or horizontal lines that might create distracting patterns in the bokeh. Be cautious of bright background elements that can create blown highlights or draw attention from your subject. Color conflicts between subject and background can persist even with shallow depth of field, so consider color harmony in your composition.
Technical Settings Errors
Over-reliance on wide apertures can result in inconsistent results across different shooting conditions. Remember that factors like subject distance and focal length affect depth of field as much as aperture. Avoid using unnecessarily high ISOs when shooting in good light - this can introduce noise that becomes more apparent in smooth bokeh areas. Don't forget to adjust white balance for different lighting conditions, as color casts are often more noticeable in large blurred areas.
Troubleshooting and Expert Solutions
Why isn't my background blurring enough?
Insufficient background blur typically results from one or more factors: aperture too narrow (try f/1.4-f/2.8), subject too far from camera (get closer), background too close to subject (increase separation), or focal length too short (use 85mm+ for portraits). Camera sensor size also affects depth of field - full-frame sensors produce shallower depth of field than crop sensors at equivalent settings. If using a smartphone, ensure you're in portrait mode with adequate subject-background separation for the computational algorithms to work effectively.
How do I achieve smooth, creamy bokeh?
Smooth bokeh depends on lens quality, aperture blade design, and background selection. Lenses with 9 rounded aperture blades typically produce smoother bokeh than those with 6 straight blades. Choose backgrounds with gradual tonal transitions rather than high contrast elements. Distance matters - backgrounds further from your subject will appear smoother. Some lenses are specifically designed for bokeh quality (like the Sony FE 100mm f/2.8 STF or Nikon Z 58mm f/0.95), while others may produce more "nervous" or busy background blur.
Can I create professional bokeh with budget equipment?
Absolutely. Budget-friendly options like the Canon EF 50mm f/1.8 STM, Nikon AF-S 50mm f/1.8G, or Sony FE 50mm f/1.8 produce excellent bokeh for their price point. Vintage manual focus lenses often offer unique bokeh character at affordable prices. The key is understanding your equipment's strengths and limitations, then optimizing shooting technique accordingly. Proper subject positioning, background selection, and lighting often matter more than expensive gear for achieving pleasing depth of field effects.
What about bokeh in different weather conditions?
Weather affects bokeh in various ways. Rain creates interesting background textures and reflections that blur beautifully. Snow provides neutral backgrounds but requires exposure compensation to prevent underexposure. Fog naturally creates separation and can enhance the depth of field effect. Harsh sunlight can create problematic highlights in bokeh areas, while overcast conditions provide even lighting ideal for portrait work. Golden hour and blue hour remain optimal for most bokeh photography, offering both quality of light and potential background illumination.
Mastering Depth of Field: Your Creative Journey
Comprehensive Technique Summary
Mastering depth of field and bokeh requires understanding the relationship between aperture, focal length, subject distance, and background separation. Start with wide apertures (f/1.4-f/2.8) for maximum effect, then adjust based on your creative vision and technical requirements. Remember that bokeh quality depends as much on background selection and subject positioning as it does on camera settings. Practice with different lenses to understand their unique characteristics, and don't overlook the creative potential of moderate depth of field (f/4-f/5.6) for environmental context while maintaining subject separation.
The journey to mastering depth of field and bokeh is both technical and artistic. As you develop these skills, you'll find that controlling what's in focus and what's beautifully blurred becomes second nature. Whether you're shooting with the latest mirrorless camera, a classic DSLR, or even a modern smartphone, these principles remain constant. The key is consistent practice, experimentation with different scenarios, and developing your personal aesthetic vision.
Remember that great photography is about more than just technical execution - it's about using these tools to tell compelling stories and create emotional connections with your viewers. Depth of field and bokeh are powerful compositional elements that, when mastered, will elevate your photography to new creative heights. Start practicing today, and don't be afraid to push the boundaries of these techniques to develop your unique photographic voice.