Master Lighting Glass Photography: Eliminate Reflections with Polarizing Filters and Diffusion Panels
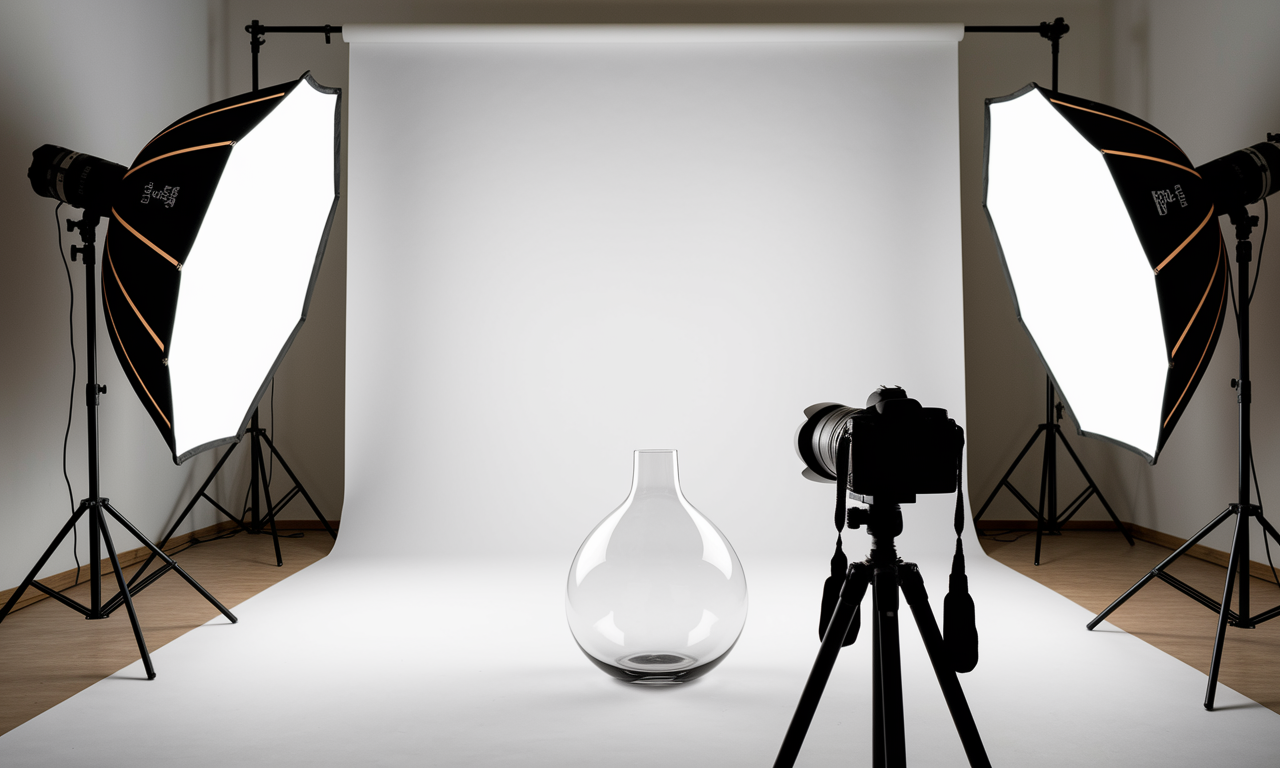
Lighting glass photography presents unique challenges that frustrate even skilled photographers. Glass surfaces create unwanted reflections that hide details and ruin shots. Professional photographers use polarizing filters photography and diffusion panels to solve these problems.
This guide teaches you proven methods to capture stunning glass images. You'll learn to control reflections while maintaining natural lighting. These techniques work for product photography lighting and commercial photography projects.
Master these studio lighting setup methods and transform your glass photography. Your clients will notice the difference in quality immediately. These skills separate professional photographers from amateurs.
Step-by-Step Guide
Set Up Your Base Lighting
Start with your main light source at a 45-degree angle. Position it high enough to avoid direct reflections on the glass surface. Use a large softbox or umbrella to create even lighting distribution.
Place your glass object on a clean surface. Check for dust and fingerprints before shooting. Even tiny spots will show up in your final image.
Test your camera angle by taking a quick shot. Look for unwanted reflections in the glass. Adjust your position until you see minimal reflections.
Install Polarizing Filters
Attach a circular polarizing filter to your camera lens. Rotate the filter while watching through your viewfinder. You'll see reflections appear and disappear as you turn it.
Find the position that removes the most unwanted reflections. Don't over-polarize or you'll lose important surface details. The goal is balance between reflection control and natural appearance.
Consider using polarizing filters on your light sources too. Linear polarizing gels can eliminate specific reflections when combined with your lens filter.
Position Diffusion Panels
Place large diffusion panels between your lights and the glass object. These panels scatter light evenly across the surface. They prevent harsh reflections while maintaining good illumination.
Use white translucent material like shower curtains or professional diffusion fabric. The larger the panel, the softer your lighting becomes. Multiple panels at different angles give you more control.
Move panels closer to reduce light intensity without changing quality. This technique helps when working with powerful studio strobes. Distance controls both brightness and softness.
Fine-Tune Your Setup
Take test shots and examine them closely on your camera's LCD screen. Zoom in to check for remaining reflections. Small adjustments make big differences in glass photography.
Adjust your polarizing filter rotation for each shot. Different angles require different polarization settings. What works for one view may not work for another.
Use a black card behind transparent objects to create contrast. White cards work better for showing glass thickness and clarity. Experiment with both approaches.
Practical Applications
Product Photography Applications
E-commerce sites need clean glass product images without distracting reflections. Use this reflection free photography method for perfume bottles, wine glasses, and jewelry. Customers make buying decisions based on these images.
Catalog photography requires consistent lighting across multiple products. Set up your diffusion panels and polarizing filters once. Then photograph entire product lines with the same professional quality.
Beauty product photography benefits greatly from these techniques. Glass cosmetic containers need to show the product inside clearly. Your lighting setup reveals the contents while eliminating surface glare.
Commercial Photography Uses
Restaurant photography often includes glassware and beverages. These techniques help capture the liquid inside glasses clearly. Your images will show condensation and bubbles without harsh reflections.
Architectural photography uses similar principles for windows and glass surfaces. Large diffusion panels outside can soften daylight. Interior reflections become manageable with proper filter use.
Fine art photography explores glass sculptures and installations. These subjects require careful lighting to show form and transparency. Your technical skills become artistic tools for creative expression.
Tips & Tricks
Camera Settings for Glass Photography
Use a smaller aperture like f/8 or f/11 for better depth of field. Glass objects often have varying depths that need to stay in focus. Smaller apertures ensure everything looks sharp.
Keep your ISO low to minimize noise in clear glass areas. ISO 100 or 200 works best for studio lighting setups. Higher ISOs can create grain that shows prominently in transparent areas.
Use manual focus for precise control over your focal point. Autofocus can struggle with transparent subjects. Focus on the most important edge or detail in your composition.
Advanced Lighting Techniques
Try rim lighting to define glass edges and create separation from backgrounds. Position a small light source behind and to the side of your subject. This technique adds drama while maintaining control.
Gradient backgrounds work better than solid colors for glass subjects. They provide visual interest without competing with your main subject. Use large softboxes to create smooth gradients.
Multiple exposures can capture different aspects of complex glass objects. Shoot one exposure for the glass itself and another for any contents. Blend them in post-processing for perfect results.
Equipment Recommendations
Invest in high-quality circular polarizing filters from trusted brands. Cheap filters can degrade image quality and add unwanted color casts. Your investment pays off in sharper, cleaner images.
Large diffusion panels give you more lighting control than small ones. Consider panels at least four feet wide for most studio work. Bigger panels create more even, professional-looking light.
Tethered shooting helps you see results immediately on a larger screen. This setup makes it easier to spot reflection problems and make quick adjustments. Your efficiency improves dramatically with instant feedback.
Sample Scenario
Photographing a Crystal Vase
Your client wants clean product shots of an expensive crystal vase. The vase has complex cut patterns that create multiple reflection surfaces. Standard lighting creates chaos with overlapping reflections everywhere.
Set up two large softboxes at 45-degree angles to your subject. Place diffusion panels between the lights and the vase. This creates soft, even illumination across all the crystal surfaces.
Attach your polarizing filter and rotate it slowly while watching the reflections change. Find the position that shows the crystal cuts clearly without eliminating all reflections. Some reflections help define the crystal's depth.
Results and Problem Solving
Your first test shot shows improvement but still has some hot spots. Move your diffusion panels closer to create even softer light. The closer position reduces light intensity while improving quality.
Add a black card behind the vase to create contrast and definition. The dark background makes the crystal edges more visible. Your subject now stands out clearly from its surroundings.
Fine-tune your polarizing filter for each camera angle you need. The crystal requires different polarization settings when shot from different positions. Take time to optimize each shot individually.
Key Do's for Effective Usage
Essential Best Practices
Always clean your glass subjects thoroughly before shooting. Use lint-free cloths and appropriate cleaning solutions. Even tiny dust particles become visible with proper lighting.
Take multiple test shots while adjusting your polarizing filter. The optimal setting changes with camera angle and subject position. Don't assume one setting works for all shots.
Use large light sources for even illumination across glass surfaces. Small lights create harsh reflections that are difficult to control. Bigger sources give you more professional results.
Professional Workflow Tips
Plan your lighting setup before bringing out expensive glass objects. Test with similar shapes or even empty glass containers first. This approach prevents damage and saves time.
Shoot in RAW format for maximum post-processing flexibility. Glass photography often benefits from exposure and highlight adjustments. RAW files give you more room to perfect your images.
Work with consistent studio lighting setup whenever possible. Once you find settings that work, document them for future sessions. Consistency improves efficiency and client satisfaction.
Common Mistakes to Avoid
Polarization Errors
Never over-polarize your filters to eliminate all reflections completely. Some reflections help define glass surfaces and show transparency. Total elimination makes glass look flat and unnatural.
Don't use your polarizing filter at maximum effect for every shot. Rotate it gradually and watch how reflections change. Find the sweet spot between control and natural appearance.
Avoid using polarizing filters with extremely wide-angle lenses. The polarization effect becomes uneven across the frame. This creates inconsistent reflection control in different areas.
Lighting Setup Problems
Don't place lights too close to glass objects without diffusion. Direct lighting creates harsh reflections that polarizing filters can't eliminate. Always use diffusion panels for soft, even lighting.
Avoid using only one light source for complex glass shapes. Single lights create areas of deep shadow and bright reflections. Multiple diffused sources provide better overall illumination.
Never ignore your background when setting up lighting. Dark backgrounds can eliminate important edge definition. Light backgrounds might create unwanted reflections in the glass surface.
Technical Mistakes
Don't rely solely on automatic camera settings for glass photography. Manual exposure and focus give you better control. Cameras often struggle with transparent subjects and bright reflections.
Avoid shooting with wide apertures unless you need shallow depth of field. Glass objects often have varying depths that need sharp focus. Smaller apertures ensure everything stays in focus.
Troubleshooting & FAQs
Common Technical Issues
Q: My polarizing filter creates dark bands across the image. What's wrong?
A: This happens with wide-angle lenses where polarization varies across the frame. Use longer focal lengths or accept some reflections in exchange for even lighting.
Q: The glass looks completely flat with no depth. How do I fix this?
A: You've over-polarized the image. Rotate your filter to allow some reflections back. Strategic reflections help define glass thickness and curves.
Q: My diffusion panels create color casts in the lighting. What should I do?
A: Use neutral-colored diffusion materials like white shower curtains. Colored materials will tint your lighting. Professional diffusion fabric works best for color accuracy.
Reflection Control Problems
Q: I still see my studio lights reflected in the glass. How do I eliminate them?
A: Position your lights at steeper angles or use larger diffusion panels. The panels should be big enough that only soft light reaches the glass surface.
Q: Different parts of my glass object need different polarization settings. What's the solution?
A: Shoot multiple exposures with different polarizing filter positions. Combine them in post-processing to optimize each area separately. This technique works well for complex glass shapes.
Q: My images are darker after using polarizing filters. Is this normal?
A: Yes, polarizing filters reduce light transmission by one to two stops. Increase your exposure time or ISO to compensate. Plan for longer exposure times in your workflow.
Bringing It All Together
Mastering lighting glass photography requires patience and practice with these essential techniques. Polarizing filters and diffusion panels work together to solve reflection problems. Your images will show dramatic improvement once you apply these methods consistently.
Professional glass photography combines technical skills with artistic vision. These tools give you creative control over reflections and transparency. Use them to support your artistic goals rather than letting technical problems limit your creativity.
Remember that each glass object presents unique challenges and opportunities. Build your skills gradually by practicing with different types of glassware. Your technical mastery will grow with every session, leading to consistently professional results that impress clients and advance your career.