How to Master Light Painting Photography in Complete Darkness Using Long Exposure Techniques
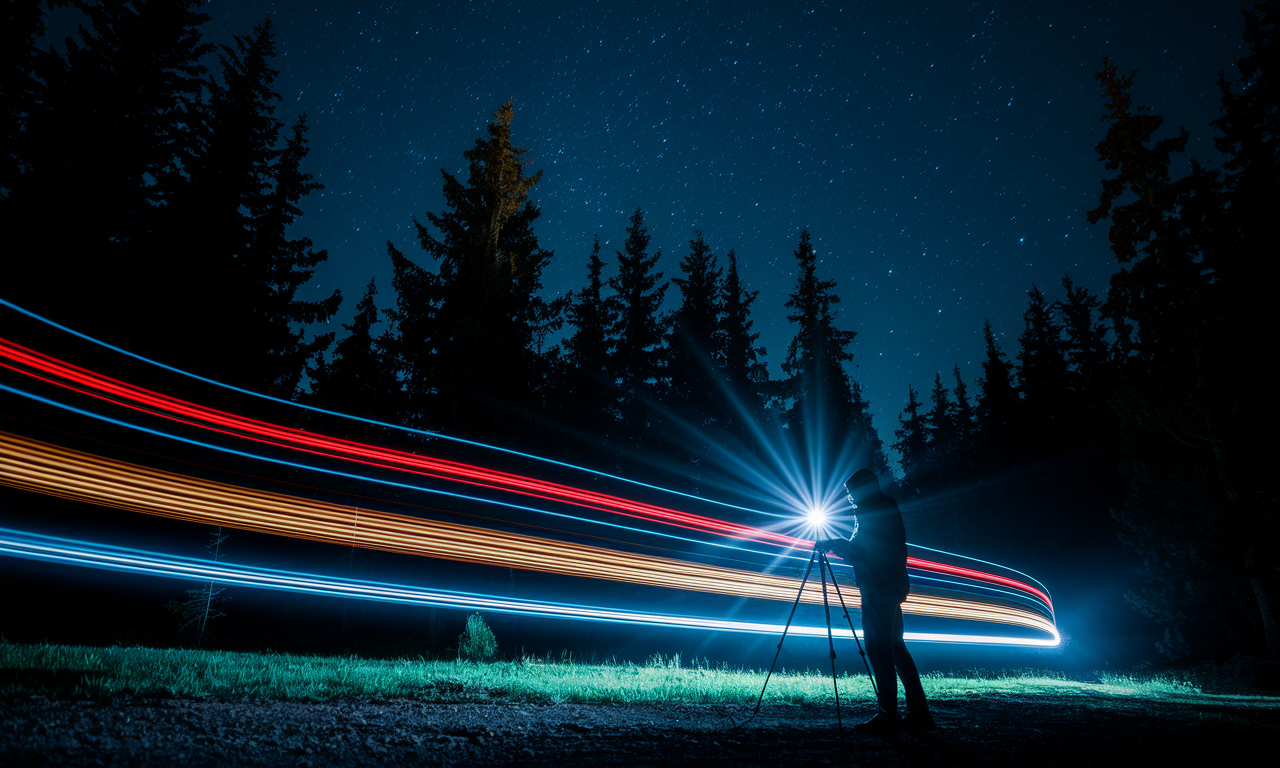
Light painting photography opens up creative possibilities that transform complete darkness into stunning art. This technique combines long exposure photography with moving light sources to create magical images. When darkness falls, photographers can paint with light using various tools and camera settings. The process requires patience and practice, but the results are worth the effort. Understanding the basics helps you create professional-looking images even without expensive equipment.
Night photography techniques have evolved with digital cameras making long exposures easier than ever. The key lies in mastering camera settings and understanding how light behaves in darkness. Creative lighting photography becomes possible when you learn to control exposure time and light movement. Your camera becomes a canvas, and light sources become your paintbrush.
Complete darkness provides the perfect backdrop for light painting experiments. Without ambient light interference, you have full control over your composition. The absence of natural light means every photon counts in creating your final image. This guide will teach you the essential techniques for successful light painting photography.
Step-by-Step Guide
Essential Camera Settings for Dark Light Painting
Start with manual mode to gain complete control over your exposure. Set your ISO settings between 100-400 to minimize noise in dark areas. Lower ISO values produce cleaner images but require longer exposure times. Higher values introduce grain but allow faster light painting movements.
Choose shutter speed based on your desired light painting duration. Start with 30-second exposures for simple patterns. Complex designs may require several minutes of exposure time. Use bulb mode for exposures longer than 30 seconds.
Set your aperture between f/8 and f/16 for sharp focus throughout the scene. Wider apertures like f/2.8 create shallow depth of field effects. Narrower apertures ensure everything stays in focus during long exposures.
Equipment Setup and Preparation
Mount your camera on a sturdy tripod to prevent movement during exposure. Even slight camera shake ruins long exposure images. Use a remote shutter release or timer function to avoid touching the camera. Cable releases or wireless remotes provide the most control.
Gather various light sources for different painting effects. LED flashlights create bright, focused beams for precise work. Colored gels or filters add creative color variations. Steel wool creates dramatic sparks when spun safely.
Prepare backup batteries as cold weather drains power quickly. Long exposures consume significant battery life. Carry extra memory cards since RAW files take up considerable space. Test all equipment before heading to your shooting location.
Basic Light Painting Techniques
Begin with simple movements like drawing basic shapes in the air. Keep the light source moving continuously to avoid bright spots. Point the light away from the camera lens to prevent flares. Practice smooth, controlled movements for consistent light trails.
Vary the distance between the light source and camera for different effects. Closer lights appear brighter and thicker in the final image. Distant lights create thin, delicate trails. Change your position relative to the camera during exposure.
Experiment with different light sources for unique textures and colors. Phone screens create soft, even illumination for portraits. Sparklers produce organic, flowing trails with natural variation. Each light source offers distinct creative possibilities.
Practical Applications
Portrait Light Painting in Darkness
Position your subject in front of the camera and focus manually. Use a flashlight to briefly illuminate the person at the start of exposure. Have the subject remain completely still throughout the entire exposure time. Paint light around them to create dramatic silhouettes or rim lighting.
Create multiple exposures with the subject in different positions. This technique produces ghostly, ethereal effects in the final image. Use colored lights to add mood and atmosphere to portraits. Soft, diffused light sources work best for flattering skin tones.
Landscape Enhancement with Light Painting
Use light painting to highlight specific landscape features in darkness. Paint trees, rocks, or buildings to add depth and interest. Colored lights can enhance the mood of natural scenes. Blue lights create cool, mysterious atmospheres while warm colors feel inviting.
Combine star trails with light painting for dramatic sky compositions. Start the exposure and paint your foreground elements first. Allow the stars to continue trailing throughout the remaining exposure time. This technique creates stunning connections between earth and sky.
Urban Night Photography Applications
Transform city environments using light painting techniques in dark areas. Paint abandoned buildings or architectural details for dramatic urban scenes. Use multiple colored lights to create complex compositions. Safety becomes critical when shooting in unfamiliar urban locations.
Tips & Tricks
Advanced Light Control Techniques
Use black clothing to remain invisible during light painting exposure. Dark colors prevent the photographer from appearing as ghostly figures. Move quickly between painting areas to minimize your presence. Plan your movements before starting the exposure.
Cover your light source when moving between painting locations. This prevents unwanted light streaks across your composition. Use your hand or a piece of cardboard as a simple shutter. Uncover the light only when actively painting desired areas.
Creative Light Source Modifications
Attach colored gels or filters to flashlights for custom color effects. Plastic bottles can diffuse harsh light sources for softer illumination. Cut patterns in cardboard to create custom light shapes and stencils. Aluminum foil can redirect and focus light beams.
Experiment with reflective surfaces to bounce light into shadow areas. Mirrors create sharp, focused reflections while white foam core provides soft fill. Position reflectors strategically before starting your exposure. This technique adds depth and dimension to flat compositions.
Post-Processing Enhancement Tips
Shoot in RAW format for maximum editing flexibility in post-processing. Adjust highlights and shadows to balance the extreme contrast. Use masking tools to selectively edit light trails without affecting dark areas. Increase vibrance to make colored lights more dramatic.
Combine multiple exposures for complex light painting compositions. This technique allows you to perfect individual elements separately. Use layer blending modes to merge exposures seamlessly. Lighten and screen modes work well for adding light trails.
Sample Scenario
Creating a Light Orb in Complete Darkness
Set up your camera on a tripod in an open area. Choose ISO 200, f/11, and 30-second exposure for this project. Position yourself about 10 feet from the camera with a small LED light. Focus manually on the spot where you will create the orb.
Start the exposure and immediately begin spinning the light in a circular motion. Keep your arm extended and rotate your entire body for smooth circles. Maintain consistent speed throughout the entire 30-second exposure. The result will be a perfect sphere of light floating in darkness.
Vary the technique by changing orb sizes or creating multiple overlapping circles. Use different colored lights for multi-colored orbs. Add a person standing inside the orb for scale and interest. This simple technique demonstrates the basic principles of light painting photography.
Key Do's for Effective Usage
Essential Best Practices
Always use a sturdy tripod to ensure sharp images during long exposures. Test your equipment thoroughly before heading to remote shooting locations. Bring extra batteries and memory cards for extended shooting sessions. Plan your compositions and light painting movements in advance.
Practice basic light painting movements in a safe, familiar environment first. Start with simple shapes before attempting complex designs. Keep your movements smooth and controlled for consistent results. Review images frequently to adjust technique and settings.
Use manual focus and lock it before starting exposures. Check focus with a flashlight if needed before the session begins. Wear dark clothing to avoid appearing in long exposure images. Coordinate with others when working in groups to avoid confusion.
Safety and Location Considerations
Scout locations during daylight hours to identify hazards and obstacles. Bring reliable lighting for navigation between shots. Inform others about your shooting location and expected return time. Carry first aid supplies when shooting in remote areas.
Respect private property and obtain necessary permissions for shooting. Follow leave-no-trace principles in natural environments. Be mindful of other photographers and avoid interfering with their work. Use red-filtered lights to preserve night vision between shots.
Common Mistakes to Avoid
Technical Errors That Ruin Images
Avoid moving the camera during long exposures even slightly. Camera shake creates double images and blurred light trails. Never touch the camera body while the shutter is open. Use a remote release or timer to prevent vibration.
Do not use ISO settings that are too high in dark conditions. High ISO creates noise that cannot be removed in post-processing. Stick to lower ISO values and longer exposures for cleaner results. Noise becomes especially visible in the dark areas of images.
Avoid pointing light sources directly at the camera lens. This creates lens flares that can overpower your composition. Keep lights angled away from the camera position. Use lens hoods to minimize unwanted reflections and flares.
Creative and Composition Pitfalls
Resist the urge to create overly complex light paintings initially. Simple designs often have more visual impact than busy compositions. Focus on mastering basic techniques before attempting advanced projects. Clean, simple light trails usually work better than chaotic patterns.
Do not ignore the background elements in your composition. Dark areas still need interesting shapes and forms for visual appeal. Consider the relationship between light painted areas and existing landscape features. Balance is key to successful night photography compositions.
Troubleshooting & FAQs
Common Technical Issues
Q: Why are my light trails appearing broken or dotted? A: This usually happens when you move the light source too quickly or inconsistently. Maintain smooth, controlled movements throughout the exposure. Check that your light source has consistent brightness output.
Q: My images are coming out too dark even with long exposures. A: Increase your ISO slightly or open your aperture wider. Dark environments require careful balance between exposure time and light intensity. Consider using brighter light sources for painting.
Q: How do I prevent myself from appearing in the image? A: Wear all black clothing and keep moving during the exposure. Avoid staying in one spot for more than a few seconds. Use the light source to mask your position when necessary.
Equipment and Settings Questions
Q: What is the best aperture setting for light painting? A: F/8 to f/11 provides good depth of field while maintaining sharpness. Wider apertures create shallow focus effects if desired. Narrower apertures may require longer exposures or brighter lights.
Q: Can I do light painting with my phone camera? A: Some phones offer manual modes with long exposure capabilities. However, dedicated cameras provide better control and image quality. Phone apps can simulate light painting but with limited creative control.
Q: What happens if there is some ambient light present? A: Small amounts of ambient light can add context to your scene. Too much ambient light will wash out your light painting effects. Scout locations to find areas with minimal light pollution.
Bringing It All Together
Light painting photography transforms complete darkness into a creative playground. The techniques covered in this guide provide the foundation for endless experimentation. Start with simple projects and gradually work toward more complex compositions. Each shooting session teaches valuable lessons about light control and timing.
Remember that success comes through practice and patience rather than expensive equipment. Your creativity matters more than the specific tools you use. Focus on understanding how light behaves during long exposures. Develop your own style through experimentation with different light sources and movements.
The journey into creative lighting photography never truly ends. Each new location and lighting condition presents fresh challenges and opportunities. Share your work with other photographers to gain feedback and inspiration. The community of light painting artists continues to push boundaries and discover new techniques.