
Travel Photography Tips: 15 Essential Tricks to Capture Epic Journeys
📝 Step-by-Step Guide: Travel Photography Tips
Introduction: Why these travel photography tips matter
Travel photography tips provide a practical framework for turning a visit into a visual story. From planning to post-processing, these methods help you make deliberate choices. In addition, practicing the fundamentals improves creativity and technical control. This guide presents actionable steps you can follow on any trip, whether you are shooting street travel photography, golden hour photography, or large-scale landscapes.
Step 1 — Plan with Intention
Effective travel photography begins long before you press the shutter. Research locations, identify the best times for light, and compile a shot list of must-get images. Use tools such as PhotoPills and The Photographer’s Ephemeris to map sun and moon angles. As a result, you will reduce guesswork on location and increase opportunities for compelling shots.
- Find viewpoints on Google Maps and verify with recent images on Flickr or Instagram.
- Create a shot list: establishing, portrait, detail, and environmental images.
- Check local weather and transit timetables to avoid missed light windows.
Step 2 — Choose the Right Travel Photography Gear
Gear choices should balance image quality with portability. For most photographers, a mirrorless camera or lightweight DSLR paired with two lenses is optimal. These travel photography tips focus on practical kit that you will actually use while moving.
- Camera body: compact mirrorless for portability or full-frame for low-light performance.
- Lenses: 24–70mm or 24–105mm zoom plus a 35mm or 50mm prime; add a 70–200mm or 300mm for wildlife if needed.
- Accessories: travel tripod, polarizer, ND filters, extra batteries, fast memory cards, and a portable SSD for backups.
Step 3 — Set Camera Settings for the Scene
Understand the exposure triangle and apply settings that match your creative intent. For example, street travel photography benefits from faster shutter speeds, while golden hour photography often uses wider apertures or bracketing for highlights.
- Street: f/5.6–f/8, 1/125s or faster, ISO auto with a noise cap.
- Landscape: f/8–f/16, tripod, low ISO, and possibly focus stacking for front-to-back sharpness.
- Night/astro: wide aperture, 20–30s exposures, and high ISO; use the 500-rule to limit star trails.
Step 4 — Master Travel Photography Composition
Composition transforms subjects into narrative images. Apply rules such as thirds and leading lines, but also experiment with negative space and the Fibonacci spiral for advanced balance. Therefore, deliberate framing produces stronger photos.
- Use foreground interest to create depth in landscapes.
- Frame within a frame for portraits and street scenes to isolate subjects.
- Look for repeating patterns, contrast, and color layers to strengthen composition.
Step 5 — Interact and Respect Locals
Cultural sensitivity is a core travel photography tip. Always ask permission when possible. Learn a few local phrases and offer to send a photo. Moreover, respect restrictions at religious or government sites to avoid conflicts.
Step 6 — Shoot with Variety
For each location, capture a range of images — wide establishing shots, medium environmental portraits, and tight detail shots. As a result, you will produce a cohesive story rather than a single image.
Step 7 — Backup Immediately
Back up daily. Use a portable SSD and cloud storage when available. Use dual card slots or make two copies before formatting. This is a practical travel photography tip that prevents loss and preserves your work.
Step 8 — Edit with Purpose
Establish a consistent editing workflow. Cull, rate, and then refine images using Lightroom Classic or Capture One. Use RAW files and develop a preset to maintain a recognizable visual identity.
Step 9 — Deliver and Share
Optimize exports for each platform. Use sRGB for web and high-resolution TIFF or AdobeRGB for print. Pair images with captions and contextual details to increase engagement and SEO value.
📌 Practical Applications: Travel Photography Tips
Urban Street Travel Photography
For street travel photography, arrive early or shoot at dusk to avoid harsh midday light. Use a 35mm or 50mm prime for natural perspective and low-light capability. Be unobtrusive and practice zone focusing or back-button focus to capture candid moments with minimal disturbance.
Landscape and Golden Hour Photography
Golden hour photography is an essential travel photography tip for landscapes. Scout locations in advance and bracket exposures where dynamic range is high. Use graduated ND filters and include a human subject to establish scale when appropriate.
Adventure and Wildlife
Prioritize safety and ethics. Use a telephoto lens and learn animal behavior. Shoot in continuous mode with shutter speeds of 1/500s or faster to freeze action. However, avoid altering wildlife patterns or chasing animals for a shot.
Architecture and Cultural Sites
Use tilt-shift lenses or correct perspective in post. For dramatic results, shoot during blue hour or at night when structures are illuminated. Also, check site rules about tripods and flash to remain compliant.
These practical applications map directly to the steps above. Use them to adapt shoot plans according to context — urban, rural, night, or bright daylight. In addition, keep your packing list for photographers streamlined so you move fast and creatively.
💡 Tips & Tricks: Travel Photography Tips
Light and Exposure Control
Embrace light as your subject. Learn to read histograms and practice exposing to the right (ETTR) for better raw detail. Use reflectors or off-camera flash for fill when shooting portraits at golden hour.
Composition Strategies
Pre-visualize images and move to refine frames. Use leading lines, negative space, and foreground interest to give depth. For advanced scenes, apply the Fibonacci spiral to guide the viewer through the image.
Technical Efficiency
Back-button focus speeds up tracking and improves hit rates for candid frames. Moreover, shoot tethered when possible to verify focus and composition on a larger screen.
Workflow and Editing
Shoot RAW and develop a minimal preset to maintain consistency across a series. Use Lightroom or Capture One for global edits and Photoshop for selective retouching. As a result, your travel photography composition will translate more predictably from capture to final image.
📸 Sample Scenario
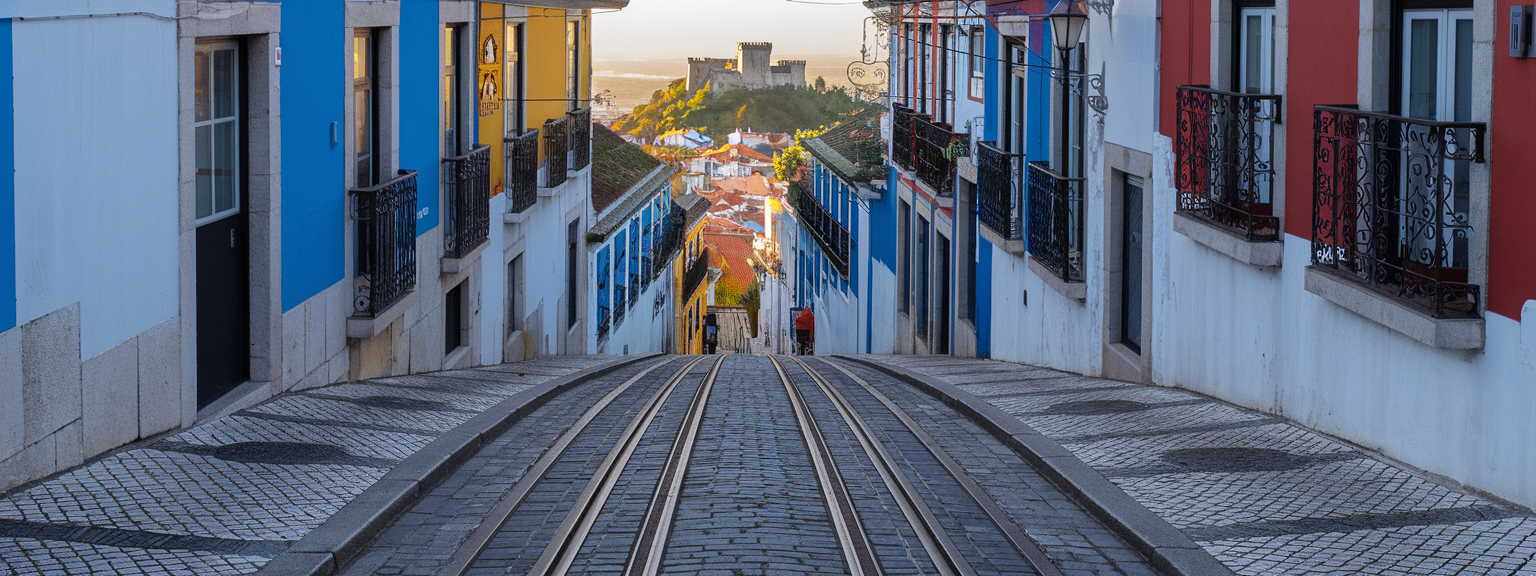
Scenario: Golden Hour Street Travel Photography in Lisbon
You are in Alfama at sunset. Narrow alleys, tram tracks, and azulejo tiles create numerous photographic opportunities. Plan three complementary images: an establishing wide, a street portrait, and a tram-in-motion shot. These three images together form a coherent mini-portfolio.
Preparation and Gear
- Mirrorless full-frame camera, 24–70mm f/2.8 zoom, 35mm f/1.8 prime.
- Compact tripod, ND filter, three batteries, four SD cards, lens cloth.
- Use PhotoPills to set the golden hour window precisely.
Shot Plans and Settings
Shot 1 (24mm): Establishing wide, f/8, 1/125s, ISO 200. Shot 2 (35mm): Street portrait, f/2.8, 1/250s, ISO 400 with a small reflector. Shot 3 (24–70mm): Tram motion, 1/25s on tripod for panning or 1/60s handheld with a practiced pan. In post, warm the tones slightly and selectively boost clarity on the tiles.
✅ Key Do’s for Effective Usage
- Do plan shoots around golden hour photography for optimal light.
- Do pack a pragmatic travel photography gear kit — balance quality with weight.
- Do shoot RAW and maintain at least two backups before formatting cards.
- Do respect local customs and obtain consent when photographing people.
- Do vary perspectives and focal lengths to tell richer visual stories.
❌ Common Mistakes to Avoid
- Overpacking and carrying unnecessary gear that slows you down.
- Shooting exclusively at midday when light is harsh and flat.
- Failing to back up images promptly — a preventable loss.
- Ignoring background clutter and distracting elements in frames.
🔄 Troubleshooting & FAQs
Quick Fixes
Blurry images: confirm focus mode, enable stabilization, or increase shutter speed. Overexposed highlights: bracket or use graduated ND filters and recover in RAW where possible. Excessive noise: use a tripod, lower ISO, or use noise reduction in post.
FAQs (Voice-Search Friendly)
Q: What are the best travel photography tips for beginners?
A: Start planning, shoot during golden hour photography, use a versatile lens like a 24–70mm or a 35mm prime, shoot RAW, and practice rule of thirds and leading lines.
Q: What is the best travel camera for long trips?
A: Choose a camera based on priorities. For portability, consider compact mirrorless cameras such as the Sony A7C or Fujifilm X-S10. For low-light, full-frame mirrorless like Sony A7 III/A7 IV or Canon R6 excel.
Q: What should be on my packing list for photographers traveling light?
A: One camera body, two lenses (one zoom and one prime), 3 batteries, several memory cards, a compact tripod, lens cloth, portable SSD, and a travel adapter.
Q: How can I improve travel photography composition?
A: Use rule of thirds, leading lines, frame within a frame, foreground interest, and vary perspectives. Study master photographers and practice framing deliberately.
Q: How do I shoot golden hour photography for landscapes?
A: Arrive early, use smaller apertures (f/8–f/16) for depth, bracket exposures if necessary, and retain natural warmth in post while preserving highlight detail.
Q: What are top travel photo tips for capturing street travel photography?
A: Use a 35mm or 50mm lens, practice zone focusing, use a small unobtrusive camera, and anticipate gestures or interactions for candid captures.
Q: What are the best AI tools for productivity?
A: For workflow productivity, use Notion or Roam Research for planning and shot lists; Adobe Sensei (in Lightroom) and Luminar AI for assisted edits; ChatGPT for captions and location research; Backblaze B2 for cloud backups when paired with third-party UIs.
🖼️ Bringing It All Together
Daily Workflow for Travel Photographers
Morning scouting followed by priority shots ensures you capture essential images. For every scene, shoot wide, medium, and tight for narrative depth. Back up and cull daily. Then perform a focused editing pass to select highlights for social sharing.
Building a portfolio requires curation and consistent presentation. Use image alt text that includes keywords like best travel camera, golden hour photography, and travel photography composition for improved SEO. Promote across social channels and link back to longer blog posts to increase discoverability.
Continue practicing with specific weekly challenges. For example, shoot only during golden hour for a week, or create a series of minimalist compositions using negative space. These exercises sharpen skills and help you internalize travel photography tips across contexts.
Consistent practice, respectful engagement with subjects, and disciplined backups form the backbone of a reliable travel photography workflow. Use these travel photography tips, pack smartly with the packing list for photographers, and focus on capturing stories rather than single images. As a result, your travel photography portfolio will grow both in quality and in audience.
![[Person taking an outdoor portrait demonstrating Quick Photo Tips]](https://lenslesson.com/wp-content/uploads/2025/12/quick-photo-tips-better-photos.png "[quick-photo-tips-outdoor-portrait]")
![[Photographer capturing candid subjects at a busy city crosswalk for street photography]](https://lenslesson.com/wp-content/uploads/2025/12/street-photography-candid-crosswalk-urban.png "[Street Photography Crosswalk]")
![[Photographer using high shutter speed to capture an athlete mid-jump in sharp action shots with a blurred background]](https://lenslesson.com/wp-content/uploads/2025/12/action-shots-pro-tips-freeze-motion.png "[Action Shots Athlete Mid-Jump]")

![[Flat-lay of must-have photography gear including camera, lenses, tripod, camera bag, and lighting accessories]](https://lenslesson.com/wp-content/uploads/2025/12/must-have-photography-gear-flatlay.png "[Must-Have Photography Gear Flatlay]")
![[Close-up of a ladybug on a leaf showcasing macro photography detail and texture]](https://lenslesson.com/wp-content/uploads/2025/12/macro-photography-ladybug-close-up.png "[ladybug-macro-photography]")

