
Travel Photography Essentials: 15 Tips to Shoot Like a Pro
Travel photography is a structured practice that blends planning, technical skill, and cultural awareness. In this guide you will learn actionable travel photography tips, recommended travel camera settings, and proven travel photo composition strategies to shoot like a pro on the road. This resource emphasizes practical steps — from packing for photography to golden hour photography techniques — so you can apply them immediately while traveling.
📝 Step-by-Step Guide: Travel Photography Workflow
Step 1 — Plan with Purpose
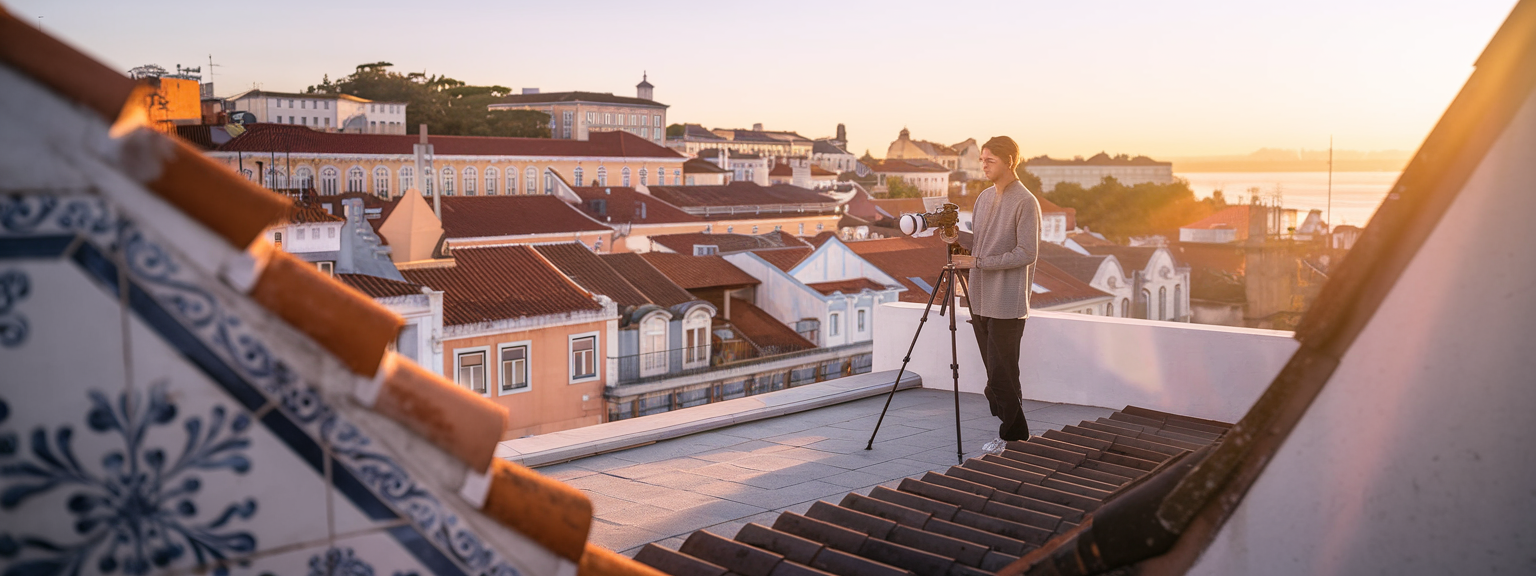
Research is the foundation of successful travel photography. Before you depart, check weather patterns, permits, and local customs. Use apps such as PhotoPills and The Photographer’s Ephemeris to identify golden hour photography windows. Create a prioritized shot list that includes must-get landmarks, contextual environmental portraits, and opportunistic street photography tips for candid moments. For example, when visiting Lisbon, plan rooftop panoramas and tram street scenes for diverse visual storytelling.
Step 2 — Pack Smart (Packing for Photography)
Packing efficiently improves mobility and creative options. Choose a reliable travel kit: one mirrorless body, a versatile zoom (24–70mm or 18–55mm), and a 35mm or 50mm prime for low-light and portraits. Bring spare batteries, several memory cards, a lightweight carbon-fiber travel tripod, and a compact cleaning kit. In addition, include a polarizer and an ND filter if you plan to shoot landscapes and long exposures. Keep camera gear in your carry-on to reduce loss or damage during transit.
Step 3 — Set Up Your Travel Camera Settings
Establish practical defaults and adapt per scene. Aperture priority is useful for most travel scenes, while manual mode is best for controlled exposures. Keep ISO low (100–200) for sharp landscapes; open aperture wide for environmental portraits and night street photography. Use RAW for maximum post-processing flexibility. For motion, increase shutter speed (1/500s+ for active subjects). Use face/eye AF for portraits and continuous AF when subjects move.
Step 4 — Compose with Purpose (Travel Photo Composition)
Composition is a repeatable skill. Apply rule of thirds, leading lines, and foreground interest to add depth. Use framing elements like doorways and windows to contextualize subjects. For advanced structure, experiment with symmetry, negative space, and the golden ratio. Walk the scene, change your camera height, and shoot multiple exposures to compare compositions.
Step 5 — Capture the Moment
Patience and respectful interaction produce authentic travel photography. When photographing people, ask permission and spend time building rapport. Use burst mode for quick street moments, and pre-focus zones for fast action. Remember that blending into the environment reduces obtrusiveness and increases the chances of candid shots.
Step 6 — Immediate Backup & Culling
Backup daily to a portable SSD and to a cloud service when possible. Use Lightroom or Capture One for fast culling: flag keepers and apply star ratings. Delete obvious mistakes, but retain slightly imperfect images that may be recoverable in post. Consistent file naming and metadata practices improve long-term organization.
Step 7 — Post-Processing Workflow
Begin edits in a RAW converter, correct exposure, and set accurate white balance for travel photography color fidelity. Correct lens distortion and apply selective adjustments. For high ISO images, perform noise reduction before final sharpening. Export for web in sRGB with appropriate dimensions and compression. As a result, your images will retain quality while loading quickly online.
📌 Practical Applications: Travel Photography Projects
1. Landscape & Panoramas
For landscapes, prioritize sharpness and depth. Use apertures between f/8 and f/11, ISO 100, and a tripod. When dynamic range is high, bracket exposures and stitch panoramas. A polarizer deepens blue skies, while a graduated ND helps balance bright horizons.
2. Street & Candid Photography (Street Photography Tips)
Street photography benefits from a 35mm or 50mm prime and moderate apertures (f/5.6–f/8) for dependable depth of field. Use zone focusing for speed, and cap ISO auto to a level you can tolerate for noise. Respect local rules, and when in doubt ask for permission to maintain trust and safety.
3. Environmental Portraits
Environmental portraits reveal context. Use f/2.8–f/4 to separate subject from background while preserving workspace details. Engage the subject and position them relative to natural light to create catchlights and soft modeling.
4. Food & Detail Shots
For food, shoot with a shallow depth of field to highlight texture. Overhead flat-lays are effective for plated dishes, while close-ups emphasize texture and aroma. Consider including hands to add narrative to food photography.
5. Night & Low-Light Scenes
Night travel photography uses fast primes and either elevated ISO or tripod-based long exposures. Bracket exposures for illuminated cityscapes, and experiment with white balance to manage neon and tungsten lights. Also, use noise-reduction tools in post to recover clean detail.
What travel photography project will you attempt on your next trip — a street series, a rooftop panorama, or an environmental portrait series?
Apply these practical projects to build a balanced portfolio. For example, a single trip can produce landscape panoramas at sunrise, a market street photo series at midday, and intimate portraits during golden hour. Use consistent travel camera settings and travel photo composition rules to ensure cohesion across images.
💡 Tips & Tricks: Travel Photography Essentials
Scout, Then Shoot
Scout locations in daylight so you know where to return for golden hour photography. In addition, scouting helps you avoid no-photography zones and find alternative shooting angles.
Use Back-Button Focus
Back-button focus separates focusing from the shutter. Therefore, you gain better control for street and action shots. It reduces accidental refocusing during critical moments.
Read the Light
Learn to assess light direction and quality. Side light emphasizes texture; backlight creates rim light and silhouettes. For example, use side light on stonework to reveal texture and history in architectural travel photography.
Take one deliberate shot each hour — compose, expose, and reflect on the result; then improve the next hour.
Carry a Fast Prime
A 35mm or 50mm f/1.8 prime is lightweight and ideal for low-light travel photography. It also encourages intimate composition and helps isolate subjects with shallow depth of field.
Use Polarizers & ND Filters
Polarizers reduce glare and deepen skies, while ND and graduated ND filters enable long exposures in bright conditions. As a result, you can create smooth water surfaces and balanced skies.
📸 Sample Scenario
4-Day Marrakech Itinerary (Applied Travel Photography Tips)
Day 1: Arrival and rooftop golden hour — set aperture f/8, ISO 100–200, and bracket exposures for skyline balance. Day 2: Jemaa el-Fna market for street photography tips — use a 35mm prime, aperture f/5.6, shutter 1/250s, and zone focus. Day 3: Interior riads and mosques — tripod, f/8, ISO 100, and long exposures with bracketed shots for highlight control. Day 4: Desert excursion — use telephoto to compress dunes, and capture silhouettes at sunset with rapid bursts to freeze movement.
Expected Outcome
After applying travel camera settings and composition tips, you will create a diverse portfolio that includes landscapes, candid street images, and environmental portraits. Consistency in editing and captioning will make the collection coherent and publish-ready.
✅ Key Do’s for Effective Usage
Do Plan and Know the Light
Always check golden hour timings and weather. When possible, arrive early to set composition and exposure. This preparation improves your odds of capturing decisive moments.
Do Shoot RAW
RAW retains more tonal information and supports color grading. Therefore, RAW is essential for travel photography images that will be edited and shared professionally.
Do Respect Subjects and Culture
When photographing people, ask permission and learn local etiquette. This approach fosters trust and often yields stronger portraits and stories.
❌ Common Mistakes to Avoid
Overpacking Gear
Carrying too much equipment often reduces mobility and creativity. Instead, choose a versatile kit: a reliable body, a zoom, and a fast prime.
Relying Only on Auto Modes
Auto modes can be inconsistent. Learn aperture and shutter priority modes to control depth of field and motion effectively.
Not Backing Up Files
One lost card can erase a trip’s worth of images. Back up daily to a portable SSD and to cloud storage when possible.
🔄 Troubleshooting & FAQs
Q: My images are soft or out of focus — what should I check?
Check your shutter speed against focal length using the reciprocal rule. Ensure autofocus point placement is correct and confirm the lens is clean. If shooting low light, use a tripod and enable image stabilization if available.
Q: Photos are too dark or bright; how do I fix exposure?
Use exposure compensation in aperture or shutter priority modes to fine-tune brightness. Examine the histogram to avoid clipped highlights. For high dynamic range scenes, bracket and merge exposures.
Q: How do I reduce noise in high ISO images?
Expose to the right without clipping highlights, then reduce exposure in post. Use camera or software noise reduction, or shoot with a faster lens at lower ISO using a tripod.
Q: My photos have blown highlights in skies — how do I retain sky detail?
Expose for highlights, use graduated ND filters, or bracket exposures to merge in post. Shooting during golden hour reduces dynamic range extremes.
Q: How to capture candid street photos without being intrusive?
Use a small, silent camera and blend into the scene. Pre-focus zones and use a prime lens for natural perspective. When practical, ask permission after capture for portrait use.
Q: What are the best AI tools for productivity?
For non-photography productivity, tools such as ChatGPT, Notion AI, and Jasper streamline writing and planning. For photography-specific AI, Adobe Lightroom and Photoshop offer AI masking and noise reduction. Topaz Labs provides advanced denoise and sharpening. Use these tools to speed up editing workflows, however, retain manual oversight to preserve image integrity.
Q: How do I troubleshoot focusing problems with mirrorless cameras?
Update firmware, clean lens contacts, and verify AF area settings. Reset AF custom settings if needed. Mirrorless systems usually require less calibration than DSLRs.
Q: My JPEG exports look washed out compared to RAW edits — why?
In-camera JPEGs use camera profiles and picture styles that differ from your RAW edit settings. When exporting, apply sRGB profile and appropriate sharpening for screen to match expectations.
🖼️ Bringing It All Together
Daily Workflow for Consistent Results
Adopt a daily routine: morning scouting for compositions, midday detail work and indoor scenes, golden hour for priority shots, and night sessions for illuminated scenes. Backup and cull each evening. This structure improves both skill and output quality.
Ready to build a consistent travel photography portfolio? Start by selecting one project and shoot it across three different light conditions this week.
Travel photography rewards planning, practice, and cultural respect. Use the travel camera settings and composition tips outlined here to improve your technical control and narrative skill. Keep a photo journal to document lighting conditions and emotions behind images; over time, this habit enhances your storytelling and editorial choices.
Final checklist before publishing: choose your strongest images, apply consistent color grading, add descriptive alt text with location and keyword phrases (for example: “travel photography rooftop Lisbon golden hour panorama”), and optimize filenames and captions for SEO. By following these steps, you will present a professional and discoverable travel photography portfolio.
![[Close-up of a photographer adjusting camera settings - Photo Tips for sharper shots]](https://lenslesson.com/wp-content/uploads/2025/12/photo-tips-better-photos-smartphone-composition.png "[Photo Tips Sharper Shots]")
![[Photographer capturing a candid moment on a busy city sidewalk — street photography scene]](https://lenslesson.com/wp-content/uploads/2025/12/street-photography-candid-urban-moment.png "[Urban Street Photography Moment]")


![[Sunrise over a mountain valley with wildflowers in the foreground — landscape photography showing golden-hour light and wide-angle composition.]](https://lenslesson.com/wp-content/uploads/2025/12/landscape-photography-breathtaking-sunrise-scene.png "[Breathtaking Landscape Photography Sunrise]")