Master Minimalist Lighting for Stunning Studio-Quality Photos

📝 Step-by-Step Guide: Master Minimalist Lighting
Introduction to Minimalist Lighting
Welcome to our comprehensive tutorial on Master Minimalist Lighting. In this guide, we explore the art of using minimalist lighting setups to create stunning studio-quality photos of everyday items. Whether you’re an enthusiast of Minimalist Photography, or you aim to achieve Studio-Quality Photos with your lighting techniques, this guide is designed to help you master both natural and artificial lighting. As you read along, you will discover various techniques including Diffusing Light, using Reflectors, adjusting Color Temperature, and even DIY Lighting Hacks that enhance the overall mood and clarity of your images.
Gathering Your Tools
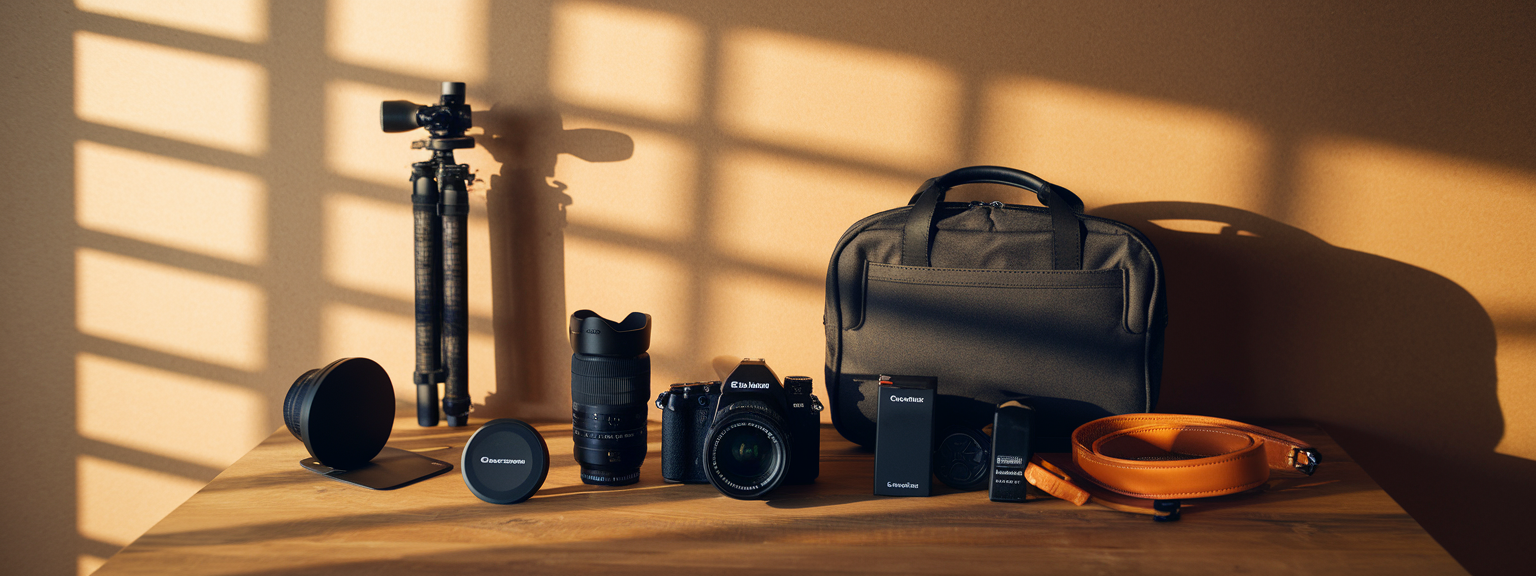
Before diving into the creative process, ensure that you have all the necessary equipment. Minimalist Photography demands simplicity, so your toolkit should reflect that—frequent items are:
- Camera (DSLR or Mirrorless)
- Quality lens with low distortion
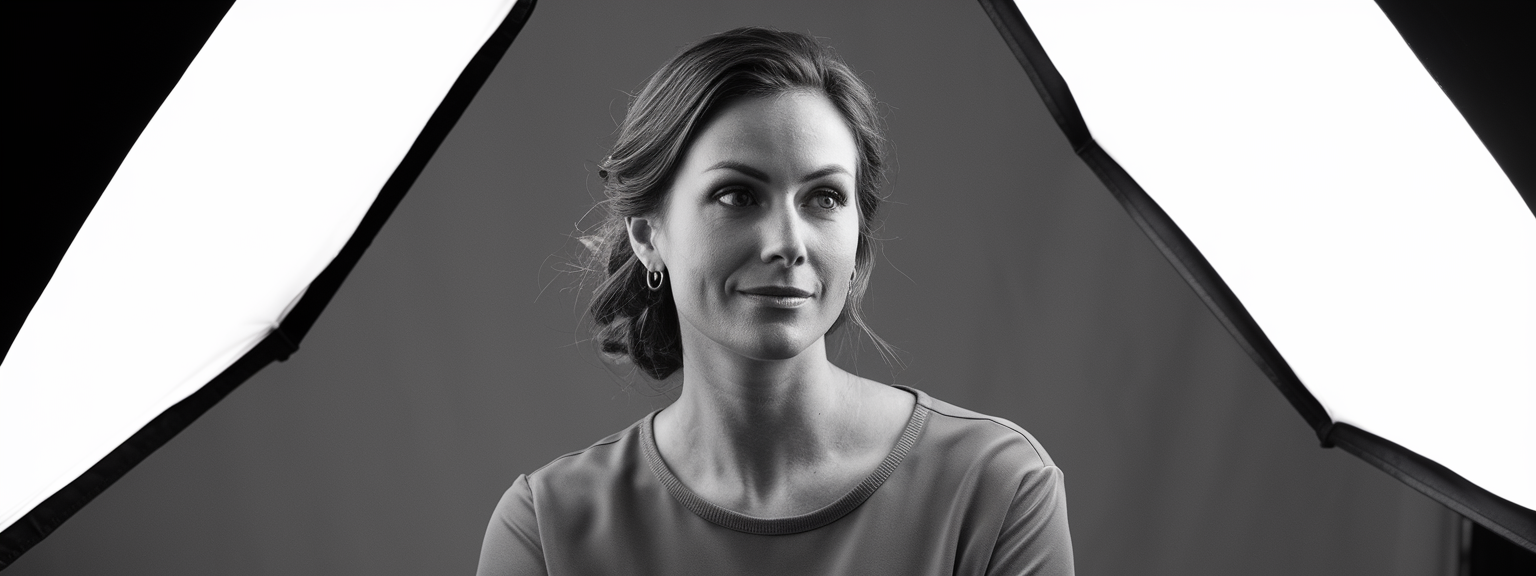
- Light modifiers such as softboxes and diffusers
- Reflectors and flags
- Tripod for stability
- Background materials (white, gray, or neutral colors)
Setting Up Your Space
For optimal results in Master Minimalist Lighting, you need a clean and controlled shooting environment. Start by clearing clutter and selecting a neutral background. In addition, consider the influence of Natural Light Photography by ensuring that no harsh direct light interferes with your planned setup. Utilize diffusers to soften any incoming sunlight if necessary.
Detailed Lighting Configurations
Next, experiment with your lighting. Here’s a basic yet powerful lighting setup designed for minimalist photos:
- Place the key light at a 45-degree angle to your subject
- Use a fill light opposite the key light to reduce harsh shadows
- Adjust the brightness to balance the shadows adequately with reflectors if needed
- Ensure that your color temperature remains consistent for a natural feel
By following these steps, you will be well on your way to mastering minimalist lighting and exploring innovative Lighting Techniques that bring out the best in everyday subjects.
📌 Practical Applications: Master Minimalist Lighting
Capturing Everyday Objects
Master Minimalist Lighting is not just about technical manipulation of artificial lights; it’s about capturing the natural beauty of everyday items. With careful control over the light, you can transform a simple cup of coffee, a piece of fruit, or even a commonplace gadget into an artful subject that speaks volumes. Minimalist Photography combined with Studio-Quality Photos can elevate the ordinary into the extraordinary.
Creating Mood and Ambience
By adjusting the light’s intensity and angle, you can evoke various moods. For instance, soft, diffused light can produce a calm and inviting atmosphere; whereas a harsher, directional light might introduce drama and mystery. The secret to Master Minimalist Lighting lies in experimenting with Light Modifiers and Reflectors to suit the subject’s personality.
Versatility in Different Settings
Minimalist Lighting techniques are highly adaptable. Whether it’s for product shoots, food photography, or portrait sessions that require a minimalist touch, these lighting setups are designed to work well in varied environments. Studio-Quality Photos aren’t confined to a professional studio—a well-planned lighting configuration can work equally well in a home studio or on location.
💡 Tips & Tricks: Master Minimalist Lighting
Optimize Your Camera Settings
In order to successfully execute Master Minimalist Lighting, it is crucial to adjust your camera settings accordingly. Use a lower ISO to reduce noise, set a moderate aperture for a good depth of field, and balance the shutter speed for the best exposure. Simultaneously incorporating aspects of Natural Light Photography can complement your artificial lighting set up.
Experiment with Diffusers and Reflectors
Using diffusers helps to soften hard light, especially when working with Studio-Quality Photos. Additionally, reflectors assist in bouncing light back onto your subject, ensuring that even the subtleties of texture are brought out. Both of these tools are essential when learning how to master minimalist lighting.
Play with Color Temperature
Understanding and manipulating color temperature is vital. A warmer light can evoke feelings of coziness, while a cooler tone might give your image a modern, sleek appearance. Experiment with different settings and observe how the ambiance shifts with every adjustment.
DIY Lighting Hacks
For those on a budget or looking for innovative touches, DIY lighting hacks can be incredibly useful. For example, using inexpensive materials like white foam boards as reflectors or repurposing household lamps with affordable diffusers can make a significant difference. These simple adjustments can transform ordinary lighting into a masterful display that emphasizes the art of Master Minimalist Lighting.
📸 Sample Scenario
Case Study: Photographing a Simple Coffee Mug
Imagine you have a classic coffee mug that you want to feature in a product shoot. With the principles of Master Minimalist Lighting, you would start by selecting a neutral, uncluttered background that doesn’t detract from the subject. The key light would be positioned at a 45-degree angle, emphasizing the mug’s curves, while a secondary fill light softens the shadows to retain detail. Using a reflector on the opposite side further enhances the light distribution, ensuring that the mug’s texture and color are vividly captured.
Workflow and Adjustments
During the shoot, continuous adjustments may be necessary. For instance, if the shadows appear too harsh, you can loosen the diffuser or change the angle of your reflector. Conversely, if the image seems too flat, adding a subtle backlight can create depth and dimension. The ongoing adjustments in this sample scenario illustrate how flexible Master Minimalist Lighting can be, thus allowing even casual photographers to achieve Studio-Quality Photos with ease.
✅ Key Do’s for Effective Usage
DO: Plan Your Light Placement
Before executing a shoot, carefully plan the placement of each light source. In minimalist setups, every light counts. Ensure that your key light, fill light, and any additional modifiers work together to produce a harmonized look. Adhering to the principles of Master Minimalist Lighting will assist you in producing images that are both visually appealing and technically sound.
DO: Experiment with Angles and Distances
The effectiveness of lighting can vary drastically with slight changes in angle and distance. Experimentation is key when mastering minimalist lighting settings. Take multiple shots with different configurations until you find the combination that best accentuates your subject.
DO: Use Reflectors Thoughtfully
Reflectors are indispensable in Master Minimalist Lighting. Use them to bounce light into shadows and add subtle highlights, ensuring that the subject does not lose dimension. Whether you opt for a white, silver, or gold reflector depends on the desired warmth or cool tone of your final image.
❌ Common Mistakes to Avoid
Avoid Overcomplicating the Setup
A common pitfall in minimalist photography is the tendency to overcomplicate lighting arrangements. Remember, the aim is to enhance the natural beauty of your subject with subtle illumination. Adding too many light sources can cause unwanted shadows and overly busy images. Simplicity is the essence of Master Minimalist Lighting.
Avoid Inconsistent Color Temperature
It’s crucial to maintain a consistent color temperature throughout the shoot. Mixing different light temperatures can create a disjointed final image. Be mindful of the ambient light conditions, and adjust your artificial lighting accordingly. This attention to detail is key in both Studio-Quality Photos and achieving true minimalist aesthetics.
Avoid Underexposure or Overexposure
Lighting that is too harsh can overexpose parts of the image, while inadequate lighting may leave portions underexposed. Constantly monitor your exposure levels by using your camera’s histogram and highlight warning features. This ensures that Master Minimalist Lighting remains balanced and effective.
🔄 Troubleshooting & FAQs
What are the best camera settings for minimalist lighting?
For mastering minimalist lighting, it is generally recommended to use a low ISO setting (between 100-400), an aperture between f/5.6 to f/11, and an appropriate shutter speed that captures the light without motion blur. Experiment with these settings based on the ambient conditions and the subject’s requirements.
How do I balance natural and artificial lighting?
Balancing natural and artificial lighting requires careful observation. Start by measuring the ambient natural light during different times of the day. Then, adjust your artificial light sources by modifying their positions, intensities, or using diffusers. Additional tools like reflectors can help merge both light sources harmoniously, thus boosting the overall quality of Studio-Quality Photos.
What are some common DIY lighting hacks?
Some popular DIY lighting hacks include using inexpensive white foam boards as reflectors, repurposing household lamps with diffusing materials, and utilizing inexpensive LED panels with adjustable brightness. Experimenting with these hacks allows you to achieve Master Minimalist Lighting without breaking the bank.
How can I improve the overall mood of my photos?
Improving the photo’s mood involves fine-tuning the intensity, angle, and color temperature of your lights. For example, gentle, diffused light sets a calming tone while sharper directional light can create a dramatic ambiance. Integrating minimalist methods with thoughtful adjustments will help you achieve a photographic masterpiece using Master Minimalist Lighting techniques.
What should I do if my subject appears too flat?
If your subject looks flat, try introducing subtle backlighting or repositioning your key light to create more contrast and depth. Additionally, using a reflector can help lift shadows and restore dimension to your image. Regularly reviewing your images on a calibrated monitor can also provide insights into necessary adjustments.
🖼️ Bringing It All Together
Final Thoughts on Master Minimalist Lighting
In conclusion, mastering minimalist lighting is a journey that combines technical precision with artistic flair. By carefully planning your setup, experimenting with different lighting configurations, and understanding the interplay between natural and artificial light, you can consistently create Studio-Quality Photos that are both captivating and expressive. The techniques we discussed, from using diffusers and reflectors to adjusting color temperature, are fundamental in achieving a well-balanced and visually appealing image. These approaches are not only essential for Minimalist Photography but also serve as the building blocks for innovation in any photographic discipline.
Remember, the journey to mastering minimalist lighting is ongoing. Each session is an opportunity to innovate and improve. Embrace experimentation, learn from every shot, and continue to refine your skills. With time, your ability to create amazing Studio-Quality Photos will flourish as you integrate these essential techniques into your workflow.
Master Minimalist Lighting is not just a technical skill; it’s a creative journey that redefines how everyday items are perceived. As you explore these innovative techniques, you will not only elevate your photography but also inspire others to see beauty in simplicity. Continue pushing the boundaries and let your images tell a compelling story through light and shadow.
Now, it’s your turn. Experiment with these methods, adjust your setups, and share your success stories. The art of Master Minimalist Lighting awaits you, and every click of your shutter brings you one step closer to photographic mastery.

![[Stunning Images Editing Workflow] [Photographer editing a vibrant landscape on a monitor, demonstrating techniques for stunning images]](https://lenslesson.com/wp-content/uploads/2025/12/advanced-stunning-images-editing-workflow.png)
![[sports-photography-action-shot] [Photographer using a telephoto lens to capture a fast break at a basketball game — Sports Photography]](https://lenslesson.com/wp-content/uploads/2025/12/sports-photography-action-shot-telephoto-basketball.png)
![[Travel photography sunrise capture] [Photographer capturing sunrise landscape during a travel photography trip with a mirrorless camera]](https://lenslesson.com/wp-content/uploads/2025/12/travel-photography-sunrise-shot-essentials.png)
![[Photo Tips Sharper Shots] [Close-up of a photographer adjusting camera settings - Photo Tips for sharper shots]](https://lenslesson.com/wp-content/uploads/2025/12/photo-tips-better-photos-smartphone-composition.png)
![[Urban Street Photography Moment] [Photographer capturing a candid moment on a busy city sidewalk — street photography scene]](https://lenslesson.com/wp-content/uploads/2025/12/street-photography-candid-urban-moment.png)


