Perfecting Portrait Shots: A Complete Guide to Stunning Photography

Photography is more than pressing the shutter—it is the art of freezing emotion, personality, and stories in a single frame. In Perfecting Portrait Shots, balancing technical skill with creative vision is essential. Whether you are a beginner exploring portrait photography tips or an experienced professional refining your approach, this guide offers comprehensive steps to help you capture professional portraits and consistently improve portrait photos.
We will discuss lighting for portraits, camera settings for portraits, posing techniques, portrait composition, and background selection, in a logical way that makes results achievable for all skill levels.
📝 Step-by-Step Guide: Perfecting Portrait Shots
Step 1 – Understand Your Subject
Successful portraits start with knowing your subject. Establish their comfort level, the intended use of the image (corporate headshot, creative portrait, lifestyle image), and features they wish to emphasize or minimize.
- Assess their personal style and clothing preferences.
- Know their intended audience for the image.
- Engage in casual conversation to create comfort and trust.
Step 2 – Plan Your Lighting Setup
Lighting defines the mood and quality of a portrait. For Perfecting Portrait Shots, use lighting that flatters facial features and complements the story you want to tell.
- Natural Light: Golden hour provides warm, soft illumination.
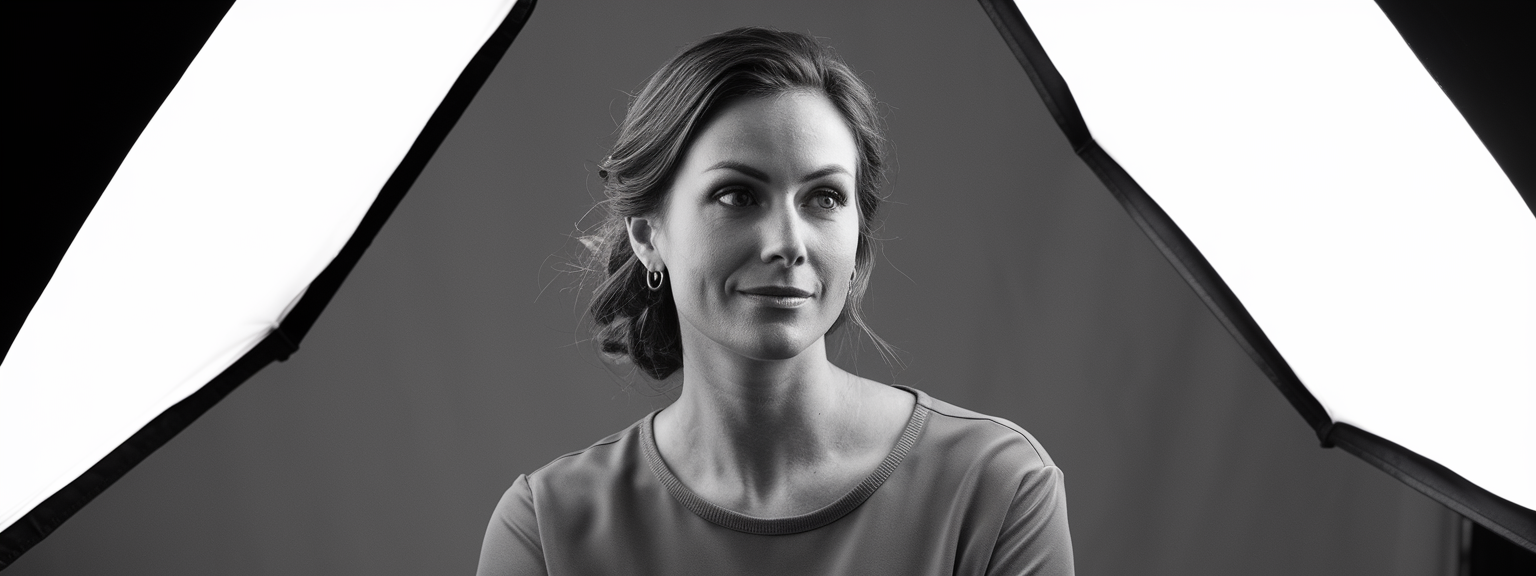
- Studio Lighting: A key light, fill light, and background light give control over shadows and highlights.
- Modifiers: Reflectors and diffusers manage harsh shadows and even out tones.
Step 3 – Select the Right Camera Settings for Portraits
In general, wide apertures between f/1.4–f/2.8 produce a shallow depth of field, isolating the subject. Maintain a shutter speed of at least 1/125s to avoid blur, and keep ISO low for optimal clarity. Adjust white balance according to light type to avoid color cast.
Step 4 – Choose an Effective Background
A good background supports the subject rather than distracting from them. Keep it uncluttered, relevant, and separated from the subject to ensure depth.
Step 5 – Master Posing Techniques
Guide subjects to pose naturally while conveying confidence. Angled stances, relaxed shoulders, and engaged hands create a composed yet approachable image.
Step 6 – Perfect Your Composition
Apply the rule of thirds, lead the viewer’s eye with environmental lines, and use natural frames to highlight the face.
Step 7 – Engage Throughout the Session
Genuine expressions emerge from real interaction. Give positive feedback, direct confidently, and maintain a relaxed atmosphere.
Step 8 – Post-Process with Precision
Enhance but do not over-edit. Adjust exposure, color balance, and detail selectively. Retouch skin to preserve natural texture.
📌 Practical Applications: Perfecting Portrait Shots
- Professional headshots: For corporate branding and networking profiles.
- Creative portraits: Suitable for portfolios, publications, and campaigns.
- Lifestyle portraits: For families, events, and personal branding.
- Event coverage: Weddings, graduations, award ceremonies.
- Marketing imagery: Artistic shoots for promotional content.
💡 Tips & Tricks: Perfecting Portrait Shots
- Always focus precisely on the eyes for compelling connection.
- Use prime lenses like 50mm or 85mm for sharpness and beautiful bokeh.
- Maintain regular dialogue to keep subjects engaged.
- Angle from slightly above eye level for flattering proportions.
- Incorporate the environment subtly for storytelling depth.
📸 Sample Scenario
An aspiring model is photographed at a coastal location during golden hour using an 85mm f/1.8 lens. Settings include aperture f/1.8, shutter speed 1/250s, and ISO 200. Natural sunlight forms a halo effect from behind, while a reflector brightens facial features. The result is a warm, ethereal image with depth and balanced light.
✅ Key Do’s for Effective Usage
- Do plan lighting, location, and styling before the shoot.
- Do ensure the eyes are sharp and well-lit.
- Do vary perspectives for creative diversity.
- Do maintain subject comfort and energy throughout.
- Do review shots on-site for adjustments.
❌ Common Mistakes to Avoid
- Do not shoot in harsh midday light without modifiers.
- Avoid cluttered or visually demanding backgrounds.
- Do not over-smooth or over-edit skin textures.
- Avoid rigid body language or awkward posing.
- Do not neglect accurate focus points.
🔄 Troubleshooting & FAQs
Why do my portraits look flat?
Flat lighting results from even, frontal light with no shadows. Introduce side-lighting or angles for contrast and depth.
What is the best lens choice for portraits?
Prime lenses of 50mm or 85mm are preferred for natural compression and background separation.
How do I make my subject look more relaxed?
Maintain conversation, play soft background music, and allow your subject to move naturally between poses.
How can I improve portrait photos quickly?
Prioritize clean lighting, simplified backgrounds, and focus precision on the subject’s eyes.
What settings should I use indoors?
Use a wide aperture, raise ISO as needed, and avoid slow shutter speeds to preserve sharpness.
🖼️ Bringing It All Together
Mastery in Perfecting Portrait Shots comes from consistent application of planning, lighting, composition, and editing techniques learned here. By combining technical know-how with an understanding of your subject, you transform images into compelling stories.
Whether capturing professional portraits for corporate clients, documenting family milestones, or experimenting with creative imagery, these strategies ensure each shot delivers both technical excellence and emotional impact.

![[Travel photography sunrise capture] [Photographer capturing sunrise landscape during a travel photography trip with a mirrorless camera]](https://lenslesson.com/wp-content/uploads/2025/12/travel-photography-sunrise-shot-essentials.png)
![[Photo Tips Sharper Shots] [Close-up of a photographer adjusting camera settings - Photo Tips for sharper shots]](https://lenslesson.com/wp-content/uploads/2025/12/photo-tips-better-photos-smartphone-composition.png)
![[Urban Street Photography Moment] [Photographer capturing a candid moment on a busy city sidewalk — street photography scene]](https://lenslesson.com/wp-content/uploads/2025/12/street-photography-candid-urban-moment.png)


![[Breathtaking Landscape Photography Sunrise] [Sunrise over a mountain valley with wildflowers in the foreground — landscape photography showing golden-hour light and wide-angle composition.]](https://lenslesson.com/wp-content/uploads/2025/12/landscape-photography-breathtaking-sunrise-scene.png)