
Must-Have Photography Gear: Essential Kit Every Photographer Needs
📝 Step-by-Step Guide: Must-Have Photography Gear
Introduction
If you’re building your kit, this must-have photography gear guide gives a complete camera gear checklist and expert advice on essential camera gear. Whether you’re assembling camera equipment for landscapes, portraits, or events, you’ll learn what belongs in your camera bag essentials, how to choose lenses and tripods, and which photography accessories are truly worth the investment.
Step 1 — Define your niche and budget
Start by identifying your primary genre. Portrait, wedding, landscape, wildlife, sports, macro, product, or hybrid workflows all require slightly different camera equipment. Then set realistic budget tiers. For example, entry-level kits can range from $500–$1,200, while enthusiast and professional tiers rise accordingly. Your budget determines how many duplicates and backups you can afford; therefore plan redundancy for paid work.
Step 2 — Choose the right camera body
Select a sensor size and feature set aligned with your work. Full-frame bodies offer better low-light and shallower depth of field, while APS-C bodies deliver value and telephoto reach via crop factor. Medium format provides ultimate image quality for commercial landscapes but at higher cost. In addition, check autofocus performance, frames per second (fps), in-body image stabilization (IBIS), and weather sealing.
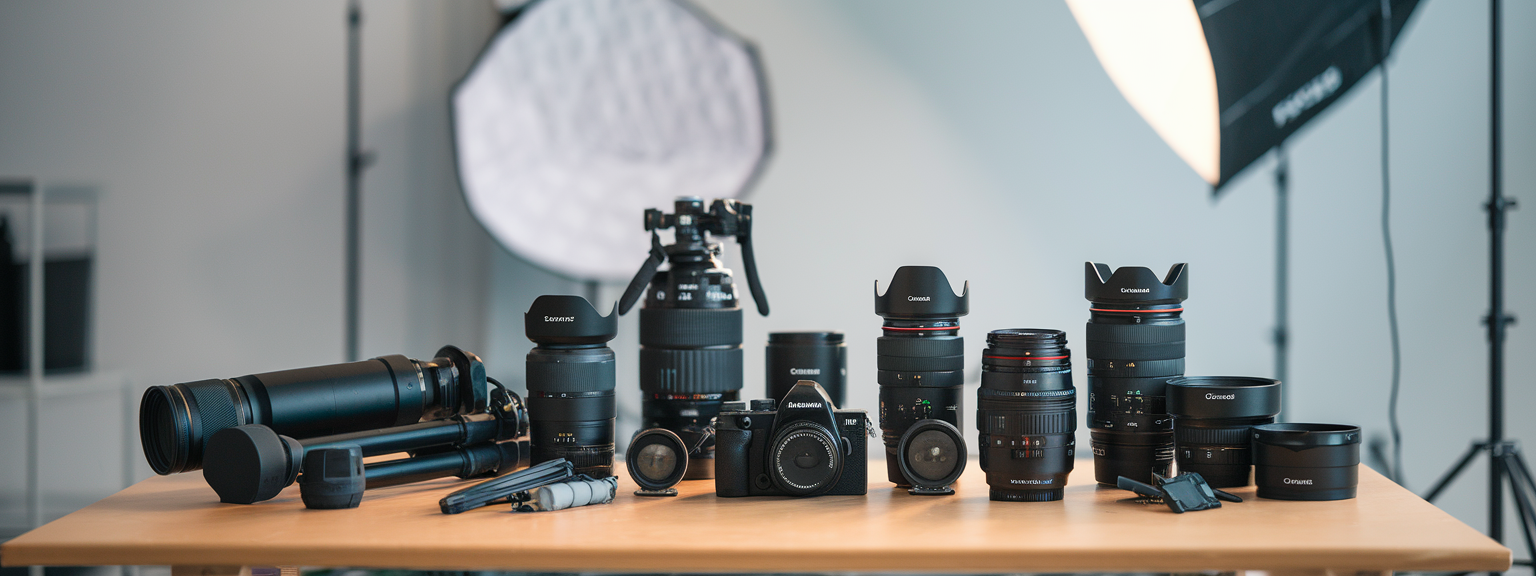
Step 3 — Build a core lens kit
Lenses determine your look more than camera bodies. Therefore prioritize a few high-quality pieces of glass. For portraits, choose 35mm, 50mm, and 85mm primes; for landscapes, a reliable wide-angle (16–35mm or 10–22mm) is essential. Events require fast zooms such as 24–70mm f/2.8 and 70–200mm f/2.8. Wildlife and sports call for long telezooms like 100–400mm or 200–600mm. A typical beginner kit includes a camera body, a versatile 24–70mm equivalent zoom, and a 50mm f/1.8 prime.
Step 4 — Stabilization: tripods and monopods
Choose a tripod rated at 1.5–2x the weight of your heaviest camera plus lens. For travel, a carbon-fiber travel tripod offers weight savings. For studio or landscape, favor rigidity. Monopods are indispensable for sports and wildlife when mobility matters. Also decide between ball heads and pan-tilt heads based on shooting style.
Step 5 — Lighting essentials
Include an on-camera speedlight for fill and bounce. For portraits and studio work, add off-camera speedlights or strobes with triggers, softboxes, umbrellas, and reflectors. Portable LED panels are valuable for video and continuous-light scenarios. Light stands and booms complete the kit.
Step 6 — Camera bag essentials and organization
Select a bag style that suits your workflow: backpack for landscape travel, shoulder bag for event mobility, or roller for large studio setups. Ensure internal organization with padded dividers, quick-access pockets for memory cards and batteries, and a rain cover compartment. Label compartments for faster packing and retrieval.
Step 7 — Storage, backup, and power
Use multiple memory cards, high-quality brands, and portable NVMe or SSD drives for rapid offloads. Follow a 2-of-3 backup rule: original plus local backup plus cloud backup. Carry 2–3 spare batteries per body and a reliable charger. For USB-C-compatible cameras, external power banks provide extended runtime.
Step 8 — Essential photography accessories
- Filters: polarizer, ND, UV/protection
- Remote release and intervalometer
- Lens cleaning kit and sensor swabs
- Color checker and gray card
- Comfortable strap or harness
Step 9 — Software, tethering, and calibration
Select a RAW processing workflow such as Lightroom, Capture One, or DxO PhotoLab. Use tethering for studio shoots to review images instantly. Calibrate monitors with a hardware tool like X-Rite or Datacolor to maintain color accuracy for print and web delivery.
Step 10 — Insurance, maintenance, and upgrade path
Insure professional gear and maintain serial-numbered inventory. Schedule lens calibration and sensor cleanings. Prioritize lenses when upgrading because glass retains value and defines image quality.
📌 Practical Applications: Must-Have Photography Gear
Portrait photography
For portrait work, choose a full-frame or high-resolution APS-C body plus an 85mm or 50mm fast prime. Use softboxes and reflectors to sculpt light. In addition, tethering helps clients review selects immediately. Prioritize camera gear checklist items such as spare batteries, backup memory cards, and a color checker for accurate skin tones.
Wedding and events
Events demand redundancy and mobility. therefore carry two camera bodies and a combination of 24–70mm and 70–200mm pro zooms. Fast primes like 35mm f/1.4 are indispensable for dim ceremonies. Use belt pouches and a second shooter with duplicated essential camera equipment.
Landscape and travel
For landscapes, prioritize a stable tripod, wide-angle lenses, and filter systems. In addition, robust camera bag essentials—such as weather protection and a tripod mount—make remote shoots reliable. Carry an SSD for backups and GPS tools for location recall.
Wildlife and sports
High fps cameras, long telephoto lenses, and monopods or gimbal heads form the core kit. Use fast memory cards and lens rain covers. Practice pre-focusing and panning techniques with your camera equipment to increase keep rates.
Macro and product
Macro work benefits from a 1:1 macro lens, focusing rail, and controlled lighting like ring flashes or small softboxes. For product and commercial shoots, tethering, studio strobes, and a color checker ensure repeatable results with accurate color reproduction.
💡 Tips & Tricks: Must-Have Photography Gear
Tip 1 — Prioritize lenses over bodies
Lenses shape image quality. Therefore invest early in sharp, fast glass. Over time, bodies change faster than lenses, so strong optics are a long-term advantage.
Tip 2 — Modular packing reduces fatigue
Create a base kit that travels light: camera, two lenses, and a small accessory pouch. Separate heavier lighting gear into a second bag that you pick up only when needed.
Tip 3 — Rent specialty gear when needed
For occasional needs like super-telephotos, tilt-shifts, or large studio strobes, renting is often more cost-effective. Test equipment before committing to a purchase.
Action inspiration
Tip 4 — Optimize battery and data workflows
Disable lengthy image review, use airplane/wifi off where possible, and carry USB power banks for mirrorless bodies. For data, use multiple small memory cards and offload to an SSD during breaks.
Tip 5 — Make a pre-shoot checklist
- Format memory cards in-camera and label them
- Charge and pack batteries and chargers
- Verify weather protection and rain covers
- Run a short equipment test at home
📸 Sample Scenario
Wedding day kit — reliable and mobile
For a full-day wedding, assemble a kit that balances redundancy, mobility, and creative control. Use two identical camera bodies to simplify lens and setting swaps. Equip one with a 24–70mm f/2.8 and the other with a 70–200mm f/2.8. Add a 35mm f/1.4 prime for low-light ceremony shots and a lightweight 50mm f/1.8 as a backup.
Lighting and support
Carry two speedlights with radio triggers and a small softbox for portraits. A monopod makes roaming reception coverage comfortable and steady. Keep rain covers and gaffer tape accessible for fast fixes.
Power and data plan
Bring 4–5 batteries per body, multiple 64–128GB cards, and a portable SSD for midday backups. Implement a quick backup workflow: offload cards to SSD, verify files, and then continue shooting.
✅ Key Do’s for Effective Usage
Do 1 — Invest in at least one high-quality prime lens
A fast prime changes your images and shooting approach. For example, an 85mm f/1.8 or 50mm f/1.4 will improve low-light performance and deliver pleasing bokeh.
Do 2 — Carry spares and maintain backups
- Two camera bodies for paid events
- Multiple memory cards and redundant backups
- Spare batteries for each body
Do 3 — Keep gear clean and protected
Use lens hoods, microfiber cloths, and protective filters. For outdoor shoots, invest in weather-sealed bodies or quality rain covers. As a result, your gear lasts longer and performs reliably.
❌ Common Mistakes to Avoid
Mistake 1 — Buying every new gadget
Avoid gear acquisition syndrome. Purchase to solve a defined problem in your workflow rather than collecting tools you rarely use.
Mistake 2 — Neglecting lens quality
A cheap body with poor glass yields mediocre images. Therefore prioritize sharp, reliable optics; they influence image quality far more than incremental body upgrades.
Mistake 3 — Relying on a single point of failure
For paid gigs, lack of redundancy risks lost images. Always carry backups for cameras, cards, and batteries.
🔄 Troubleshooting & FAQs
Q1: My autofocus is hunting in low light — how do I fix it?
Use AF assist or an external LED focus light. Switch to single-point AF and select a contrasty target. In addition, increase ISO or use a faster lens to give the AF system more light to work with.
Q2: My images are coming out soft — what should I check?
Confirm accurate focus, raise shutter speed, and test lens sharpness at different apertures. If using a tripod, disable image stabilization if the lens recommends it.
Q3: Memory card errors — how to prevent and recover?
Prevent by using reputable brands and by formatting cards in-camera. Recover by stopping use immediately and employing recovery software or professional services if needed.
Q4: My flashes aren’t syncing properly — what now?
Check sync speed and ensure triggers are on the same channel. Test each flash individually and update trigger firmware if available.
Q5: How do I prevent banding with long exposures and high ISO?
Use lower ISO where possible, employ long-exposure noise reduction, or stack multiple shorter exposures and average them in post-processing to reduce banding and noise.
Q6: Which portable storage solution is best for photographers?
Portable NVMe SSDs with USB-C provide the best mix of speed and durability. Brands like Samsung T7/T9 and SanDisk Extreme Pro are reliable choices. For long-term storage, combine RAID solutions and cloud backups.
Q7: What are the best AI tools for productivity?
AI accelerates repetitive tasks and improves creative efficiency. For photographers, consider Adobe Firefly and Lightroom AI tools for masking and sky replacement, Topaz Labs for denoise and upscaling, and Photo organization tools like Excire Foto. Use ChatGPT or Bard for writing client emails and generating shot lists. In addition, task automation platforms such as Zapier can automate backups and uploads. However, always verify AI edits and metadata for accuracy.
Q8: How do I keep gear safe while traveling internationally?
Carry gear in checked or carry-on according to airline rules; whenever possible, keep gear in carry-on. Keep receipts and inventories and consider travel insurance for high-value equipment.
Additional troubleshooting tips
- Keep firmware updated for cameras, lenses, and triggers
- Run dry rehearsals for complex setups such as multi-flash combos
- Carry a small toolkit for tripod screws and quick fixes
🖼️ Bringing It All Together
Summary principles
Prioritize high-quality lenses, build redundancy for critical shoots, and protect your investment with insurance and regular maintenance. Match gear to genre and workflow: a wedding photographer needs fast zooms and backups, while a landscape photographer needs a stable tripod and filter system. Practice until your kit becomes an extension of your creative process.
Practical kit examples
Here are three practical kit builds to use as a shopping and packing template. First, the Beginner/Enthusiast kit includes an APS-C mirrorless body, an 18–55mm kit zoom, a 50mm f/1.8, a travel tripod, a speedlight, spare batteries, and a small SSD. Second, the Hybrid Pro kit uses a full-frame body plus a backup, 24–70mm f/2.8, 70–200mm f/2.8, 35mm f/1.4, carbon-fiber tripod, two speedlights, and a tethering setup. Third, the Specialist Landscape/Commercial kit employs a high-resolution or medium-format body, wide-angle glass, a heavy-duty tripod, a filter holder system, and RAID-capable portable storage.
Use the camera gear checklist in the appendix to ensure you never forget essentials on a shoot. Remember, the most effective kit is the one you know how to use well. Match your purchases to real needs. Test gear and adapt over time. As a result, your must-have photography gear will grow as your skills and clients demand.
![[Person taking an outdoor portrait demonstrating Quick Photo Tips]](https://lenslesson.com/wp-content/uploads/2025/12/quick-photo-tips-better-photos.png "[quick-photo-tips-outdoor-portrait]")
![[Photographer capturing candid subjects at a busy city crosswalk for street photography]](https://lenslesson.com/wp-content/uploads/2025/12/street-photography-candid-crosswalk-urban.png "[Street Photography Crosswalk]")
![[Photographer using high shutter speed to capture an athlete mid-jump in sharp action shots with a blurred background]](https://lenslesson.com/wp-content/uploads/2025/12/action-shots-pro-tips-freeze-motion.png "[Action Shots Athlete Mid-Jump]")

![[Close-up of a ladybug on a leaf showcasing macro photography detail and texture]](https://lenslesson.com/wp-content/uploads/2025/12/macro-photography-ladybug-close-up.png "[ladybug-macro-photography]")


