
Exploring the World of Macro Photography
Macro Photography reveals extraordinary detail in the world around us. By exploring this intricate field, photographers uncover the hidden textures, patterns, and structures that exist beyond the limits of normal perception. Whether capturing the delicate wings of a butterfly or the abstract design of a water droplet, macro photography transforms the ordinary into something mesmerizing. This guide introduces core principles, provides step-by-step guidance, and delivers actionable techniques for mastering close-up photography with precision and creativity.
📝 Step-by-Step Guide: Mastering Macro Photography
1. Understanding Macro Photography Fundamentals
Macro Photography involves capturing a subject at close distances with magnification ratios typically of 1:1 or greater. This means that a small object appears life-sized on your camera sensor. Mastering this requires understanding the relationship between magnification, distance, and focus, as it directly affects depth of field and composition. Macro work allows you to capture details invisible to the naked eye, transforming tiny subjects into dramatic scenes.
2. Selecting the Right Equipment
Having the correct tools is fundamental to achieving sharp, detailed macro shots. The following equipment plays key roles in successful close-up photography:
- Macro Lens: A dedicated macro lens with a true 1:1 ratio delivers precise focus and detail. Popular focal lengths include 60mm, 90mm, 100mm, and 105mm, balancing versatility and working distance.
- Extension Tubes and Close-Up Filters: Ideal for photographers exploring on a budget, these attachments shorten the focusing distance of standard lenses, offering magnified results.
- Tripod: Stabilization is essential at high magnifications. Even the smallest vibration can blur the image, so a solid tripod ensures consistency and clarity.
- Lighting Gear: Macro ring lights, diffused LEDs, and reflectors help manage exposure. These provide balanced illumination and highlight fine structures without harsh shadows.
3. Mastering Exposure and Depth of Field
Macro photography operates under very narrow depth of field conditions. Aperture settings determine how much of your subject remains in sharp focus. Typically, using settings between f/8 to f/16 ensures adequate sharpness while maintaining background separation. Wider apertures (f/2.8–f/5.6) create more artistic blur, emphasizing specific details. Balance ISO and shutter speed to maintain clarity—low ISO values (100–400) reduce noise, and faster shutter speeds minimize movement blur.
4. Focusing Techniques
Precise focusing defines a successful macro image. Autofocus often struggles with small distances; therefore, manual focus is preferred. Use live view and magnified previews for precision. For professional results, experiment with focus stacking—taking multiple images at incremental focus points and merging them digitally to achieve optimum sharpness throughout the subject.
5. Compositional Creativity
Composition directs the viewer’s eye and enhances visual storytelling. Apply classic rules such as the rule of thirds or symmetry, and consider how light, contrast, and angle highlight your main point of interest. Macro photography thrives on perspective—experiment by shooting from above, below, or through translucent materials to generate unique viewpoints.
📌 Practical Applications: Macro Photography in Everyday Life
1. Nature Photography
Nature offers limitless opportunities for macro exploration. Every leaf vein, insect wing, or snowflake structure can reveal patterns and stories of natural organization. Morning dew and diffused light make early hours the perfect time for macro nature shots.
2. Product and Commercial Macro Work
Product photographers rely on macro lenses to showcase intricate craftsmanship. From jewelry detailing to fabric texture, macro photography emphasizes precision and enhances brand storytelling. Controlled studio lighting ensures consistency and vibrance in each image.
3. Creative and Abstract Exploration
Beyond realistic presentation, macro work can be abstract. Textures from everyday items—like glass surfaces or paper fibers—transform into visual art forms. Lighting experimentation brings depth and intrigue to such compositions.
4. Scientific and Educational Use
In research, macro photography documents specimen details accurately for analysis. It supports biology, geology, and material science by visually preserving data that requires meticulous observation.
💡 Tips & Tricks: Improving Your Macro Photography
Lighting Mastery
Soft, diffused lighting minimizes harsh shadows and highlights the subject’s micro-textures. Outdoors, use natural light during golden hours. Indoors, diffuse artificial light with translucent materials to create gentle illumination.
Using Focus Stacking for Depth
Stacking multiple focused images expands the effective depth of field. Tools like Helicon Focus or Adobe Photoshop automate the merging process to achieve pin-sharp results across the entire subject.
Stabilization and Shooting Position
A tripod ensures steadiness, while remote shutter triggers or self-timers eliminate vibrations. Consider using a macro focusing rail for minute positional adjustments that enhance frame composition.
📸 Sample Scenario
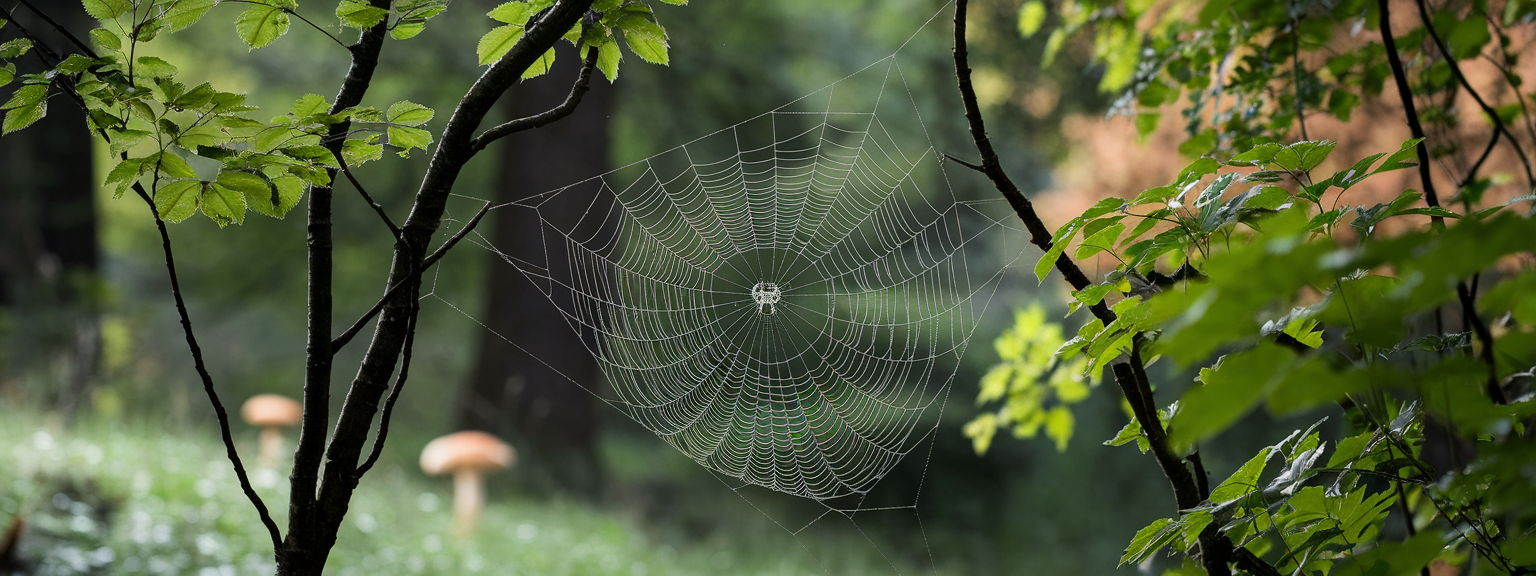
Imagine dawn in a garden. You set your camera with a 100mm macro lens mounted on a tripod. A dew-covered spiderweb catches your attention. The soft morning light filters through the droplets, turning them into tiny orbs of brilliance. You select f/11, ISO 200, manual focus, and activate a gentle LED source to enhance highlights. Each shift in angle produces new patterns of reflection. Within moments, a simple web becomes an extraordinary canvas of light, structure, and form—demonstrating how macro photography reveals marvels usually overlooked.
✅ Key Do’s for Effective Usage
- Use a dedicated macro lens for consistent 1:1 magnification and superior clarity.
- Maintain proper lighting balance; natural or diffused flash preserves authentic detail.
- Rely on manual focus to control precision.
- Employ a tripod or macro focusing rail for exact positioning.
- Simplify backgrounds for strong subject emphasis.
- Explore non-natural subjects—textures, fabrics, and mechanical components often surprise you with results.
- Shoot RAW to retain full editing capability and color fidelity.
- Experiment regularly and document your progress for learning consistency.
❌ Common Mistakes to Avoid
- Using excessively wide apertures, causing shallow depth and subject blur.
- Neglecting background simplicity, resulting in visual distractions.
- Relying on direct, harsh flash that creates glare and unnatural reflections.
- Overlooking subject distance, leading to awkward perspective distortion.
- Failing to stabilize equipment, particularly during low light sessions.
- Ignoring ethical considerations when photographing insects or plants in natural environments.
- Skipping post-processing—refinement in exposure, contrast, and sharpness polishes professional standards.
🔄 Troubleshooting & FAQs
How can I achieve maximum sharpness in macro photography?
Use manual focus and a sturdy tripod, employ a small aperture (around f/11 to f/16), and activate mirror lockup or a remote shutter. Combining these steps minimizes motion and enhances clarity.
What are the best lenses for macro photography?
Lenses such as the Canon EF 100mm f/2.8L Macro IS or Nikon 105mm f/2.8 VR are excellent choices. For Sony users, the FE 90mm f/2.8 Macro G OSS offers top-tier results. These provide a comfortable working distance while maintaining exquisite sharpness.
Why do my macro photos appear blurry?
Blurriness often arises from micro-vibrations, misfocus, or slow shutter speeds. Ensure stability, use diffused lighting for increased exposure flexibility, and recheck focal accuracy.
Can smartphone cameras produce good macro images?
Yes. Modern phones paired with clip-on macro lenses can yield impressive close-up photography results. Ensure abundant light and use manual exposure adjustment for best output.
How do I improve depth of field in small-scale compositions?
Increase aperture number value, use focus stacking, and adjust camera distance slightly. Post-process to merge stacked images for comprehensive detail across the subject plane.
🖼️ Bringing It All Together
Macro Photography is more than a technical process; it’s a way of seeing. Each photo captures a hidden world of structure and color that reveals the extraordinary beauty of minute details. Mastering settings and techniques enhances your creative capacity, while patient observation enriches your vision.
As you continue this photographic journey, remember that macro photography rewards curiosity. Beyond the gear and exposure settings lies patience and fascination. By combining precision with creativity, your images can transcend technical mastery and become storytelling art. Each detail you capture deepens an appreciation for the world’s fine structures and unseen dimensions.
![[Sunrise over a mountain valley with wildflowers in the foreground — landscape photography showing golden-hour light and wide-angle composition.]](https://lenslesson.com/wp-content/uploads/2025/12/landscape-photography-breathtaking-sunrise-scene.png "[Breathtaking Landscape Photography Sunrise]")
![[Person at desk using laptop and notebook to level up your skills]](https://lenslesson.com/wp-content/uploads/2025/12/level-up-your-skills-planning-workspace.png "[Level Up Your Skills Workspace]")
![[Person journaling at a sunlit desk capturing daily creative inspiration with a notebook and coffee.]](https://lenslesson.com/wp-content/uploads/2025/12/daily-creative-inspiration-journaling-ideas.png "[Daily Creative Inspiration Journaling]")
![[Photographer editing images on a monitor demonstrating post processing essentials workflow]](https://lenslesson.com/wp-content/uploads/2025/12/post-processing-essentials-overview.png "[Post Processing Essentials Demo]")
![[Photographer adjusting studio lights for Stunning Images during a portrait session.]](https://lenslesson.com/wp-content/uploads/2025/12/advanced-stunning-images-lighting-composition-editing.png "[Stunning Images Lighting Composition]")
