
Master the Art of Capturing Breathtaking Landscapes
Capturing Breathtaking Landscapes is a timeless pursuit that combines technical mastery, artistic vision, and an emotional connection to nature. Whether you’re photographing sweeping mountain ranges, serene coastlines, or peaceful forests, crafting a truly remarkable image requires deliberate planning and an understanding of light, composition, and camera settings. This comprehensive guide explores everything you need to know—from preparation and camera techniques to post-processing—to help you master the art of landscape, nature, and outdoor photography.
📝 Step-by-Step Guide: Capturing Breathtaking Landscapes
1. Research and Preparation
Effective landscape photography begins well before you arrive on location. Researching and planning in advance allows you to optimize lighting, choose optimal times, and identify unique compositions that enhance your results.
- Scout Locations: Use Google Earth and photography forums to preview potential angles or vantage points for compelling scenes.
- Monitor Weather Patterns: Weather sets the tone—storm systems add drama, fog brings mystery, and clear skies emphasize minimalism.
- Study Lighting Direction: Apps such as PhotoPills or The Photographer’s Ephemeris help determine when and where the sun will appear.
- Pack for Versatility: Bring a tripod, lens cleaning kit, ND filters, extra batteries, and memory cards to adapt to changing conditions.
2. Choosing the Right Equipment
Your gear should align with your creative goals rather than simply being the most expensive option. The right tools ensure clarity, control, and flexibility in dynamic environments.
- Camera Body: A DSLR or mirrorless camera with full manual control enables precise adjustments in exposure and focus.
- Lenses: A wide-angle lens between 16–35mm captures expansive vistas, while a telephoto lens isolates distant details.
- Tripod: For sharp results, a sturdy carbon fiber tripod ensures stability during long shutter exposures.
3. Mastering Camera Settings for Landscape Photography
Mastering camera settings for landscape scenes unlocks precision and depth. Small adjustments in aperture, exposure, and focus can elevate your final results.
- Aperture: Set between f/8 and f/16 for optimal depth of field, ensuring both foreground and background sharpness.
- ISO: Keep ISO low (100–200) to preserve image clarity and reduce noise.
- Shutter Speed: Modify according to motion. Slow speeds create smooth water or cloud movement; faster speeds freeze dynamic scenes.
- Manual Focus: In complex lighting, manual focusing provides precision where autofocus may fail.
- White Balance: Adjust manually for accurate color during sunrise, sunset, or shaded environments.
4. Composition Techniques That Define Your Image
Composition provides structure and emotional rhythm to your landscapes. By organizing visual elements effectively, your image communicates intention and artistry.
- Rule of Thirds: Align key elements along the grid intersections to establish balance and movement.
- Leading Lines: Utilize rivers, paths, or fences that guide the viewer’s gaze through the scene.
- Foreground Interest: Add textures like rocks or flora to establish visual depth.
- Framing: Natural frames, such as trees or archways, add layering and focus attention on the subject.
- Negative Space: Space in skies or open fields creates tranquility and grandeur.
5. Timing and Lighting
Lighting dictates a photograph’s atmosphere. Golden hour photography—shortly after sunrise and before sunset—produces soft, warm tones that sculpt natural landscapes with depth. Alternatively, blue hour imparts cool hues that evoke tranquility. Experiment during different periods for unique moods.
6. Post-Processing for Fine Detail
Editing is an extension of your creative process. Working from RAW files allows you to refine details without quality loss.
- Exposure Balancing: Recover highlights, brighten shadows, and maintain natural contrast.
- Color Adjustments: Maintain realistic tones; over-saturation can diminish authenticity.
- Selective Sharpening: Apply sharpness selectively to emphasize texture while avoiding noise.
- Thoughtful Cropping: Reframe for impact but retain essential composition balance.
📌 Practical Applications: Capturing Breathtaking Landscapes
1. Travel and Adventure Photography
When traveling, landscape photography allows you to transform distant locations into visual narratives. Seek unique angles by stepping off typical trails, and contextualize well-known landmarks through fresh perspectives. Preparation and patience will help capture distinctive images that transcend standard travel photos.
2. Environmental Storytelling
Nature photography offers more than scenic beauty—it can convey environmental awareness. Use composition to highlight ecological contrasts such as thriving forests beside barren land or serene lakes marred by pollution. These juxtapositions underscore powerful messages about conservation.
3. Outdoor Lifestyle and Commercial Projects
Outdoor photography is increasingly valuable in advertising, branding, and lifestyle storytelling. Natural light enhances product authenticity, making images more relatable to audiences seeking genuine experiences.
4. Fine Art Landscape Prints
Transform your strongest compositions into fine art prints. Experiment with different finishes, such as matte or metallic paper, to enhance tonal richness and contrast. Presenting your work in physical form deepens appreciation for its textural details and emotional resonance.
💡 Tips & Tricks: Capturing Breathtaking Landscapes
- Arrive early and stay past sunset to capture dynamic lighting transitions.
- Use polarizing filters to control reflections and deepen sky tones.
- Apply neutral density filters to achieve motion blur in water or clouds.
- Incorporate a human figure to emphasize scale and perspective.
- Experiment during stormy weather for dramatic compositions.
- Use focus stacking for extensive depth in macro landscapes.
- Practice exposure bracketing for balanced HDR outputs.
- Use live view to refine composition and ensure horizon accuracy.
📸 Sample Scenario
Imagine shooting a sunrise over a misty valley. After scouting viewpoints the prior day, you arrive before dawn and set your camera to f/11, ISO 100, and a slow shutter for soft water flow. As light pierces through the clouds, you capture three exposures to merge later in post-processing. The finished composite reveals glowing highlights and deep shadow detail—an image infused with atmosphere and harmony.
✅ Key Do’s for Effective Usage
- Do shoot in RAW for flexible editing and dynamic range.
- Do stabilize with a tripod for sharp long-exposure shots.
- Do experiment with different focal lengths for varied perspectives.
- Do include foreground features to build spatial depth.
- Do continually review your compositions mid-session.
- Do observe how light interacts with terrain and textures.
❌ Common Mistakes to Avoid
- Overprocessing colors, which results in unnatural scenes.
- Ignoring weather forecasts that affect visual tone.
- Failing to level the horizon or apply grids.
- Neglecting the foreground element that provides context.
- Using too narrow an aperture, causing diffraction softness.
- Relying solely on post-processing to “fix” composition errors.
🔄 Troubleshooting & FAQs
What are the best camera settings for landscape photography?
Start with an aperture of f/8–f/16, ISO 100, and shutter speed based on light and movement. Use manual or aperture priority mode for full control.
How can I capture dynamic skies without losing detail?
Bracket exposures or use graduated ND filters to balance bright skies and darker terrain.
When is the ideal time for golden hour photography?
Shortly after sunrise and before sunset, when the light is warm, soft, and directional, highlighting textures and creating depth.
How do I create motion blur in water or clouds?
Use slow shutter speeds (1–5 seconds) and ND filters to limit light. This technique adds dreamlike motion while keeping static elements crisp.
What editing software works best for landscape images?
Adobe Lightroom and Photoshop are industry standards, while Capture One and Luminar also offer advanced editing tools.
Should I always use a tripod?
In low light or long exposures, a tripod ensures maximum sharpness. For handheld shots, use image stabilization and faster shutter speeds.
🖼️ Bringing It All Together
Capturing Breathtaking Landscapes is a creative balance between vision and technique. When preparation, light comprehension, and precise composition intersect, your photographs can transcend documentation to become visual storytelling.
Continue experimenting, revisit locations under changing seasons, and analyze your results critically. With practice, your portfolio will evolve into a reflection of both technical skill and artistic maturity—an authentic expression of nature through your lens.
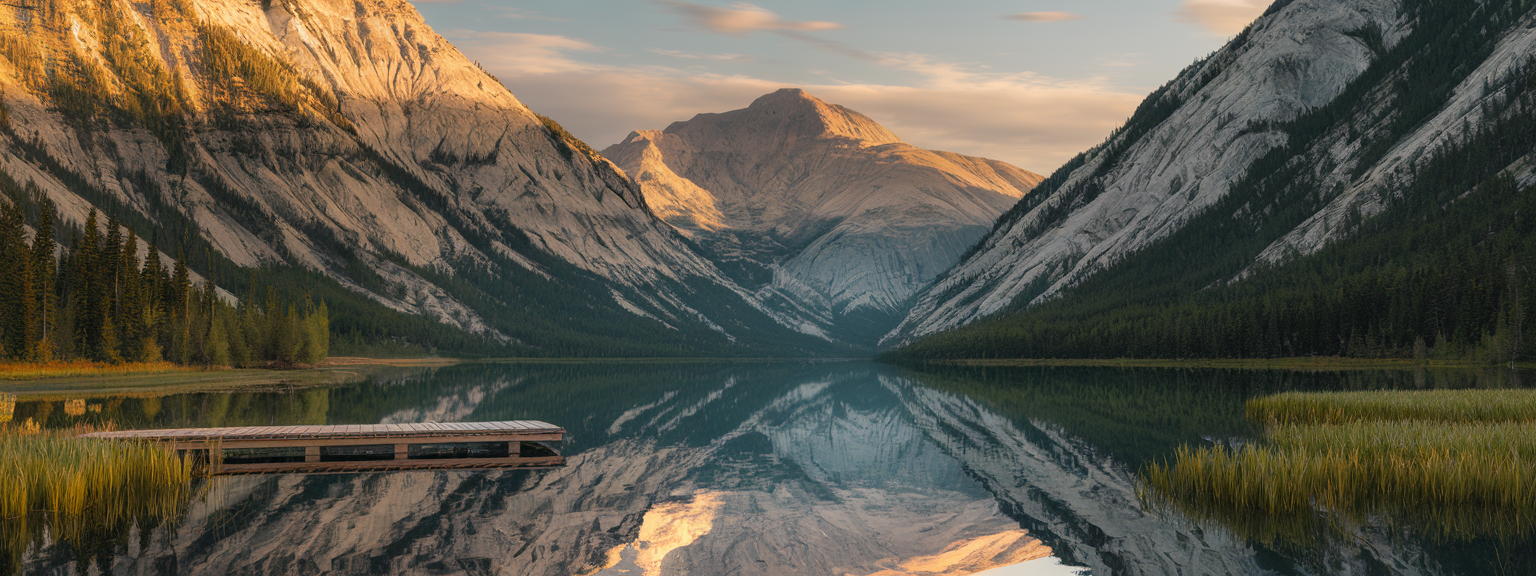
![[Sunrise over a mountain valley with wildflowers in the foreground — landscape photography showing golden-hour light and wide-angle composition.]](https://lenslesson.com/wp-content/uploads/2025/12/landscape-photography-breathtaking-sunrise-scene.png "[Breathtaking Landscape Photography Sunrise]")
![[Person at desk using laptop and notebook to level up your skills]](https://lenslesson.com/wp-content/uploads/2025/12/level-up-your-skills-planning-workspace.png "[Level Up Your Skills Workspace]")
![[Person journaling at a sunlit desk capturing daily creative inspiration with a notebook and coffee.]](https://lenslesson.com/wp-content/uploads/2025/12/daily-creative-inspiration-journaling-ideas.png "[Daily Creative Inspiration Journaling]")
![[Photographer editing images on a monitor demonstrating post processing essentials workflow]](https://lenslesson.com/wp-content/uploads/2025/12/post-processing-essentials-overview.png "[Post Processing Essentials Demo]")
![[Photographer adjusting studio lights for Stunning Images during a portrait session.]](https://lenslesson.com/wp-content/uploads/2025/12/advanced-stunning-images-lighting-composition-editing.png "[Stunning Images Lighting Composition]")
