Selective Color Temperature Adjustment: Using Split Toning Techniques to Create Depth and Mood in Street Photography
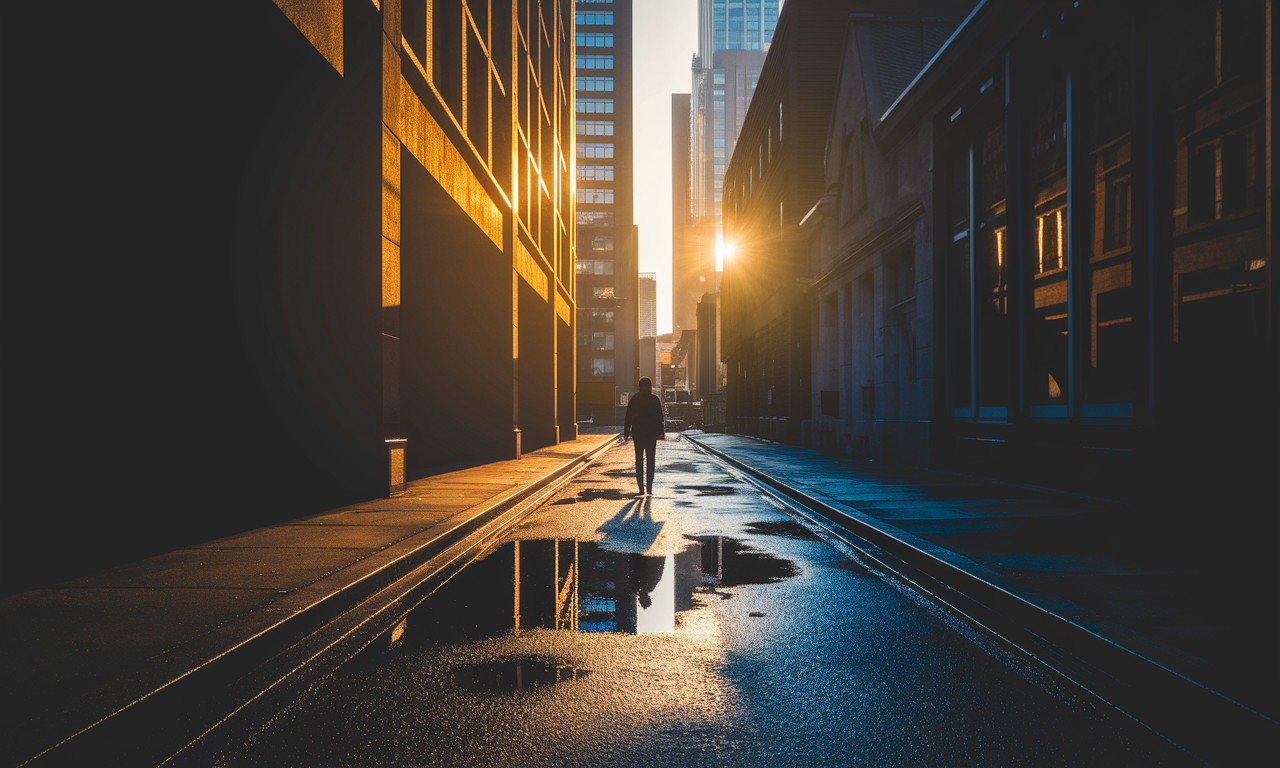
Street photography captures raw moments of urban life. Adding mood and depth requires skilled post-processing techniques. Split toning is a powerful color temperature adjustment method that transforms ordinary street images into compelling visual stories. This technique allows photographers to apply different color casts to highlights and shadows independently.
Modern street photography editing demands precise color grading control. Selective color temperature adjustment gives photographers creative freedom to enhance atmosphere. The method works by separating tonal ranges and applying warm or cool tones to each section.
Mastering these photo post processing skills elevates your street photography from simple documentation to artistic expression. Professional photographers use these techniques to create signature looks and emotional impact.
Step-by-Step Split Toning Guide
Setting Up Your Workspace
Open your street photography image in Adobe Lightroom or Photoshop. Navigate to the Color Grading panel in Lightroom's Develop module. This tool replaces the older Split Toning panel with enhanced functionality.
Examine your image's tonal distribution before making adjustments. Look for distinct highlight and shadow areas that will benefit from color temperature changes. Urban scenes typically offer excellent contrast between bright sky areas and darker building shadows.
Identifying Highlight and Shadow Areas
Press 'J' in Lightroom to activate clipping warnings. This reveals where highlights and shadows exist in your image. White areas show highlight clipping while blue areas indicate shadow clipping.
Street photography often contains mixed lighting conditions. Identify areas where natural daylight meets artificial lighting. These zones create perfect opportunities for selective color temperature adjustment.
Applying Color Temperature to Highlights
Click on the Highlights circle in the Color Grading panel. Drag toward warmer tones (orange) for sunset moods or cooler tones (blue) for modern aesthetics. Start with subtle adjustments around 15-25% saturation.
Warm highlights work well for golden hour street scenes. Cool highlights complement urban architecture and create contemporary feels. Adjust the balance slider to control how color affects midtone transitions.
Adjusting Shadow Color Temperature
Select the Shadows circle and apply contrasting colors to highlights. If highlights are warm, try cool shadows for depth. This creates visual separation between light and dark areas.
Blue shadows paired with orange highlights create classic cinema looks. Teal shadows with warm highlights produce modern Instagram-style grading. Experiment with different combinations to find your signature style.
Practical Applications
Creating Mood Through Color Temperature
Color temperature directly influences emotional response to street photography images. Warm tones evoke comfort, nostalgia, and human connection. Cool tones suggest isolation, modernity, and urban detachment.
Rush hour scenes benefit from warm highlights and cool shadows. This combination emphasizes the human element while maintaining urban atmosphere. Late-night street photography works well with predominantly cool color grading.
Enhancing Depth and Dimension
Split toning creates apparent depth by pushing shadows back and bringing highlights forward. Cool shadows recede visually while warm highlights advance. This mimics natural atmospheric perspective.
Layer separation becomes more pronounced with contrasting color temperatures. Background elements appear more distant when rendered in cool tones. Foreground subjects stand out when highlighted with warmer colors.
Matching Environmental Lighting
Street scenes contain multiple light sources with different color temperatures. Sodium streetlights produce warm orange light while LED signs emit cool white light. Use selective color grading to harmonize these mixed sources.
Balance artificial and natural light sources through careful highlight and shadow adjustment. This creates cohesive images that feel natural despite heavy processing.
Tips & Tricks
Mastering Subtlety in Color Grading
Start with low saturation values between 10-20%. Street photography looks best with gentle color adjustments rather than dramatic shifts. Build intensity gradually by increasing saturation in small increments.
Use the luminance slider to control which tonal ranges receive color treatment. Higher luminance values affect brighter highlights while lower values target deeper shadows. This provides precise control over color placement.
Working with Different Light Conditions
Overcast days produce naturally cool lighting that benefits from warm highlight adjustments. Sunny conditions already contain warm light, allowing for creative cool highlight treatments. Match your color grading to existing environmental conditions.
Golden hour street photography requires minimal warm adjustments since natural light already provides warmth. Focus on cool shadow treatments to maintain color contrast and visual interest.
Protecting Skin Tones
Human subjects in street photography require careful color temperature adjustment. Excessive warm or cool tones can make skin appear unnatural. Use luminance masking to protect skin tone areas.
Building Consistent Style
Develop signature color combinations that work across different street photography scenarios. Save preset settings for quick application to similar lighting conditions. Consistency builds recognizable photographic style.
Sample Scenario
Evening Commuter Scene
Consider a street photograph captured during evening rush hour. The scene contains people walking past illuminated storefronts with natural daylight fading overhead. This mixed lighting situation provides excellent opportunities for split toning.
Apply warm orange tones to highlights around 20% saturation. This enhances artificial lighting from shops and street lamps. The warmth creates welcoming atmosphere and emphasizes human activity.
Add cool blue tones to shadows at 15% saturation. This treatment pushes shadow areas back visually and maintains the urban environment's modern feel. The contrast between warm highlights and cool shadows creates compelling depth.
Technical Settings for This Scene
- Highlights: Hue 40 (orange), Saturation 20%, Luminance 80%
- Shadows: Hue 210 (blue), Saturation 15%, Luminance 20%
- Balance: -15 (favoring shadow treatment)
- Blending: 75% (smooth transition between tones)
These settings create cinematic mood while maintaining natural appearance. Adjust values based on your specific image characteristics and desired intensity.
Key Do's for Effective Usage
Essential Best Practices
Always start with proper exposure and contrast before applying color grading. Split toning works best on well-exposed images with good tonal separation. Correct basic adjustments first.
Use complementary colors for maximum visual impact. Orange highlights with blue shadows create classic cinema looks. Experiment with color wheel opposites for strong contrast effects.
- View images on calibrated monitors for accurate color assessment
- Export test versions to check color reproduction across devices
- Save custom presets for consistent workflow efficiency
- Study cinema and fine art photography for color inspiration
Technical Considerations
Shoot in RAW format to maintain maximum color grading flexibility. JPEG files contain limited color information and restrict adjustment possibilities. RAW files preserve highlight and shadow detail needed for effective split toning.
Consider final output medium when making color decisions. Images destined for print require different color treatment than web display. Monitor your histogram to prevent color clipping during adjustment.
Common Mistakes to Avoid
Over-Saturation Pitfalls
Excessive color saturation creates unnatural-looking images that distract from photographic content. Keep saturation values below 30% for most street photography applications. Subtle adjustments produce more professional results.
Heavy color grading can overwhelm image composition and subject matter. Street photography should tell stories about human experience. Color enhancement should support narrative rather than dominate visual attention.
Ignoring Color Harmony
Random color combinations create chaotic visual experiences. Study color theory basics to understand which combinations work together. Analogous and complementary color schemes provide safe starting points for beginners.
Conflicting color temperatures can confuse viewers about lighting conditions and time of day. Maintain logical relationships between environmental lighting and color grading choices.
Neglecting Skin Tone Protection
Aggressive color grading often affects skin tones negatively. People in street photography should maintain natural skin color regardless of artistic treatment applied to surroundings. Use masking tools when necessary.
- Avoid extreme hue shifts that turn skin green or purple
- Check skin tones at 100% zoom during editing
- Use reference images of natural skin tones for comparison
- Apply selective masking to protect subject areas
Troubleshooting & FAQs
Why Doesn't My Split Toning Show Up?
Low saturation values make color changes barely visible. Increase saturation to 25-30% temporarily to see the effect clearly. Reduce back to desired levels once you've confirmed proper color placement.
Images with limited tonal range may not show dramatic split toning effects. High contrast scenes with distinct highlights and shadows respond better to this technique. Consider adjusting basic exposure controls first.
How Do I Fix Muddy Colors?
Muddy colors result from conflicting color temperatures or over-saturation. Reduce saturation values and check that highlight and shadow colors complement each other. Reset and start with more conservative adjustments.
Increase luminance values to target specific tonal ranges more precisely. Lower luminance settings can cause colors to affect midtones, creating muddy appearance. Fine-tune luminance for cleaner color separation.
Can I Use Split Toning with Black and White Images?
Split toning works excellently with monochrome street photography. Convert to black and white first, then apply color grading for duotone effects. This creates vintage film looks or modern artistic treatments.
Sepia and selenium toning effects are achievable through split toning techniques. Use warm browns in highlights and cool blues in shadows for traditional darkroom aesthetics.
What About Different Camera Brands?
Split toning principles work regardless of camera manufacturer. Canon, Nikon, Sony, and Fujifilm RAW files all support color grading adjustments. Some brands may require slightly different approach due to color science differences.
Fujifilm film simulation modes may limit color grading range. Disable film simulations and work with standard color profiles for maximum flexibility. Apply creative looks through post-processing rather than in-camera.
Bringing It All Together
Split toning transforms ordinary street photography into compelling visual narratives. The technique provides creative control over mood and atmosphere through selective color temperature adjustment. Master these skills to develop signature photographic style.
Start with subtle adjustments and build intensity gradually. Practice on diverse street photography scenarios to understand how different lighting conditions respond to color grading. Develop personal presets for consistent workflow efficiency.
Remember that technical excellence serves artistic vision. Use split toning to enhance emotional impact and storytelling power of your street photography. Color should support narrative rather than dominate compositional elements.
Professional street photographers understand that post-processing skills are equally important as capture techniques. Split toning provides powerful tools for creative expression while maintaining photographic authenticity. Practice regularly and study work of established photographers for continued inspiration and growth.