Creating Compelling Before After Photography Stories: Documenting Neighborhood Gentrification Through Monthly Walking Routes
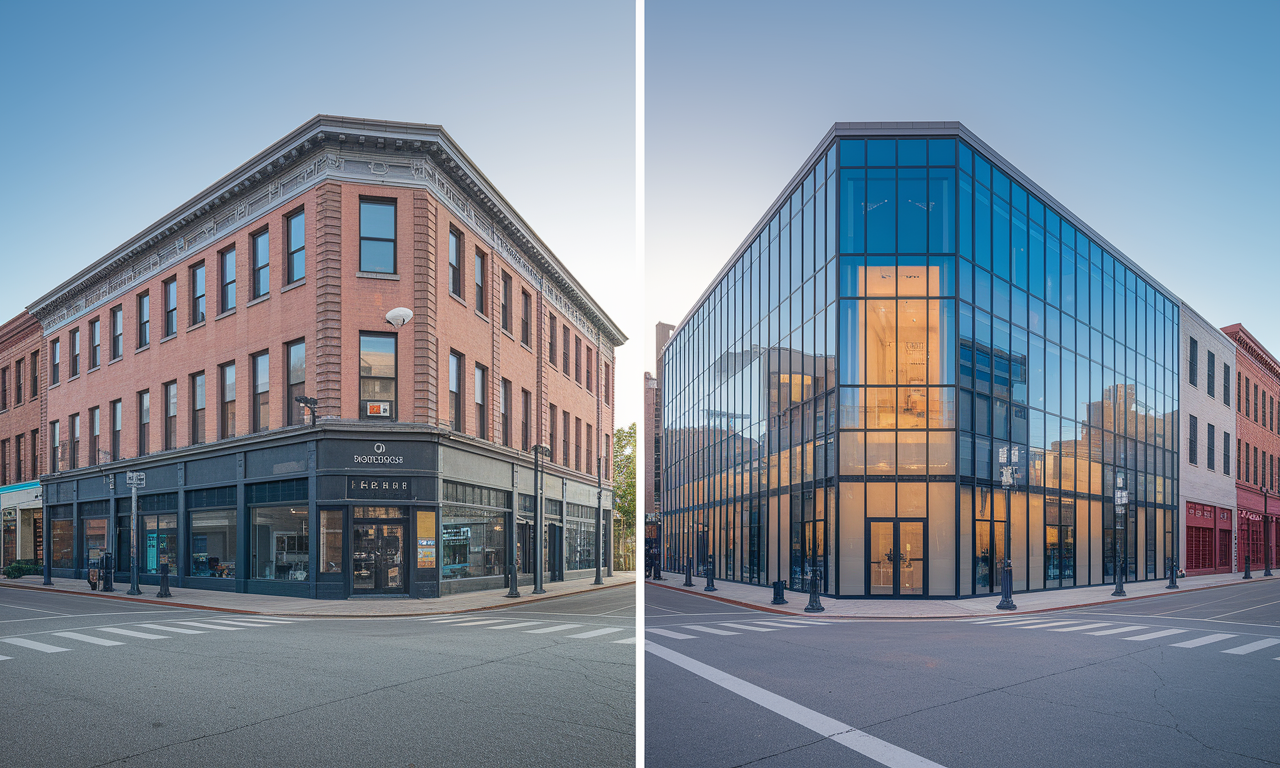
Before after photography offers a powerful way to document social change in our communities. Neighborhood gentrification happens slowly. Visual documentation through monthly photo walks is essential.
Urban photography becomes more meaningful when you track changes step by step. Monthly walking routes create consistency in your documentary series. This approach helps viewers understand the full story behind neighborhood changes.
Storytelling photography requires patience and commitment to long-term projects. Your camera becomes a tool for social commentary. Each month reveals new layers of transformation in the community.
Step-by-Step Guide
Planning Your Documentation Route
Start by mapping a consistent walking route through your target neighborhood. Choose a path that takes about an hour to complete at a steady pace. Mark key landmarks and buildings that show signs of potential change.
Document your route with GPS coordinates or a simple map sketch. Take note of construction sites, vacant lots, and older buildings. These locations often become focal points for gentrification documentation.
Schedule your walks for the same day each month. Early morning or late afternoon provides consistent lighting conditions. Weather can vary, but maintain your schedule for authentic documentation.
Essential Camera Settings and Equipment
Use a wide-angle lens between 24-35mm for building documentation. This focal range captures building facades and street scenes well. A 50mm lens works well for detail shots and people.
Set your camera to aperture priority mode at f/8-f/11 for sharp building details. Keep ISO between 100-400 for clean image quality. Use a polarizing filter to reduce reflections from windows and wet surfaces.
Carry a lightweight tripod for consistent framing across months. Mark your exact shooting positions with small ground markers or GPS notes. Consistent viewpoints make before after photography comparisons more powerful.
Setting Up Your Documentation System
Create a numbering system for your shooting locations along the route. Take the same shots from identical positions each month. This consistency creates the foundation for compelling visual storytelling.
Photograph both wide shots and specific building details. Wide shots show overall neighborhood context and atmosphere. Detail shots capture small changes like new signage or building changes.
Record written notes about each location during your walk. Note construction activity, new businesses, and demographic changes you observe. These notes enhance your visual documentation with important context.
Practical Applications
Identifying Key Signs of Neighborhood Change
Look for new coffee shops and upscale restaurants replacing traditional businesses. These changes signal shifting demographics and rising property values. Document the transformation of storefront signage and window displays.
Pay attention to construction activity and building renovations. New developments and facade improvements indicate investment in the area. Photograph scaffolding, permit signs, and building changes throughout the construction process.
Notice changes in street art, murals, and community spaces. Gentrification often involves the removal or replacement of existing community expressions. These visual elements tell important stories about cultural shifts.
Capturing Human Elements and Community Life
Document the people who use the neighborhood spaces throughout different times. Early morning reveals commuter patterns and local workers. Evening hours show social gatherings and recreational activities.
Photograph community events, street vendors, and public gatherings when possible. Always respect privacy and ask permission for close portraits. These human elements add emotional depth to your documentary series.
Notice changes in how people dress, the languages spoken, and age demographics. These subtle shifts complement your building documentation. Visual storytelling becomes more powerful when it includes human stories.
Building a Compelling Story Arc
Set up your monthly images to show clear progress over time. Create side-by-side comparisons that highlight specific transformations. The story should reveal both positive developments and potential community displacement.
Include images that show resistance to change alongside evidence of transformation. Community gardens, longtime businesses, and cultural centers often persist through gentrification. These elements add complexity to your story.
Tips & Tricks
Advanced Techniques for Before After Photography Documentation
Use a smartphone app to save exact GPS coordinates for each photo location. This ensures perfect alignment when creating before and after comparisons. Small position changes can change the visual impact a lot.
Photograph during similar weather conditions when possible for consistent mood and lighting. Overcast days provide even lighting that works well for building documentation. Avoid dramatic weather that might distract from the main subject.
Take multiple exposures of each scene to account for changing light conditions throughout the year. Bracket your exposures to capture detail in both shadows and highlights. This gives you more options during post-processing.
Post-Processing for Maximum Impact
Maintain consistent color grading across all images in your series. This creates visual unity when presenting your work. Avoid heavy stylization that might distract from the documentary content.
Use split-screen layouts to show dramatic before and after transformations. Align key building elements like building corners and street lines. This technique emphasizes the scale of change over time.
Creating Engaging Presentation Formats
Design time-lapse style presentations that cycle through your monthly images rapidly. This creates a powerful visual effect showing transformation speed. Include dates and brief captions to provide context.
Create detailed photo essays that combine multiple angles of the same location. Show wide shots for context and detail shots for specific changes. Include historical context when available to deepen the story.
Sample Scenario
Following a Corner Building Through Transformation
Month one shows a vacant corner building with boarded windows and faded signage. The surrounding area features a laundromat, corner market, and check-cashing store. Street art covers several building walls, and older residents gather on stoops.
Month three reveals construction permits posted and scaffolding appearing around the building. The corner market closes, replaced by a temporary construction fence. New "For Lease" signs appear in nearby storefront windows.
Month eight shows the completed renovation featuring large windows, modern materials, and upscale retail signage. A coffee shop and boutique clothing store now occupy the ground floor. The demographic mix on the sidewalk has changed a lot.
Documenting the Ripple Effects
The surrounding block shows gradual changes following the corner building transformation. Property owners begin improving facades and updating storefronts. Rent increase notices appear in apartment building windows.
New businesses cater to different income levels and cultural preferences. The original laundromat struggles to compete with upscale services. Community spaces face pressure to adapt or relocate.
Your documentation reveals both the visible building changes and subtler social shifts. This creates a complete story about neighborhood transformation that goes beyond simple building improvements.
Key Do's for Effective Usage
Documentation Best Practices
- Maintain strict consistency in shooting positions and camera settings across all sessions
- Document both dramatic changes and subtle shifts to create a complete story
- Include wide shots and detailed close-ups for full coverage
- Photograph during similar times of day to maintain consistent lighting conditions
- Keep detailed notes about each location and observed changes during your walks
Storytelling Photography Techniques
- Focus on human elements alongside building changes for emotional connection
- Capture community resistance and adaptation alongside development progress
- Use before after photography to highlight specific transformation examples
- Include historical context when possible to deepen viewer understanding
- Present your work in formats that emphasize change over time well
Technical Excellence Standards
- Use GPS coordinates or detailed location notes for exact position matching
- Shoot in RAW format for maximum post-processing flexibility and quality
- Bracket exposures to handle varying light conditions throughout seasons
- Apply consistent color grading across your entire documentary series
- Create high-quality archive files for long-term project preservation
Common Mistakes to Avoid
Technical and Planning Errors
- Changing camera positions or focal lengths between monthly documentation sessions
- Skipping months due to weather conditions or schedule conflicts
- Focusing only on dramatic changes while ignoring subtle neighborhood shifts
- Using inconsistent processing styles that distract from the documentary message
- Failing to backup and set up monthly images with clear dating systems
Story and Presentation Problems
- Presenting a one-sided view of gentrification without community perspective
- Relying solely on building changes without human or cultural context
- Creating presentations that move too quickly for viewers to process changes
- Neglecting to include captions or context that explain what changes mean
- Avoiding controversial or sensitive aspects of neighborhood transformation
Ethical Considerations
- Photographing people without permission or respect for privacy concerns
- Exploiting community struggles for purely artistic or commercial purposes
- Failing to engage with community members about your documentation project
- Presenting work without considering its potential impact on local residents
- Ignoring the complex social and economic factors driving neighborhood changes
Troubleshooting & FAQs
Technical Challenges
Q: How do I maintain exact camera positions across multiple months?
Use a smartphone GPS app to record precise coordinates for each shot. Take reference photos showing your exact standing position. Mark positions with small chalk marks or temporary ground markers when appropriate.
Q: What camera settings work best for consistent building documentation?
Use aperture priority mode at f/8-f/11 for sharp building details. Keep ISO between 100-400 for clean images. Set white balance to daylight for consistency across different weather conditions.
Project Management Issues
Q: How long should I continue documenting the same route?
Plan for at least one year to capture meaningful change cycles. Big gentrification often takes 2-3 years to fully transform an area. Continue as long as interesting changes occur.
Q: What should I do when construction blocks my usual shooting positions?
Document the obstruction as part of the story while finding alternative angles. Take notes about why positions changed. Resume original positions when construction clears.
Legal and Ethical Concerns
Q: Do I need permission to photograph in public spaces?
Public street photography is generally legal, but respect private property boundaries. Ask permission for close portraits and be sensitive to community concerns about documentation.
Q: How can I share my work responsibly with the community?
Engage with local community centers and neighborhood groups. Present your work in local venues first. Include community voices and perspectives in your final presentations.
Bringing It All Together
Creating Meaningful Documentary Impact
Your before after photography project becomes more than visual documentation. It creates historical records of community transformation that future residents and researchers will value. These images become part of the neighborhood's permanent story.
Successful urban photography projects balance artistic vision with social responsibility. Your monthly walks capture both the excitement of development and the complexity of displacement. This balanced approach creates more honest and impactful storytelling.
The discipline of monthly documentation teaches patience and observation skills that improve all your photography. You learn to see subtle changes that others miss. This attention to detail strengthens your overall visual storytelling abilities.
Remember that good documentary photography serves the community being photographed. Share your work in local venues and engage with residents about their experiences. Your camera becomes a bridge between past and future, preserving important moments of change.
The stories you capture through consistent monthly documentation create powerful stories about urban transformation. These visual stories help viewers understand complex social changes happening in cities everywhere. Your neighborhood becomes a case study in the broader patterns of urban development.