Your Ultimate Guide to Getting Started with Camera

📝 Step-by-Step Guide: Getting Started With Camera
Welcome to this comprehensive beginner’s guide on Getting Started with Camera. In this article, you will find detailed instructions on camera basics, photography tips, and a step-by-step process to set up and master your camera. Whether you are delving into DSLR photography for the first time or exploring new camera settings, this guide is designed to equip you with the fundamental skills you need for success. By the end of this guide, you will confidently handle your camera, understand the exposure triangle, and incorporate key composition techniques into your photography.
Unboxing and Understanding Your Camera
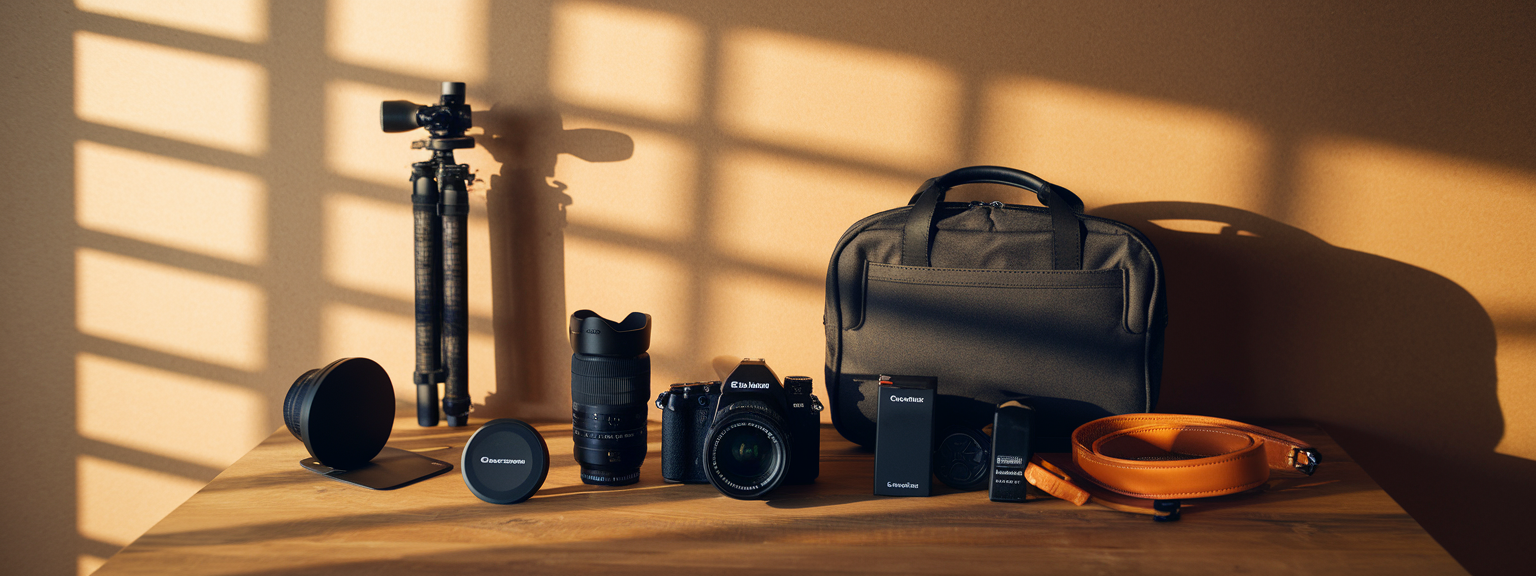
The first step in Getting Started with Camera is to unbox your equipment carefully. Each component of your camera plays a significant role in how you capture your moments. As a beginner’s guide, here are some key parts you need to consider:
- Body: The main hub that contains the sensor and controls. Familiarize yourself with the layout and buttons.
- Lens: Your window to the world. Understand the difference between a kit lens and a prime lens as both influence your camera’s performance.
- Battery and Charger: Read the instructions carefully to maximize battery life and ensure proper charging cycles.
- Memory Card: This is where all your images are stored. Insert a compatible card and consider its speed for optimal performance.
- Accessories: Additional items such as straps, lens caps, and cleaning cloths are vital for maintenance.
Setting Up the Camera
Before you begin shooting, follow these essential steps to configure your camera settings. This process lays the groundwork for advanced camera customization later:
- Set the correct date and time to maintain accurate image timestamps.
- Select your preferred language so that menu options are easy to understand.
- Format the memory card within the camera to avoid any compatibility issues.
- Check for firmware updates on the manufacturer’s website to utilize the latest features and fixes.
Understanding Essential Camera Settings
Grasping the fundamental camera settings is crucial when Getting Started with Camera. Your camera settings influence every shot you take. Here are the core settings:
- ISO: Adjusts the sensor’s sensitivity to light. Lower ISO values (e.g., 100-200) are ideal for bright conditions, while higher ISO values (e.g., 1600+) work better in low-light environments.
- Aperture: Dictates the lens opening size. A wide aperture (lower f-number) results in a shallow depth-of-field, perfect for portraits; a narrow aperture (higher f-number) is suitable for capturing expansive landscapes.
- Shutter Speed: Controls the duration the sensor is exposed to light. Opt for a faster shutter speed to freeze action, whereas slower speeds can introduce motion blur and create dynamic effects.
- White Balance: Ensures natural color tones by adjusting for different lighting conditions.
Composing Your First Shots
Composition is key in photography. Utilize these composition techniques to enhance your images:
- Rule of Thirds: Divide your frame into a 3×3 grid to position the main subject along the intersections, offering balance and interest.
- Leading Lines: Use natural or man-made lines to guide the viewer’s eye deeper into the scene.
- Framing: Incorporate surrounding elements to create natural frames around your subject.
- Perspective: Experiment with various angles to add depth and perspective to your photographs.
Exploring Shooting Modes
Modern cameras come equipped with various shooting modes that simplify the photography process, especially if you are just Getting Started with Camera. Each mode serves a unique purpose:
- Auto Mode: An ideal starting point that automatically adjusts ISO, shutter speed, and aperture.
- Program Mode (P): Offers a balance between automatic adjustments and manual input for enhanced creativity.
- Aperture Priority (A or Av): Allows you to control the aperture while the camera selects the appropriate shutter speed.
- Shutter Priority (S or Tv): You determine the shutter speed and the camera adjusts the aperture accordingly.
- Manual Mode (M): Grants full control over all camera settings, ideal for those who want to dive deeper into DSLR photography and master camera basics.
By practicing these settings and gradually moving from auto to manual, you will develop a profound understanding of the exposure triangle and other vital photography tips. This guide on Getting Started with Camera emphasizes the importance of experimentation with each mode to discover the settings that best suit your style.
📌 Practical Applications: Getting Started With Camera
Landscape Photography
Landscape photography often requires careful attention to lighting, focus, and composition. When Getting Started with Camera, follow these tips to capture beautiful landscapes:
- Set a narrow aperture (f/11 to f/16) to achieve maximum depth of field so that both foreground and background are sharp.
- Consider using a slower shutter speed to create a blurred, silky effect for moving water or clouds.
- Employ a tripod to ensure image stability especially in low light or for long-exposure shots.
- Maintain a balanced composition by using the rule of thirds, positioning the horizon at either the top or bottom third of the frame.
Portrait Photography
Portrait photography is another excellent genre for those Getting Started with Camera. To achieve professional-looking portraits, consider the following guidelines:
- Utilize a wide aperture (f/1.8 to f/2.8) to create a shallow depth of field that highlights your subject.
- Natural light, such as soft daylight from a window, is highly recommended to warm up the portrait’s ambiance.
- Focus on precise composition by ensuring that the subject’s eyes are sharp and well-framed.
- Experiment with different focal lengths, for example, a 50mm lens may provide a natural and flattering perspective.
Macro and Street Photography
As you advance in your photography journey, you might want to explore niche genres like macro and street photography. When Getting Started with Camera for these genres:
- Macro Photography: Use a dedicated macro lens, set a moderate aperture (around f/8), and prefer manual focus for precise control over tiny subjects.
- Street Photography: Utilize aperture priority mode to quickly adjust to changing light conditions, maintain a higher ISO for versatility, and adopt a candid approach without being intrusive.
💡 Tips & Tricks: Getting Started With Camera
Mastering the Exposure Triangle
One of the most critical aspects of Getting Started with Camera is understanding the exposure triangle: ISO, aperture, and shutter speed. By balancing these three elements, you can achieve perfect exposures in every situation. For example, in bright outdoor conditions, lower ISO values coupled with smaller apertures and faster shutter speeds ensure clarity without overexposure.
Leveraging Creative Camera Settings
Modern cameras offer several creative settings that allow you to experiment beyond the traditional boundaries of photography. Here are some advanced techniques:
- Apply creative filters to produce vintage or dramatic outcomes.
- Experiment with slow shutter speeds to capture motion blur in dynamic scenes.
- Utilize intentional camera movement (ICM) to add an abstract artistic quality to your photos.
- Take advantage of burst mode for action photography, ensuring you capture peak moments.
Pre-Shooting Planning and Post-Processing
Effective photography begins before you even press the shutter. When Getting Started with Camera, proper planning is as important as technical execution. Scout your location, check weather conditions, and prepare all necessary gear. After your shoot, use editing software like Adobe Lightroom or Photoshop to enhance your photos with subtle adjustments, ensuring that your images remain natural yet impactful.
📸 Sample Scenario
Scenario: Capturing a Mountain Sunrise
Imagine you are preparing for a weekend expedition to capture a stunning mountain sunrise. This scenario is a practical application of Getting Started with Camera that focuses on utilizing the best camera settings and composition techniques for a dynamic, natural scene.
- Preparation: Pack your DSLR or mirrorless camera with a wide-angle lens, extra batteries, additional memory cards, and a sturdy tripod.
- Pre-Shooting: Visit the location in advance to scout the best vantage points and note the exact timing of the sunrise. Check weather forecasts to ensure optimal conditions.
- Camera Settings:
- ISO: Set to 100 for crisp image quality in the early light.
- Aperture: Use f/11 to f/16 to secure both the foreground and the mountain range in focus.
- Shutter Speed: Adjust shutter speed to capture a slight motion blur in clouds, enhancing the dynamic feel of the shot.
- Composition: Utilize the rule of thirds by positioning the horizon along one of the grid lines. Use natural elements, such as a tree or rock, to frame the scene, which adds layers of depth.
- Execution: Begin shooting in Aperture Priority mode and adjust the settings as the light changes rapidly during sunrise. Experiment with bracketing techniques to secure the best exposure.
- Post-Processing: Import your images into editing software to balance the exposure between the bright sky and the dark foreground. Enhance details without over-editing, so that the natural beauty of the sunrise remains intact.
This scenario demonstrates the practical application of the advanced camera settings and composition techniques presented earlier. By following this structured approach, you will gain confidence in your ability to adapt to different shooting conditions while perfectly illustrating the core essence of Getting Started with Camera.
✅ Key Do’s for Effective Usage
- Do read your camera’s manual: Gain thorough knowledge about your camera’s specific features to maximize its potential.
- Do practice regularly: Experiment with various lighting conditions and settings to better understand Camera basics and exposure triangle dynamics.
- Do invest in essential gear: Use a reliable tripod, extra batteries, and high-quality memory cards that enhance shooting stability and efficiency.
- Do explore different lenses: Each lens offers a unique perspective, aiding you in mastering composition techniques and DSLR photography.
- Do participate in communities: Engage with fellow photographers online or in local groups to share insights, receive feedback, and refine your skills.
- Do edit with subtlety: Use post-processing to enhance images while preserving natural beauty and authenticity.
- Do keep a photography journal: Document your settings, shooting conditions, and creative experiments to track your growth and replicate successful shots.
❌ Common Mistakes to Avoid
- Over-reliance on Auto Mode: Relying solely on auto mode limits your understanding of the exposure triangle and fundamental camera settings. Instead, experiment with manual modes to enhance your proficiency in DSLR photography.
- Ignoring Composition: Failing to apply composition techniques such as the rule of thirds or leading lines can result in static images. Instead, take the time to plan your shots to ensure they are visually engaging.
- Neglecting Maintenance: Not cleaning lenses, sensors, or other camera components can lead to image quality issues. Maintain your gear regularly to preserve its longevity and performance.
- Improper Battery and Memory Management: Avoid running out of power or storage during critical moments by investing in spare batteries and extra memory cards.
- Over-editing: Excessive adjustments can distort the natural quality of your images. Opt for subtle post-processing techniques that enhance your photograph without compromising its authenticity.
🔄 Troubleshooting & FAQs
What if my photos are too dark or too bright?
This is often due to incorrect exposure settings. When Getting Started with Camera, ensure that you balance the ISO, aperture, and shutter speed using the exposure triangle. If brightness is an issue, try bracketing your shots or using the histogram on your camera.
Which shooting mode should I begin with?
For beginners, auto or program mode is recommended until you gain confidence. Gradually shift to aperture or shutter priority mode as you learn more about Camera basics and DSLR photography techniques.
How can I improve my composition skills?
Practice applying composition techniques such as the rule of thirds, leading lines, and framing. In addition, study the works of expert photographers to learn how subtle changes in perspective can transform an image.
What gear should I invest in as a beginner?
Begin with a basic DSLR or mirrorless camera kit. As you advance, consider investing in prime lenses, a sturdy tripod, and additional lighting accessories to further explore advanced photography techniques and camera settings.
How do I prevent focus issues in low light?
In low-light conditions, try using a higher ISO setting or switch to manual focus. Moreover, using external lighting or a reflector can help maintain an appropriate focus on your subjects.
🖼️ Bringing It All Together
This comprehensive guide has taken you through every fundamental aspect of Getting Started with Camera. We explored everything from unboxing your device and configuring key camera settings to practical applications and advanced techniques in both macro and street photography. By steadily experimenting with the exposure triangle, composition methods, and creative camera settings, you now have a solid foundation for capturing captivating images.
Remember, every photography expert started as a beginner. With dedication and continuous practice, you will transform camera basics into advanced skills, develop your unique style, and master DSLR photography. Therefore, keep experimenting with different camera modes and settings so that every shot you take reflects your growth and creativity in the art of photography.
By following these structured steps and actionable tips, you are well-equipped to explore various photography genres, whether it’s capturing landscapes, portraits, macro details, or street scenes. Remember, each time you pick up your camera, you are furthering your mastery of Getting Started with Camera, learning from practical experiences, and perfecting your photographic style.
Delve into additional content on photography gear essentials and advanced DSLR techniques to broaden your skills even further. Continue to embrace both the technical and creative aspects of photography, and never stop learning.
Happy shooting, and may every image you capture bring you closer to mastering the art of photography!
Getting Started with Camera should always remind you to explore, experiment, and enjoy each moment behind the lens. Keep this guide handy as you progress on your journey, and remember that practice and persistence are key to advancing your skills.
Embrace these insights and practical steps to transform your approach to photography and achieve visually compelling imagery that reflects both technical expertise and creative excellence.
Through regular practice and commitment to learning, Getting Started with Camera will empower you to master not only the technical nuances of your gear but also the art of storytelling through images.
Your journey starts here. Now, embrace the opportunities to create, capture, and celebrate every moment through your camera lens!

![[Getting Started With Camera - Beginner Setup] [Beginner photographer adjusting camera settings while learning how to get started with camera]](https://lenslesson.com/wp-content/uploads/2025/12/getting-started-with-camera-beginner-setup.png)
![[Stunning Images Editing Workflow] [Photographer editing a vibrant landscape on a monitor, demonstrating techniques for stunning images]](https://lenslesson.com/wp-content/uploads/2025/12/advanced-stunning-images-editing-workflow.png)
![[sports-photography-action-shot] [Photographer using a telephoto lens to capture a fast break at a basketball game — Sports Photography]](https://lenslesson.com/wp-content/uploads/2025/12/sports-photography-action-shot-telephoto-basketball.png)
![[Travel photography sunrise capture] [Photographer capturing sunrise landscape during a travel photography trip with a mirrorless camera]](https://lenslesson.com/wp-content/uploads/2025/12/travel-photography-sunrise-shot-essentials.png)
![[Photo Tips Sharper Shots] [Close-up of a photographer adjusting camera settings - Photo Tips for sharper shots]](https://lenslesson.com/wp-content/uploads/2025/12/photo-tips-better-photos-smartphone-composition.png)
![[Urban Street Photography Moment] [Photographer capturing a candid moment on a busy city sidewalk — street photography scene]](https://lenslesson.com/wp-content/uploads/2025/12/street-photography-candid-urban-moment.png)


