Transform Your Travel Photos with HDR Photography: 10 Must-Know Steps for Beginners

📝 Step-by-Step Guide: Transform Your Travel Photos with HDR Photography
HDR photography is an incredible way to transform your travel photos, providing a balanced exposure that captures both the brilliant skies and detailed landscapes. In this comprehensive guide, you will discover 10 must-know steps specifically designed to transform your travel photos using HDR photography. From exposure bracketing to advanced post-processing techniques, we will walk through every essential element. Therefore, if you are ready to elevate your travel photography, continue reading as we detail each step and provide useful tips for success.
1. Understand the Concept of HDR Photography
High dynamic range (HDR) photography allows you to capture a range of light intensities in a single image. First, learn the basics: HDR involves taking multiple shots at different exposures and then blending them. This technique ensures that even the darkest shadows and the brightest highlights are fully detailed. Moreover, understanding your camera settings and exposure bracketing is essential when aiming to transform your travel photos.
2. Gear Up with the Right Equipment
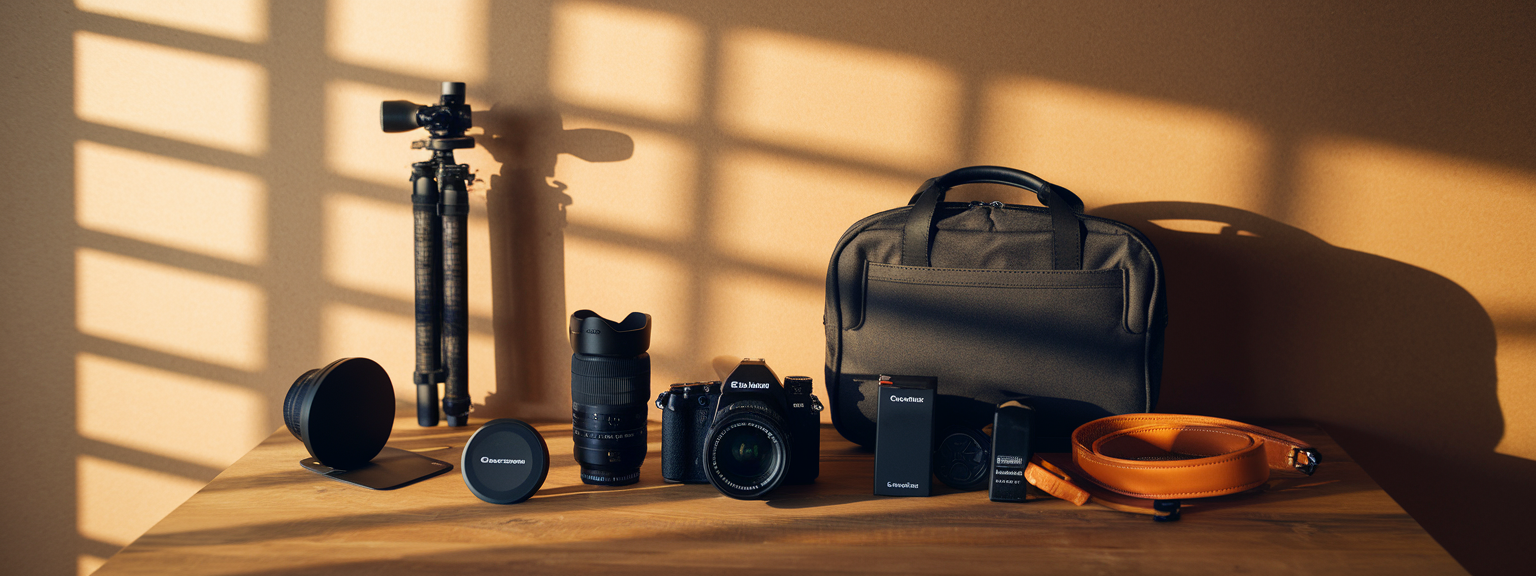
Before you begin your HDR journey, make sure that you have the right photography equipment. First, a sturdy tripod is crucial for consistency. Next, consider a camera with manual settings and a wide dynamic range. In addition, lenses with high-quality optics can significantly influence the final outcome of your transformed travel photos. By investing in solid equipment, you will ensure that your travel photography tips and techniques are executed flawlessly.
3. Master Exposure Bracketing
Exposure bracketing is the cornerstone of HDR photography. This method involves capturing several images at different exposures. Typically, you should take at least three shots: one underexposed, one correctly exposed, and one overexposed. Not only does this process help to transform your travel photos, but it also allows you to capture every detail in landscapes, ensuring that nothing is lost in either the bright skies or the dark shadows.
4. Choose the Right Scene and Lighting
When you plan to transform your travel photos, select scenes that display a dynamic range of light. For example, dramatic sunsets or bright midday reflections in water bodies can benefit from HDR techniques. However, in situations with uniform lighting, traditional photography might be more effective. Therefore, always assess the environment and natural light conditions before proceeding.
5. Configure Your Camera Settings
To successfully transform your travel photos, familiarize yourself with your camera settings. Switch to manual mode to control exposure, ISO, shutter speed, and aperture. Additionally, disable any automatic tone mapping features to maintain control over the final result. By adjusting these settings, you can achieve consistency across all your frames, making it easier to merge them later.
6. Capture Multiple Exposures
Once you have adjusted your camera settings, capture multiple exposures in sequence. It is important to ensure that your camera is stable; hence, using a tripod is recommended. As a result, you’ll capture images that cover the entire range of shadows to highlights, which are essential for producing an image with a balanced contrast and realistic details.
7. Utilize HDR Software for Merging
After capturing your images, use HDR software to merge the multiple exposures into one seamless image. Many programs offer intuitive controls that allow you to fine-tune the blending process. In addition, these tools help enhance details and produce the best possible outcome for your transformed travel photos. Popular software includes Adobe Lightroom and Photomatix Pro.
8. Refine with Post-Processing Techniques
Post-processing plays a significant role when you aim to transform your travel photos through HDR photography. Enhance your images with subtle adjustments such as contrast, saturation, and sharpness. Moreover, advanced techniques like selective editing can draw attention to key parts of the photograph. For instance, you might want to boost the vibrancy of a landscape while preserving the delicate details in the sky.
9. Experiment with Creative Adjustments
Always be open to experimentation when trying to transform your travel photos. Try out various filters, tones, and artistic effects to create a unique style. Additionally, consider changing the mood of the photograph by tweaking the color balance or adding a vignette effect. This creative experimentation encourages a personal approach to HDR photography that sets your travel images apart.
10. Review and Learn from Each Session
Finally, review your transformed travel photos critically. Analyze what worked well and what could be enhanced for the next session. By continuously learning from each process, you will refine your technique. In addition, sharing your progress with fellow enthusiasts can provide useful insights and further tips to perfect your HDR process.
📌 Practical Applications: Transform Your Travel Photos with HDR Photography
The practical applications of HDR photography are endless, especially when it comes to travel photography. When you transform your travel photos with HDR photography, you can capture breathtaking landscapes, vivid cityscapes, and intricate details in historical landmarks. For example, a breathtaking mountain range or a bustling urban evening scene can be brought to life with extraordinary dynamic range. Furthermore, HDR photography helps in scenarios where light conditions are challenging, as it effectively preserves both dark and bright areas within a single image.
Moreover, leveraging techniques like exposure bracketing alongside advanced post-processing can further enhance your travel photography tips, ensuring that every shot is perfectly balanced. As a result, the high dynamic range is maintained even in extreme lighting situations, which is essential for obtaining professional-quality images.
- Capture vibrant sunsets by merging underexposed and overexposed images for a complete range.
- Showcase stunning architectural details in historic cities by balancing harsh shadows and bright highlights.
- Create mesmerizing panoramas and landscapes by ensuring every element of the scene is well lit.
- Produce dramatic travel photos that highlight the contrasts of nature and urban life.
💡 Tips & Tricks: Transform Your Travel Photos with HDR Photography
Here are some valuable tips and tricks to further transform your travel photos with HDR photography. These insider techniques not only enhance your images but also simplify the complex process of exposure bracketing and post-processing. In addition, following these pointers can help you achieve consistent, professional results every time you set out on an adventure.
Keep an Eye on the Weather
Weather plays a crucial role when planning your shoot. For example, dramatic skies during a storm or the soft light of a cloudy day can add an atmospheric quality to your images. Therefore, always check the forecast before setting out, as unpredictable weather can sometimes offer unexpected photographic opportunities.
Use a Remote Trigger
To minimize camera shake during long exposure series, consider using a remote trigger. This tool enables you to capture multiple exposures without physically touching the camera. Additionally, it enhances the stability of the shots, ensuring that the merged final image is sharp and clear.
Experiment with Bracketing Intensity
Not every scene needs the maximum number of exposure brackets. Sometimes, a subtle variation between exposures can provide more natural results. Therefore, experiment with different bracketing intensities depending on the lighting situation. For example, for moderate scenes, fewer exposures might be required than for scenes with extreme light variations.
Stay Updated with the Latest Software
Software updates in HDR processing are frequent. Therefore, always ensure that you are using the latest version of your preferred editing software. This not only provides you with cutting-edge post-processing techniques but also improves the final clarity and accuracy of your images.
📸 Sample Scenario
Imagine you are visiting a coastal city during sunset. The sky is a canvas of vibrant oranges and pinks, while the ocean reflects every detail of the colorful sky and the illuminated city skyline. Here, you decide to transform your travel photos with HDR photography. You set up your camera on a tripod, adjust your camera settings to manual mode, and set up exposure bracketing capturing three different exposures. After the session, you merge these images using advanced HDR software and then fine-tune your image with selective post-processing to preserve the natural beauty of both the sky and the city below. This process not only breathes life into the scene but also demonstrates practical travel photography tips that leverage high dynamic range imaging to its fullest.
✅ Key Do’s for Effective Usage
When aiming to transform your travel photos with HDR photography, there are several key do’s you should always follow:
- Do plan your shoot with careful attention to lighting conditions and weather.
- Do make sure your camera is mounted on a steady tripod to prevent any motion blur.
- Do use exposure bracketing to capture a wide range of brightness levels.
- Do experiment with post-processing techniques to bring out hidden details.
- Do continually review your work to identify areas for improvement.
- Do update your software and learn new HDR methods as technology evolves.
❌ Common Mistakes to Avoid
Even experienced photographers can fall into common pitfalls when attempting to transform your travel photos through HDR. Here are several mistakes you should avoid to ensure your images are consistently impressive:
- Avoid using too many exposures, as it can lead to an unnatural look.
- Never neglect to stabilize your camera; even slight motion can ruin the bracketed series.
- Do not over-process your images. Excessive sharpening or contrast can distort details.
- Avoid shooting in raw mode without learning post-processing steps, as this can complicate the workflow.
- Do not rely solely on automatic settings; manual control is essential for superior results.
🔄 Troubleshooting & FAQs
Below are some of the most frequently asked questions and troubleshooting tips to help you transform your travel photos using HDR techniques:
- Q: What are the best camera settings to use for HDR photography?
A: Use manual mode with controlled ISO, shutter speed, and aperture settings. Also, deploy exposure bracketing to capture a wide dynamic range. It is recommended to use a tripod to avoid any blurring between exposures. - Q: How many exposures should I use for a typical HDR shot?
A: Typically, three exposures are sufficient; however, for very challenging lighting conditions, you can use five or more images. - Q: Can I use my smartphone for HDR photography?
A: Yes, many smartphones now offer HDR functionality. Although they may not provide as much control as a DSLR, they can still produce stellar results with proper exposure bracketing and post-processing. - Q: What are some common post-processing techniques for HDR images?
A: Common techniques include adjusting contrast, saturation, and sharpness, as well as using selective editing to enhance specific areas of the image. Many editing programs offer presets that can help streamline the process. - Q: How do I avoid the “overcooked” look in HDR images?
A: To avoid an artificial appearance, ensure that you process your images subtly. In addition, adjust the merge settings carefully to maintain natural transitions between the different exposures.
🖼️ Bringing It All Together
In conclusion, to truly transform your travel photos using HDR photography, you must combine careful planning, the right camera settings, and creative post-processing techniques. Every step, from capturing multiple exposures with precision to fine-tuning the final blend of shadows and highlights, plays a critical role in producing images that not only impress but also tell a vibrant story about your travel adventures. By integrating exposure bracketing with expert-level post-processing techniques, you unlock the potential to create photos that are dramatically expressive and visually stunning.
By following these comprehensive steps and expert tips, you will consistently produce breathtaking images that highlight the full beauty of your travel experiences. Remember, experimentation is key; therefore, do not hesitate to try new techniques and challenge the traditional rules of photography. As you continue to learn and experiment, your ability to transform your travel photos with HDR photography will only improve, resulting in images that not only capture moments but also inspire countless others.
Your journey in mastering HDR photography is an ongoing process filled with learning, experimentation, and immense creativity. Always stay curious, keep practicing, and enjoy the process of transforming your travel photos into timeless works of art that vividly portray your adventures.

![[Stunning Images Editing Workflow] [Photographer editing a vibrant landscape on a monitor, demonstrating techniques for stunning images]](https://lenslesson.com/wp-content/uploads/2025/12/advanced-stunning-images-editing-workflow.png)
![[sports-photography-action-shot] [Photographer using a telephoto lens to capture a fast break at a basketball game — Sports Photography]](https://lenslesson.com/wp-content/uploads/2025/12/sports-photography-action-shot-telephoto-basketball.png)
![[Travel photography sunrise capture] [Photographer capturing sunrise landscape during a travel photography trip with a mirrorless camera]](https://lenslesson.com/wp-content/uploads/2025/12/travel-photography-sunrise-shot-essentials.png)
![[Photo Tips Sharper Shots] [Close-up of a photographer adjusting camera settings - Photo Tips for sharper shots]](https://lenslesson.com/wp-content/uploads/2025/12/photo-tips-better-photos-smartphone-composition.png)
![[Urban Street Photography Moment] [Photographer capturing a candid moment on a busy city sidewalk — street photography scene]](https://lenslesson.com/wp-content/uploads/2025/12/street-photography-candid-urban-moment.png)


