
Beginner Camera Guide: 10 Simple Steps to Get Started with Your Camera
Beginner Camera Guide: If you’ve just bought your first DSLR, mirrorless, or higher-end compact, this Beginner Camera Guide will walk you through camera basics, how to use a camera, and camera settings for beginners so you can start making better photos today. In the first 100 words you will receive a clear roadmap to aperture, shutter speed, ISO, autofocus modes, and practical composition — all arranged in ten simple steps that build skills progressively.
📝 Step-by-Step Guide: Beginner Camera Guide
This section provides the ten ordered steps you need to learn camera basics and camera settings for beginners. Each step contains precise actions, recommended settings to try, and why the step matters. Use this Beginner Camera Guide as a checklist during hands-on practice.
Step 1 — Get to Know Your Gear (Camera basics)
Action: Read the quick-start portion of your manual and identify the power, mode dial, shutter button, main command dial, and where the menus live. Understand whether your camera is a DSLR, mirrorless, or compact. Knowing your body type clarifies lens compatibility and menu layout. In addition, familiarize yourself with viewfinder vs. LCD usage: the viewfinder helps stability while live view aids precise composition.
Step 2 — Charge, Format, and Prepare
Action: Fully charge batteries and format a spare memory card in-camera. Set image format to RAW or RAW+JPEG if you plan to edit. Also confirm image quality and reduce auto power-off or display brightness to save battery during long shoots. Formatting eliminates hidden errors, and spare power plus an empty card prevents missed opportunities.
Step 3 — Learn the Exposure Triangle (exposure triangle: aperture shutter speed ISO)
Concept: Exposure equals the amount of light reaching the sensor. It is controlled by aperture, shutter speed, and ISO. Aperture (f/number) controls depth of field and light: a lower f-number yields more light and shallower depth of field. Shutter speed controls motion capture: a fast shutter freezes action; a slow shutter produces blur. ISO adjusts sensor sensitivity — higher ISO increases noise. Practice by using Aperture Priority (A or Av) and watch how shutter speed and ISO change as you vary aperture.
Step 4 — Start in Aperture Priority and Program Mode
Action: Use A/Av for portraits (select f/2.8–f/5.6) and landscapes (f/8–f/16). Use Program (P) mode for quick general shooting. Aperture Priority gives control over depth of field while the camera sets shutter speed. If the exposure meter is fooled by a bright or dark scene, apply exposure compensation (+/- EV) to correct the camera’s choice.
Step 5 — Master Autofocus Modes and Points (autofocus modes)
AF Modes: Single AF (One Shot/AF-S) for still subjects; Continuous AF (AF-C/AI Servo) for moving subjects; Auto AF when you need the camera to choose. Learn to move AF points: single-point AF gives precision; zone AF is useful for unpredictable movement. Practice back-button focus to separate focusing from the shutter release. Proper autofocus prevents soft images and builds confidence when shooting kids, pets, or sports.
Step 6 — Learn Metering and Exposure Compensation
Metering modes include Evaluative/Matrix (general-purpose), Center-weighted (favors center), and Spot (meters a small area). For example, use spot metering on a subject’s skin in a backlit portrait to preserve correct exposure. In addition, set exposure compensation when the camera under- or over-exposes high-contrast scenes.
Step 7 — Understand White Balance and Color
Options: Auto White Balance (AWB), presets (Daylight, Cloudy, Tungsten), and custom Kelvin settings. If lighting is mixed, shoot RAW to correct white balance later. White balance affects color accuracy and mood; therefore, learning to control it improves the final result.
Step 8 — Lens Selection and Basic Optics (lens selection)
Lens types matter: primes (e.g., 50mm) offer wider apertures and often superior sharpness. Zooms provide flexibility. For portraits choose 35–135mm depending on crop factor; for landscapes consider 10–35mm wide angles. Start with a kit lens and then rent a 50mm f/1.8 to explore shallow depth of field. The lens changes perspective, depth, and low-light performance.
Step 9 — Practice Composition Techniques (composition techniques)
Techniques to practice: rule of thirds, leading lines, framing, negative space, symmetry, and patterns. Action: take a composition walk and capture 50 images focusing only on one technique per shot. Composition often makes the difference between a snapshot and a deliberate photograph.
Step 10 — Post-Processing Basics and Workflow
Tools: Lightroom, Capture One, Photoshop, Darktable. Workflow: cull images, correct exposure and white balance, adjust contrast, recover highlights and shadows, and apply noise reduction and sharpening. Shoot RAW to preserve editing latitude. Post-processing is part of how you use a camera to reach a finished image.
📌 Practical Applications: Beginner Camera Guide
This section applies the ten steps to common shooting situations. Each practical application lists recommended modes, starting settings, and quick tips so you can immediately practice how to use a camera in real scenarios.
Portraits
- Mode: Aperture Priority (A/Av)
- Aperture: f/1.8–f/5.6 for subject isolation
- ISO: 100–400 outdoors; increase indoors as needed
- Shutter speed: at least 1/125s for headshots
- Focus: single-point AF on the eye
- Composition: use 50–85mm for flattering perspective
Landscape Photography
- Mode: Aperture Priority
- Aperture: f/8–f/16 (avoid diffraction at very small apertures)
- ISO: 100
- Use a tripod and remote release for long exposures
- Focus: manual focus near the hyperfocal distance for maximum depth
Low Light and Night
- Mode: Manual or Shutter Priority
- Aperture: as wide as your lens allows
- Shutter speed: follow reciprocal rule for handheld; use tripod otherwise
- ISO: increase cautiously; modern sensors handle 1600–6400 depending on camera
- Use stabilization and fast lenses
Sports and Action
- Mode: Shutter Priority or Manual
- Shutter speed: 1/500s or faster; 1/2000s for very fast action
- AF: Continuous AF (AF-C) with a dynamic zone
- Use high-speed burst mode and anticipate movement
Macro and Close-up
- Lens: dedicated macro or extension tubes
- Aperture: f/8–f/16 for depth, use focus stacking when necessary
- Shutter speed: tripod recommended; use remote release
Which of these practical scenarios will you practice this week to build confidence with camera settings for beginners?
Use the Practical Applications above to create short, focused shoots. For example, spend one afternoon intentionally shooting only portraits using Aperture Priority at f/2.8. In addition, try a landscape session at golden hour with a tripod and a low ISO. Repetition and specific goals will accelerate learning.
💡 Tips & Tricks: Beginner Camera Guide
Below are concise, high-impact techniques that help beginners improve quickly. These tips combine camera basics with practical habits that become second nature with short, routine practice.
1. Shoot RAW to Maintain Flexibility
RAW files contain more tonal range and color information than JPEG. Therefore, shooting RAW allows you to recover highlights and shadows in post-processing. Use fast cards and offload regularly to avoid storage bottlenecks.
2. Use the Histogram, Not Just the LCD
The camera LCD can mislead you about exposure. Instead, check the histogram to assess highlight and shadow clipping. Slight right-side bias may be acceptable for high-key images, but avoid hard clipping unless intentional.
3. Back-button Focus for Greater Control
Assign autofocus to a rear button to separate focus action from shutter release. This method lets you lock focus and recompose without the camera refocusing. It is particularly effective for portraits and sports.
4. Learn to Read Light — Direction, Quality, and Color
Analyze light direction: front light flattens features, side light sculpts form, and backlight creates rim light or silhouettes. Use reflectors and diffusers to control quality and direction.
5. Use Exposure Bracketing for High-Contrast Scenes
Bracket exposures (e.g., ±1 EV steps) to capture highlight and shadow detail. You can merge brackets into HDR or select the best exposure during editing. Bracketing increases your margin for error in challenging light.
6. Understand Crop Factor and Field of View
Crop sensors (APS-C, Micro Four Thirds) change field of view. For example, a 50mm on APS-C behaves like 75mm on full frame. Therefore, learn how your sensor affects framing and lens choice.
7. Use Image Stabilization Carefully
Image stabilization helps handheld low-light shots by 3–4 stops. However, disable stabilization on a tripod to avoid micro-movement blur. Test and note stabilization behavior with your gear.
8. Keep a Shooting Routine: Quick Camera Setup Checklist
Checklist: battery charged, memory card formatted, lens clean, camera mode set, exposure compensation zeroed, focus mode selected, white balance set or RAW chosen. Routines prevent missed shots.
Practice now: pick one tip from above and use it for a full shoot. Repeat weekly to make the improvement permanent.
9. Clean Your Gear Regularly
Use a blower, microfiber cloth, and appropriate sensor-cleaning methods. If you are unsure, send the camera to a technician. Clean gear produces cleaner images and reduces post-processing time.
10. Learn One Skill at a Time
Focus on one element per week — aperture one week, shutter speed the next — and practice deliberately. Incremental learning is the fastest path to mastery for camera settings for beginners.
📸 Sample Scenario
This sample scenario demonstrates planning, execution, and editing. It ties together the Beginner Camera Guide steps into a real portrait session example.
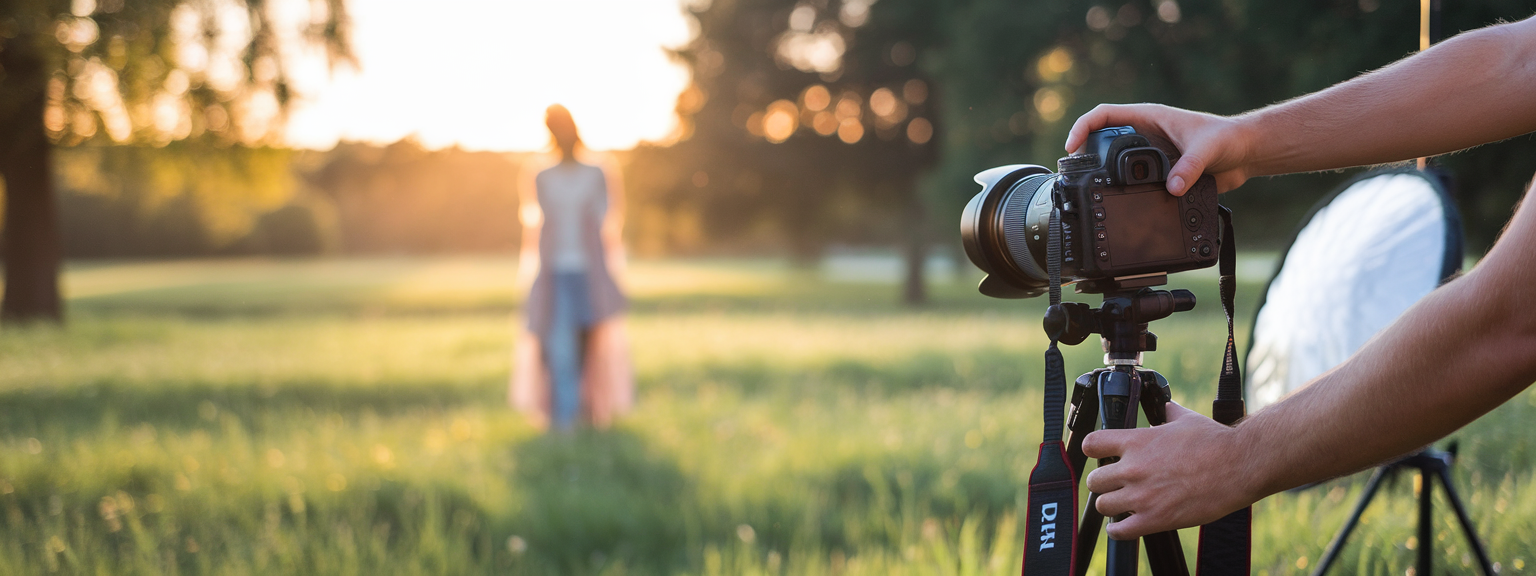
Scenario: Outdoor Couple Portrait at Golden Hour
Pre-shoot planning: Scout a location with mixed light and an open meadow. Gear: camera body, 50mm f/1.8, 24–70mm zoom, spare batteries, memory cards, reflector, and diffuser. Communicate with clients about outfits and mood. Plan 45 minutes.
On-location settings and strategy
- Mode: Aperture Priority, start at f/2.8
- ISO: 100–200, increasing as light fades
- AF: Single AF on the eye; consider back-button focus
- Metering: Evaluative with +0.3 EV for backlit skin
- Sequence: wide establishing shots, medium waist-up, and tight headshots
Post-processing workflow
Import RAW files into Lightroom. First, cull images and then apply basic exposure and white balance corrections. Next, refine contrast, clarity, and color. Perform minor skin retouching and export web-optimized JPEGs and high-res TIFFs for print.
✅ Key Do’s for Effective Usage
Follow these consistent behaviors to get better results with your camera every time you shoot. They summarize camera basics and camera settings for beginners into repeatable habits.
- Do learn the exposure triangle and practice it often.
- Do shoot RAW for maximum editing flexibility.
- Do use proper focus modes and choose AF points deliberately.
- Do stabilize your camera with a tripod for low-light work.
- Do experiment with natural light, reflectors, and off-camera flash.
- Do back up files immediately using multiple methods.
- Do review images critically and seek feedback from peers.
❌ Common Mistakes to Avoid
Avoid these frequent errors that slow learning. Each mistake is paired with a corrective step you can implement immediately.
- Relying solely on Auto mode — instead, use Aperture Priority and learn manual adjustments.
- Using unnecessarily high ISO — lower ISO and use a tripod or faster lens when possible.
- Underexposing and over-correcting shadows in post — expose to preserve midtones.
- Ignoring backgrounds — move or change angle to remove distractions.
- Using the widest aperture for everything — stop down when more depth of field is required.
- Handholding at shutter speeds too low — apply the reciprocal rule or stabilize.
- Not checking focus at 100% — verify sharpness before leaving a shoot.
🔄 Troubleshooting & FAQs
This section lists common problems and fixes, followed by voice-search-friendly FAQs to assist learners who ask concise questions while practicing.
Quick Fixes
- Blurry photos: Check focus mode and AF points. Use a faster shutter speed and stabilize the camera. Clean lens elements and test another lens.
- Images too dark or bright: Use exposure compensation, change metering to spot if needed, and shoot RAW to recover details.
- Noisy photos: Reduce ISO, use a tripod, apply noise reduction selectively in post.
- Autofocus hunting: Switch to a central AF point with contrast, ensure adequate light, and update firmware.
- Memory card errors: Format in-camera and replace cards that show errors.
FAQs (voice-search optimized)
Q: What are the best camera settings for beginners? — A: Start with Aperture Priority (A/Av), set ISO 100–400 outdoors, and use a single-point AF. Use RAW+JPEG if you plan to edit.
Q: What does exposure triangle mean — aperture shutter speed ISO? — A: It describes how those three elements control exposure. Change one and you usually must adjust another to maintain correct exposure.
Q: How do I choose the right lens for portraits vs landscapes? — A: Portraits favor medium telephotos (50–135mm equivalent). Landscapes typically use wide-angle lenses (10–35mm equivalent) and benefit from smaller apertures for depth.
Q: What is the best autofocus mode for moving subjects? — A: Continuous AF (AF-C / AI Servo) combined with a dynamic AF area.
Q: Should I shoot in RAW or JPEG? — A: RAW offers greater editing latitude and better retention of highlights and shadows. JPEG is convenient but less flexible.
Q: How can I reduce camera shake and blurry images? — A: Use a tripod, enable stabilization, maintain shutter speed at or above the reciprocal of the focal length, and use a remote shutter release when possible.
Q: What are the best AI tools for productivity for photographers? — A: Adobe Lightroom (Sensei) for automated tagging and edits, Topaz Labs (DeNoise AI, Sharpen AI) to improve image quality, and Luminar AI for creative editing. In addition, organizational tools like Notion and Todoist help manage projects.
🖼️ Bringing It All Together
This structured plan consolidates the Beginner Camera Guide into a 12-week practice path. Follow the schedule, apply the ten steps, and measure progress by reviewing your portfolio periodically.
12-Week Practice Plan
- Weeks 1–2: Camera Familiarity — menus, buttons, 100 photos exploring apertures.
- Weeks 3–4: Exposure Triangle — focused exercises on shutter and aperture.
- Weeks 5–6: Composition — daily composition challenges and a mini-series.
- Weeks 7–8: Light and Portraits — golden hour practice and reflector use.
- Weeks 9–10: Specialized Genres — test landscape, macro, and action.
- Weeks 11–12: Post-processing and Portfolio — build a 15–20 image portfolio.
Ready to take the next step? Download the printable Beginner Camera Guide checklist and start your first focused practice session today.
Final paragraph: Use this Beginner Camera Guide repeatedly. Repeat focused practice, analyze your results, and seek critique. In addition, consider renting lenses to test focal lengths, joining a critique group, and scheduling quarterly gear maintenance. As you work through the ten steps, your confidence with camera basics, how to use a camera, and camera settings for beginners will increase steadily.
![[Person writing goals in a notebook to level up your skills]](https://lenslesson.com/wp-content/uploads/2026/01/level-up-your-skills-planning.png "[Level Up Your Skills Notebook]")


![[Photographer editing on a laptop to create Stunning Images with vivid lighting and precise composition]](https://lenslesson.com/wp-content/uploads/2026/01/create-stunning-images-advanced-techniques.png "[Stunning Images Editing Example]")
![[Creative entrepreneur brainstorming products on a laptop and notebook — turning passion into profit]](https://lenslesson.com/wp-content/uploads/2025/12/turning-passion-into-profit-guide-1.png "[Turning Passion Into Profit Strategy]")
![[Photographer capturing sunrise over coastal cliffs with camera — travel photography tips in practice]](https://lenslesson.com/wp-content/uploads/2025/12/travel-photography-tips-sunrise-cliffs-camera.png "[Travel Photography Tips Sunrise Shot]")