Master Freelensing: Transform Your Travel Shots into Dreamlike Works of Art

📝 Step-by-Step Guide: Master Freelensing Techniques
Understanding the Concept of Freelensing
Master Freelensing is an innovative approach to photography that involves detaching your lens slightly from your camera body while capturing images. This artistic photography method generates light leaks and dreamlike images that truly differentiate your photos from standard travel photography tips. In essence, the freelensing technique allows you to capture stunning bokeh effects alongside unpredictable flares, making each shot unique and creatively mesmerizing. Therefore, understanding the basics of how light interacts with manual camera settings is essential.
Gathering the Right Equipment
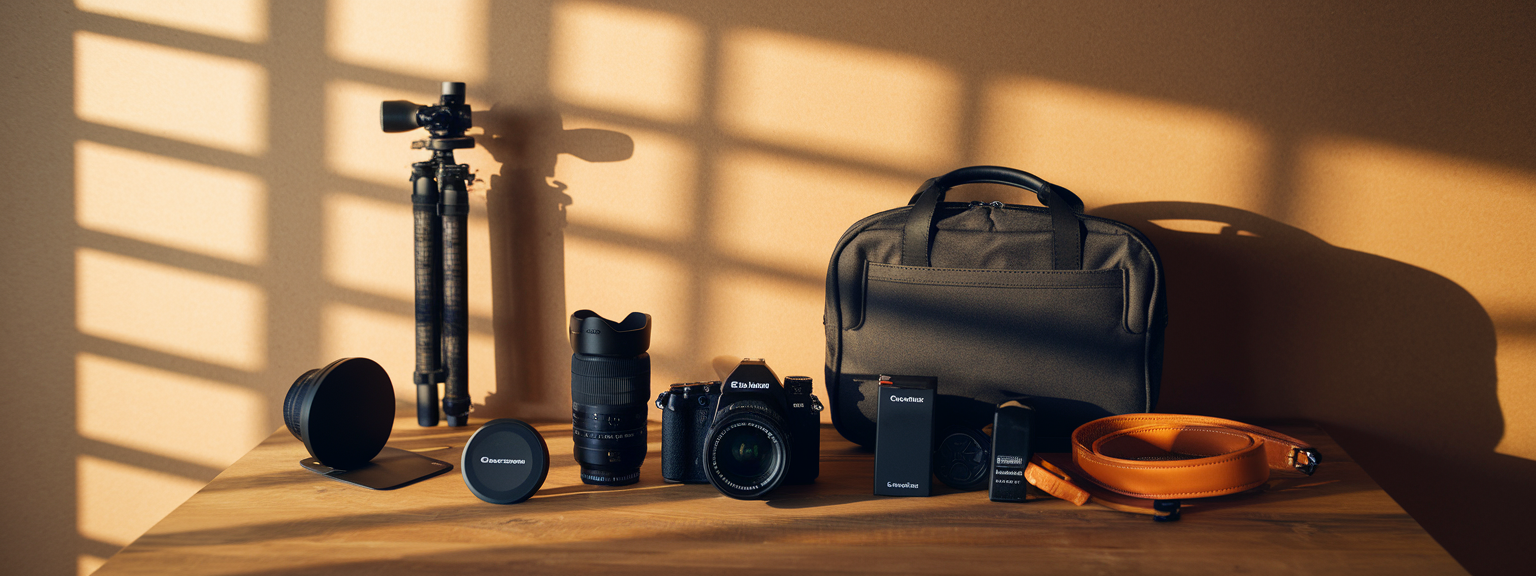
Before you dive into Master Freelensing, you must select the right gear. Although many modern cameras allow for manual control, using cameras with detachable lenses provides extra flexibility. Look for brands that offer interchangeable lenses and provide manual focus options. Additionally, having a lens with a fast aperture is crucial as it enhances bokeh effects and creates beautiful light leaks. In travel photography, lightweight equipment is key, ensuring you can explore diverse locations without compromise.
Setting Up Your Camera
Master Freelensing requires a deep understanding of manual camera settings. Set your camera to manual mode to have complete control over shutter speed, aperture, and ISO. Experiment with varying exposures, since even slight movements of your lens can influence the overall texture of the image. It is important to note that the art of freelensing means accepting unpredictability—light leaks and soft focus are part of the creative allure.
Practicing the Lens Displacement
Understanding how to naturally detach your lens is critical for Master Freelensing. Begin by securely removing the lens from your camera while ensuring the sensor is protected from dust. Then, hold the lens close but not attached to the camera, allowing it to capture stray light. Through trial and error, you’ll learn how slight adjustments can introduce a soft blur or significant bokeh effects. Experience is your best teacher as artistic photography evolves with every experiment.
Experimenting with Light Leaks and Bokeh Effects
Light leaks and bokeh effects are mainstays of the Master Freelensing approach. To achieve dreamlike images, experiment with different sources of light. For instance, try positioning yourself near a window during the golden hour or incorporate artificial lights in a low-light environment. As you explore these scenarios, you will become adept at controlling the exposure and angle to best employ freelensing technique. Therefore, always remain open to evolving your creative process.
📌 Practical Applications: Master Freelensing in Travel Photography
Integrating Freelensing with Travel Photography Tips
While many travel photographers rely on conventional methods, Master Freelensing offers an artistic twist that brings a fresh perspective. When exploring new cultures and landscapes, you can capture vibrant scenes enriched with light leaks and creative flare effects using manual camera settings. For example, urban landscapes at night and bustling markets during the day can be transformed into captivating works of art when you apply freelensing technique. Not only does it yield dramatic bokeh effects, but it also underscores the uniqueness of each location.
Creating a Sense of Movement and Atmosphere
Travel photography is not just about capturing static scenes but also about encapsulating the essence of a location. Master Freelensing infuses your images with motion and emotion through creative blurring and spotlighting of central subjects against a soft, dreamy background. In addition, this technique can simulate the feeling of motion, effectively capturing the hustle and bustle of city life or the tranquility of a remote countryside. Therefore, consider using freelensing in combination with longer shutter speeds or panning shots to maximize the poetic effects.
Overcoming Environmental Challenges
Environmental challenges such as unpredictable weather or changing light conditions can actually benefit your Master Freelensing practice. Instead of avoiding these factors, embrace them as they provide natural opportunities for generating spontaneous light leaks and dynamic bokeh. For example, cloudy skies can reduce harsh shadows, while a sudden burst of sunlight creates dramatic lens flares. With Master Freelensing, every scenario is an opportunity to create stunning, dreamlike images.
💡 Tips & Tricks: Master Freelensing for Enhanced Photography
Adjust Your Distance from the Lens
One of the simplest yet most effective tips in mastering freelensing is adjusting the distance between the lens and the camera sensor. This control helps in fine-tuning the intensity of bokeh effects. Experiment with different gaps; even a small adjustment can make a significant difference. As a result, you can tailor your shot to better capture the mood of your surroundings. Always keep safety in mind to avoid exposing your sensor to dust.
Practice with Different Light Sources
Since light plays an essential role in the Master Freelensing technique, practice with natural and artificial light sources. By doing so, you can reveal unexpected artistic photography opportunities. For example, during sunset, warm light can infuse your images with soft glows and appealing hues. Conversely, using streetlights or neon signs at night adds an edgy, modern appeal. Incorporate travel photography tips that focus on light management to create alluring, dreamy images.
Maintain a Steady Hand and Be Ready to Experiment
While cautious handling of your equipment is important, don’t be afraid to experiment. Master Freelensing is all about creative risk-taking. It might feel challenging at first, but with regular practice, you’ll develop an instinct for how much movement you can allow before the shot becomes too distorted. As a result, try numerous angles and distances, and learn from each attempt. Remember that every experiment contributes to your overall growth as a photographer.
Utilize Manual Camera Settings
Leveraging manual camera settings is integral to achieving the best results when practicing Master Freelensing. Adjust your ISO, shutter speed, and aperture to complement the freelensing technique. Experimenting with these parameters can radically alter the appearance of your shots, letting you control when to emphasize dreamy bokeh or capture more pronounced light leaks. Often, a lower ISO combined with a wider aperture will yield the most dramatic results. Therefore, understanding the interplay of these settings is essential.
📸 Sample Scenario
A Day in a Bustling City
Imagine you are exploring a vibrant, urban environment where every corner holds potential for a unique photographic moment. With Master Freelensing, you decide to capture the lively energy of a bustling city street at dusk. You begin by setting your camera to manual mode, ensuring that you have full control over your exposure settings. Then, you remove your lens slightly, adjusting the distance to let in just the right amount of stray light, which creates soft bokeh effects and dreamy light leaks in the background.
Step-by-Step Execution
- Begin with a well-lit subject, such as a neon sign or a moving crowd.
- Activate manual mode on your camera and adjust the shutter speed to capture motion.
- Slightly detach your lens and experiment with its angle to create natural flares and bokeh.
- Focus on part of the scene to create a blend of sharp and soft elements.
- Review the images and tweak your camera settings accordingly to achieve the perfect balance of light leaks and clarity.
In this scenario, you are effectively applying travel photography tips to capture the urban drama in a manner that only Master Freelensing can offer. The use of manual camera settings and the willingness to experiment with unconventional techniques foster an artistic outcome that stands out.
✅ Key Do’s for Effective Usage
Do Experiment with Angles
When using Master Freelensing, always experiment with various angles. Trying different perspectives can reveal unforeseen bokeh effects and enhance the overall composition of your photographs. Flexibility is vital; therefore, adjust your lens position and observe the resulting patterns of light leaks and soft focus areas as you move.
Do Use Natural and Ambient Lighting
Natural lighting is a photographer’s best ally, especially when applying the Master Freelensing technique. Always aim for times of the day when the sunlight is soft and diffused, such as during sunrise or sunset. In addition, consider capturing indoor scenes where ambient light reveals delicate light leaks that add a surreal quality to your images.
Do Invest Time in Practice
Master Freelensing requires patience and persistence. To perfect the freelensing technique, allocate time to practice in varied conditions. As you practice, maintain a written journal of your camera settings and the corresponding results. This record will serve as a valuable reference for making adjustments and refining your artistic photography style.
❌ Common Mistakes to Avoid
Over-detaching the Lens
One common pitfall when experimenting with Master Freelensing is detaching the lens too far from the sensor. Over-detaching leads to extreme soft focus and can obscure your subject entirely. Therefore, it is crucial to find balance—maintain enough connection to ensure that the subject remains identifiable while still enjoying the artistic effects.
Neglecting Camera Security
Leaving the sensor exposed or mishandling your camera while practicing Master Freelensing can result in dust accumulation and even damage. Always ensure that you perform freelensing in a controlled environment first, and always protect your sensor by keeping it covered when not in use.
Ignoring Manual Settings
Opting for automatic settings during creative experimentation can limit your ability to control bokeh effects and light leaks. While automatic modes are tempting, Master Freelensing is best achieved through meticulous manual adjustments. Therefore, neglecting these settings may diminish the creative potential of your images.
🔄 Troubleshooting & FAQs
How Do I Begin with Master Freelensing?
Getting started with Master Freelensing begins with understanding your equipment and practicing in controlled conditions. Use manual camera settings to control exposure, and experiment slowly with lens displacement. Over time, you will develop an intuition for capturing dreamlike images that balance sharp focus with creative light leaks.
What Camera Settings Are Ideal?
Typically, a low ISO (around 100-200) combined with a wide aperture (f/1.8 to f/2.8) works best for Master Freelensing. Additionally, experiment with slower shutter speeds to capture more ambient light. Always adjust as needed, depending on the current lighting conditions during your travel photography session.
How Can I Prevent Excessive Softness?
To avoid over-softened images, gradually adjust the lens displacement. Use small incremental shifts, and review the results after each shot. This approach minimizes drastic errors and helps maintain a recognizable subject. Also, ensure that the conditions are not too turbulent, as that could inadvertently introduce too much blur.
Can I Use a Smartphone for Freelensing?
While Master Freelensing is primarily performed with DSLR or mirrorless cameras, some smartphones allow for creative apps and manual adjustments that mimic the freelensing effect. However, the versatility and control provided by a dedicated camera often yield superior artistic photography results with more pronounced bokeh effects and light leaks.
What Are the Best Travel Photography Tips for Freelensing?
Successful travel photography using Master Freelensing is achieved by combining thorough planning with creative spontaneity. Always study your surroundings for perfect lighting opportunities, use natural and ambient light to your advantage, and prepare for varying conditions. In addition, keep your equipment ready and be patient as you experiment with freelensing techniques.
🖼️ Bringing It All Together
Integrating All Techniques for Stunning Results
Master Freelensing is not just a trend—it is a profound approach that blends technical expertise with fearless creative experimentation. By using freelensing technique alongside trusted travel photography tips, you can transform ordinary scenes into extraordinary works of art. Every step, from adjusting the lens to fine-tuning manual settings, contributes to an overall sense of wonder and artistic achievement. With each shot, you are not merely capturing an image; you are evoking emotions and telling a visual story.
Combining Equipment, Technique, and Creativity
To successfully master freelensing, make sure you combine the right equipment, proper use of manual camera settings, and an openness to creative experimentation. Use the tips provided in this guide, and remember that the journey to great artistic photography is iterative. Embrace mistakes, learn from them, and gradually refine your ability to produce captivating bokeh effects and ethereal light leaks in every shot.
Now that you have a comprehensive understanding of freelensing techniques, it is time to put theory into practice. With each creative experiment, remember that the key to Master Freelensing lies in patience, experimentation, and the willingness to break away from conventional norms. As you develop your own style, your travel shots will truly come alive, offering breathtaking artistic photography that conveys a story beyond words.
Embrace the journey, invest time in learning, and let each image you capture be a testament to your growing skill and creativity. The world is full of ideal scenes waiting for a Master Freelensing touch—so grab your camera, explore new perspectives, and create those dreamlike images that stand out.
In conclusion, the Master Freelensing guide here bridges technical mastery with imaginative artistry. By integrating freelensing techniques with travel photography tips, from adjusting camera settings to embracing unpredictable light leaks, photographers can create captivating images that resonate with emotion and narrative depth. This method not only revitalizes your portfolio but also encourages you to explore new dimensions in creative photography.

![[Stunning Images Editing Workflow] [Photographer editing a vibrant landscape on a monitor, demonstrating techniques for stunning images]](https://lenslesson.com/wp-content/uploads/2025/12/advanced-stunning-images-editing-workflow.png)
![[sports-photography-action-shot] [Photographer using a telephoto lens to capture a fast break at a basketball game — Sports Photography]](https://lenslesson.com/wp-content/uploads/2025/12/sports-photography-action-shot-telephoto-basketball.png)
![[Travel photography sunrise capture] [Photographer capturing sunrise landscape during a travel photography trip with a mirrorless camera]](https://lenslesson.com/wp-content/uploads/2025/12/travel-photography-sunrise-shot-essentials.png)
![[Photo Tips Sharper Shots] [Close-up of a photographer adjusting camera settings - Photo Tips for sharper shots]](https://lenslesson.com/wp-content/uploads/2025/12/photo-tips-better-photos-smartphone-composition.png)
![[Urban Street Photography Moment] [Photographer capturing a candid moment on a busy city sidewalk — street photography scene]](https://lenslesson.com/wp-content/uploads/2025/12/street-photography-candid-urban-moment.png)


