
Advanced Techniques to Create Stunning Images: Lighting, Composition & Editing — Stunning Images
📝 Step-by-Step Guide: Stunning Images Workflow
Introduction — Why this workflow creates stunning images
Creating stunning images starts with clear intent and a repeatable workflow. In this guide you will learn how advanced photography techniques, lighting setups, composition techniques, and image editing tips combine into a single, practical process. The steps below cover pre-shoot planning, lighting, composition rules, camera settings, and post-processing so you can reliably produce stunning images for print, web, or marketing.
Step 1 — Concept, mood board, and planning
Define the mood, story, and final use of each image. Use a mood board with 10–20 references. Note color palettes and the lighting setups you will replicate. For commercial work, add client deliverable sizes and color profile requirements. Planning reduces surprises and helps create consistent, stunning images.
- Create shot lists and time blocks for each setup.
- Scout locations and check sun position with PhotoPills or Sun Surveyor.
- Prepare backup gear and memory card rotation to avoid downtime.
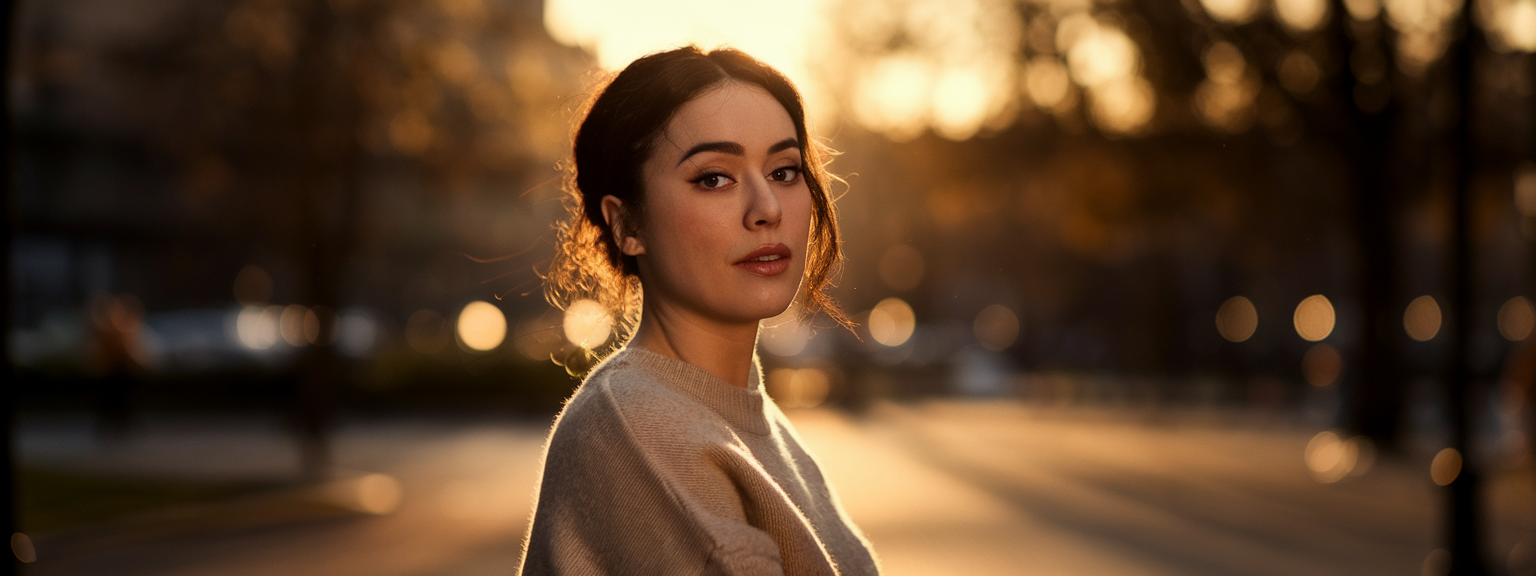
Step 2 — Lighting setups that deliver the look
Lighting defines mood and texture. Use modifiers to shape light. For portraits, softboxes or beauty dishes create pleasing skin tones. For product photography, diffused tents and controlled specular highlights are key. In addition, gels and rim lights separate subjects from backgrounds and add cinematic color grading potential.
- Natural window light: subject at 45° to the window; reflector opposite for fill.
- Two-light cinematic: soft key + low fill + colored rim for separation.
- Product tabletop: three lights (two side softboxes + overhead) or light tent for reflective surfaces.
Step 3 — Composition techniques and camera settings
Apply composition rules intentionally. Use rule of thirds, leading lines, and foreground layering to guide the eye. For portraits, keep eyes near the upper third and use flattering focal lengths (50–135mm). For landscapes, plan hyperfocal distance or focus stacking for maximum sharpness. These composition techniques produce stronger, more engaging images.
- Aperture: f/1.4–f/4 for portraits, f/8–f/16 for landscapes.
- Shutter speed: follow reciprocal rule for handheld or use faster speeds for action.
- Always shoot RAW for maximum post-processing latitude.
Step 4 — Shoot with intent and capture variations
Start by nailing core frames—pose and expression—then expand variations. Vary focal length, perspective, and lighting ratio. Tether when possible to review images on a calibrated monitor. Capture exposure brackets and safety frames for confidence. As a result, you will have the components needed to make consistent, stunning images in post.
Step 5 — Post-processing: from global to local
Adopt a structured post-processing workflow: import and cull, global adjustments, localized corrections, retouching, and final grade. Use color grading and retouching techniques to maintain texture and realism. Advanced editing tools like frequency separation and dodge & burn provide control without sacrificing skin texture.
📌 Practical Applications: Stunning Images in Photography, Marketing, and Print
Portraits — editorial and headshots
For portraits, combine short lighting or Rembrandt setups with rim light to separate the subject from backgrounds. Use 85mm or 50mm primes for flattering compression. In post, prioritize natural skin tones using HSL adjustments and subtle frequency separation. When preparing images for marketing, create variations sized and cropped for social, web, and print.
Product & e-commerce
E-commerce requires consistency. Use diffused tents, consistent camera angles, and focus stacking for full depth-of-field. Perform color matching and background removal in Photoshop. Output images to sRGB for web and prepare CMYK proofs for print catalogs when necessary. These precise steps help online stores present truly stunning images that sell.
Landscape & travel
Shoot golden hour and blue hour, and use graduated ND filters or exposure bracketing for wide dynamic range. For large prints, use panorama stitching and focus stacking. Apply color grading to enhance mood; however, avoid over-saturation. Proper composition rules and sharpness strategies yield stunning images suitable for gallery prints and editorial spreads.
Which type of shoot are you planning next, and which lighting or composition technique do you want to try first?
Use the same naming conventions and color profiles across a campaign to ensure consistent output. For marketing, create hero images with stronger contrast and alternative crops for social media. For print, soft-proof in the target color space before final export. These small technical steps help maintain brand integrity and deliver stunning images across channels.
💡 Tips & Tricks: Stunning Images Techniques
Technical tips for lighting and capture
Use grids, flags, and snoots to control spill. When mixing ambient and flash, dial flash power to sit one to two stops below ambient for cinematic contrast. For action, enable high-speed sync or use fast continuous lighting. Always check histograms and highlight warnings to avoid clipped data.
Editing and retouching tips
Start with global exposure and white balance. Then apply local masks and dodge & burn to sculpt form. Use frequency separation to smooth tones while preserving pores and hair texture. For color grading, craft a consistent LUT or preset and apply selective HSL refinements to faces and backgrounds. This creates cohesive, repeatable looks for stunning images.
Take one lighting setup from this guide and use it in three consecutive shoots. Compare the results and refine your modifiers and power ratios.
Workflow automation and tools
Automate repetitive tasks with batch presets and AI-assisted tools. ImagenAI or Lightroom presets speed consistent edits. Use Topaz Denoise and Sharpen to rescue high-ISO frames. However, always perform critical retouching manually for client deliverables to ensure quality control.
📸 Sample Scenario
Golden hour portrait with off-camera flash — objective
Objective: Create a warm, editorial portrait that uses golden-hour ambient light plus a cool rim flash for separation. The final deliverable will be a high-resolution file for web and a resized, sharpened variant for social.
Gear and camera settings
- Camera: Full-frame DSLR or mirrorless, 85mm f/1.8.
- Settings: Manual mode, ISO 100–200, f/2.2, 1/250s, white balance ~5600K.
- Lighting: Softbox key near camera left, small speedlight rim behind camera right with grid and 1/4 CTO gel.
Shooting and framing
Place the subject with the sun behind to create backlight. Use a reflector to lift shadows. Focus single-point on the near eye and shoot several exposures: base exposure, -1/2 EV, and +1/2 EV for safety. For cinematic framing, shoot both 3:2 and 16:9 crops.
Post-processing steps
Import RAW, select 4–6 finalists, perform global exposure and white balance adjustments, then move to local retouching. Use frequency separation for skin, dodge & burn for shape, and apply a subtle teal-orange grade in shadows/highlights. Export sRGB for web and prepare a softened TIFF for archival prints.
✅ Key Do’s for Effective Usage
Essential best practices
- Do plan and test lighting setups before client arrival.
- Do shoot RAW and keep a calibrated monitor for color-critical tasks.
- Do preserve texture during retouching; avoid over-smoothing.
- Do keep consistent naming, backups, and export profiles for multi-platform delivery.
❌ Common Mistakes to Avoid
Frequent pitfalls and fixes
- Over-retouching: reduces realism. Fix by lowering opacity of retouch layers and preserving high-frequency details.
- Blown highlights: lose detail. Fix with exposure bracketing or careful highlight recovery in RAW.
- Bad composition: unfocused image story. Fix by repositioning subject, using leading lines, or adding foreground context.
- Mixed color temperature: unflattering skin tones. Fix with local WB correction and color balance layers.
🔄 Troubleshooting & FAQs
Common voice-search friendly questions
- Q: Why are my highlights blown out even though the histogram looked fine?
A: The camera histogram is based on the JPEG preview. Use highlight clipping warnings or slightly underexpose and recover in RAW. Bracketing is a reliable safeguard. - Q: How do I keep skin looking natural when retouching?
A: Use frequency separation and subtle dodge & burn. Preserve texture on the high-frequency layer and limit smoothing on the low-frequency layer. - Q: What camera settings create creamy bokeh?
A: Wide aperture (f/1.2–f/2.8), longer focal length (85–135mm), and increased subject-to-background distance create smooth background separation. - Q: How do I fix color casts from mixed lighting?
A: Use local white balance adjustments, sample neutral areas, or use color correction layers in Photoshop with masks to isolate zones. - Q: What are the best AI tools for photo editing?
A: Adobe Sensei, Topaz Labs (Denoise AI, Sharpen AI), Skylum Luminar Neo, and ImagenAI accelerate edits but verify results manually for high-end retouching. - Q: How do I correct perspective in architecture photos?
A: Use a tilt-shift lens optically; or correct with Lightroom/Photoshop transform tools and perspective warp. Shoot level on a tripod to reduce correction needs.
Quick troubleshooting guide
- Problem: Banding after heavy grading — Solution: increase bit depth or reduce extreme curves.
- Problem: Harsh flash shadows — Solution: use larger modifiers and add fill.
- Problem: Noisy high-ISO images — Solution: ETTR (Expose To The Right), apply modern denoise software before sharpening.
🖼️ Bringing It All Together
Synthesis — a compact checklist to create stunning images
Follow these essential steps: plan and mood-board, select lighting setups, use strong composition techniques, capture RAW with considered camera settings, and apply a structured post-processing workflow from global to local corrections. Combine advanced photography techniques such as focus stacking, exposure blending, and targeted retouching to expand creative range and craft consistent, stunning images.
Want a printable checklist, lighting diagrams, and retouch action pack? Download the resource pack and test the sample scenario this week.
Begin by selecting one technique—rim light, focus stacking, or a specific color grade—and practice it across multiple shoots. Track your settings, modifiers, and post steps in a look recipe document so you can replicate the results. Over time, these small, deliberate practices build the skill and speed needed to produce professional, stunning images reliably.
Suggested alt text examples for SEO and accessibility: “Moody portrait using off-camera flash and rim lighting to produce stunning images with warm color grading”; “Macro jewelry focus-stacked shot with controlled lighting for stunning images”; “Golden hour landscape using exposure blending to produce stunning images with vivid color grading.”
Practice methodically, document your presets and LUTs, and review final exports on multiple devices. For feedback, share before-and-after pairs with colleagues or a mentor and iterate. By combining intent, technical control, and disciplined editing, you will increase both the frequency and quality of stunning images you produce.
![[Photographer framing a mountain sunrise to demonstrate travel photography tips]](https://lenslesson.com/wp-content/uploads/2025/11/travel-photography-tips-sunset-shot.png "[Travel Photography Tips Sunset Shot]")


![[Portrait photographer adjusting softbox to achieve flattering portrait photography of a smiling subject]](https://lenslesson.com/wp-content/uploads/2025/11/portrait-photography-softbox-lighting-setup.png "[Portrait Photography Lighting Setup]")
![[Flat lay of essential photography gear: camera, lenses, tripod, and camera bag]](https://lenslesson.com/wp-content/uploads/2025/11/photography-gear-essentials-flatlay.png "[Essential Photography Gear Flat Lay]")
