Landscape Photography: How to Capture Breathtaking Landscapes Every Time

📝 Step-by-Step Guide: Landscape Photography
Landscape photography demands an integration of planning, technique, and creative judgment. In the first 100 words of this guide you will see practical workflow steps to prepare for golden hour and to execute reliable image capture. This tutorial explains pre-shoot research, gear setup, composition strategies, exposure and focus workflows, long-exposure and ND filter use, wide-angle landscape photography best practices, panoramic stitching, and post-processing. The aim is to give you reliable landscape photo tips that produce consistent, high-quality results in the field and the studio.
Pre-shoot research and scouting
Begin with location research. Use PhotoPills, The Photographer’s Ephemeris, and Google Earth to map sun and moon angles, and to identify vantage points. Check local weather and tide tables; coastal scenes change with tides, while alpine locations vary widely by season. Scout the site when possible, and note safe access routes. Scouting reduces surprises, therefore you will spend more time composing at golden hour.
Gear checklist and on-location setup
- Camera body (full-frame preferred for low-light performance).
- Wide-angle lens (14–35mm), standard zoom (24–70mm), telephoto (70–200mm).
- Sturdy tripod and a ball or geared head; bring a bubble level.
- ND filters (3-, 6-, 10-stop), graduated ND filters, polarizer.
- Remote shutter release or intervalometer; spare batteries and cards.
- Lens cleaning kit, rain cover, phone with planning apps.
On-site, mount your camera on the tripod and level the head. Compose broadly, then refine. Set low ISO (100–200) for maximum dynamic range. Use mirror lock-up or electronic first curtain and a remote shutter to minimize vibration.
Composition fundamentals
Apply rule of thirds, prioritize foreground interest, and use leading lines to guide the eye. Layer foreground, midground, and background to create depth. For wide-angle landscape photography, avoid placing the horizon in a corner where distortion appears; instead, align key elements with thirds or use a centered horizon only for symmetrical scenes.
Exposure and focus strategy
Use manual mode for predictable exposure. Start at ISO 100, aperture f/8–f/11 for lens sweet spot, and choose shutter speed to balance the scene. When dynamic range exceeds sensor capability, bracket exposures (-2 to +2 EV) and merge in post. For depth of field, use hyperfocal focusing or focus stacking when foreground detail is critical. These landscape photo tips will help maintain sharpness from the nearest rock to the distant ridge.
Long exposure and ND filter techniques
Calculate ND exposure by determining base exposure without the filter and then adding stops. For example, a 10-stop ND converts 1/125s to roughly 8 seconds. Use remote shutter release and shield tripod from wind. For silky water, exposures of 1–30 seconds produce different looks; experiment. Also, combine ND with a polarizer cautiously to avoid vignetting on wide-angle lenses.
Panoramic stitching and high-resolution workflows
For panoramas, overlap frames by 30–40% and maintain consistent exposure and white balance. Rotate around the lens entrance pupil with a nodal slide to avoid parallax when close foreground elements exist. Stitch in Lightroom, Photoshop, or PTGui and crop to desired aspect ratio for print or web.
Post-processing workflow
Process RAW files first: correct white balance, apply lens profiles, and adjust exposure. Merge bracketed images with luminosity masks or HDR software, then perform local dodging and burning. Apply noise reduction selectively and sharpen according to output size. Export sRGB for the web and use Adobe RGB/ProPhoto for print workflows.
📌 Practical Applications: Landscape Photography
Landscape photography has broad practical applications across creative, commercial, and environmental fields. High-resolution landscapes support gallery prints, travel editorial imagery, stock photography, conservation photography, and real estate marketing. The same techniques—wide-angle framing, use of ND filter, and careful composition—apply in each use case, though output and color management differ for print versus web.
Fine art and gallery prints
For gallery work, prioritize resolution: stitch panoramas where necessary and retain RAW originals. Use subtle color grading and avoid overprocessing. Sell limited editions and include location notes and technical details to increase perceived value.
Travel and editorial use
Editorial clients want narrative images. Include contextual shots that show scale and human interaction when appropriate. Use landscape composition techniques to create images that work across spreads and covers.
Stock, conservation, and commercial work
For stock photography, keyword meticulously—include location, time of day, and style (golden hour, panoramic stitching). For conservation work, capture repeatable sequences (seasonal studies) and document changes over time. Real estate and commercial projects often require wide-angle landscape photography to frame property context and sell a lifestyle.
Have a location in mind? Tell us where you plan to shoot and we will build a tailored shot list that includes golden hour timing, tide windows, and recommended compositions.
Each application requires a slightly different output approach. For example, prints need greater pixel density and gentler contrast than web images, which benefit from stronger midtone contrast for screens. In addition, use consistent metadata and captions to improve discoverability and licensing potential.
💡 Tips & Tricks: Landscape Photography
These landscape photo tips and quick techniques are distilled from field experience. They help you improve composition, sharpen capture, and manage light. Apply them deliberately; small adjustments reliably elevate your results.
Use golden hour and blue hour effectively
Golden hour provides warm, angled light that sculpts terrain and emphasizes texture. Blue hour produces cool, saturated tones that complement reflections and long-exposure work. Therefore, plan to arrive early and stay late to maximize both periods.
Create strong foreground interest and leading lines
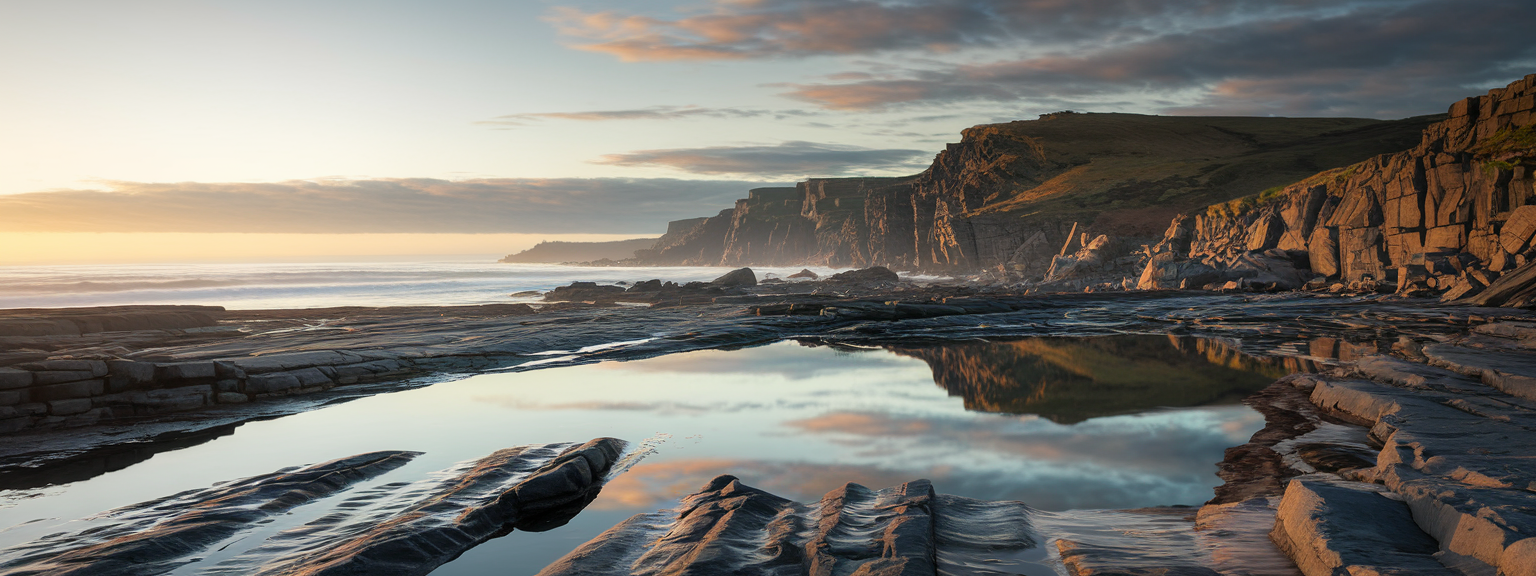
Foreground interest anchors images and conveys scale. Use rocks, logs, or wildflowers to lead the viewer into the frame. For example, place a rock in the lower third with a line of tidal pools that guides the eye to the horizon.
Master focus techniques
Combine hyperfocal focusing for quick work and focus stacking when maximum foreground detail is required. Use focus peaking on mirrorless bodies for precise manual focus, and bracket focus when close subjects introduce parallax risk in panoramas.
Polish with graduated and reverse grads
When the sky is brighter near the horizon, a reverse graduated ND filter reduces highlight clipping without darkening foregrounds. However, digital exposure blending often yields cleaner results when foreground complexity prevents a physical grad from aligning correctly.
Ready to practice? Tonight, scout a nearby scene, set your tripod low, and capture three bracketed frames with a strong foreground element — then review the results on a computer tomorrow.
Be deliberate with ND filters and long exposures
Long exposures add motion and mood, but they require stability. Use tripod weight hooks, secure leg positions, and remote triggers. For exposures over 30 seconds, consider stacking multiple shorter exposures to reduce noise.
📸 Sample Scenario
Coastal cliff sunrise — a full workflow
Scenario: You will shoot sunrise at a coastal cliff with tidal pools and jagged rocks. Your objective is a layered image with textured foreground, reflective pool, and a dramatic sky. Below is a practical workflow you can follow step by step.
Pre-shoot
- Check sunrise time and tide tables; aim for mid-low tide.
- Scout in daylight if possible to mark safe routes.
- Plan compositions using PhotoPills sun-path overlay.
Field execution
- Arrive 45–60 minutes early and set up tripod low for foreground texture.
- Compose with a triangular foreground rock leading to a tidal pool.
- Base settings: ISO 100, f/11, bracketed shutter speeds (e.g., 1/250 to 4s).
- Capture a long-exposure with a 10-stop ND for silky water, using an intervalometer.
- Take focus-stacked frames for extreme foreground detail.
Post-processing
Ingest RAW files, merge bracketed exposures with luminosity masks, blend focus-stacked layers for foreground sharpness, and apply targeted color grading to enhance golden hour warmth while retaining natural tones. Export high-resolution files for prints and sRGB for web.
✅ Key Do’s for Effective Usage
- Do plan and scout — timing and access determine success.
- Do use a tripod for any shutter slower than 1/125s with telephoto and for long exposures.
- Do expose to preserve highlights; lift shadows in RAW when needed.
- Do include foreground interest to add depth and scale.
- Do bracket exposures for high dynamic range scenes and consider exposure blending.
- Do keep gear clean — dust on the front element can ruin skies and long exposures.
- Do maintain accurate metadata and location notes for licensing or conservation uses.
❌ Common Mistakes to Avoid
- Shooting handheld for critical landscape compositions — results in softness.
- Using very small apertures (e.g., f/22) without considering diffraction; instead, identify your lens sweet spot (often f/8–f/11).
- Placing the horizon in the center for non-symmetrical scenes, which flattens depth.
- Over-relying on auto HDR or heavy dehaze, which can create unnatural results.
- Neglecting to bracket in challenging light, losing highlight or shadow detail.
- Over-cropping in post — compose carefully in camera for best quality.
🔄 Troubleshooting & FAQs
Field problems and quick fixes
Problem: Blurry images despite tripod use. Check tripod stability and leg configuration, lock mirror up or use electronic shutter, and protect the setup from wind. In addition, verify that autofocus isn’t hunting; use single-point AF or manual focus.
Problem: Blown highlights in the sky. Use exposure bracketing or a graduated ND filter. If the horizon is complex, bracket and blend exposures in post instead of forcing a physical grad.
Problem: Parallax in panoramas. Rotate around the lens’s entrance pupil with a nodal slide or increase frame overlap and stitch with advanced control points in software like PTGui.
Frequently asked, voice-search friendly questions
Q: What camera settings work best for landscape photography? A: Use low ISO (100–200), aperture f/8–f/11 for sharpness, and adjust shutter speed for correct exposure; bracket when dynamic range is high.
Q: When is the golden hour and why does it matter? A: Golden hour is the period shortly after sunrise and just before sunset when light is warm and directional. It enhances texture and depth, therefore plan your shoots around it.
Q: How do I use ND filters for smooth water? A: Meter base exposure from a tripod, then add ND stops. Use an intervalometer for long exposures, and stack exposures if necessary to reduce noise.
Q: Should I shoot RAW or JPEG for landscapes? A: Shoot RAW for maximum dynamic range and color flexibility; convert to JPEG only for final delivery or web use.
Q: What are the best lenses for landscape photography? A: Wide-angle lenses (14–35mm) for vistas, 24–70mm for versatility, and 70–200mm for compressed detail. Use the right lens for composition and perspective control.
Q: How do I protect gear in extreme weather? A: Use weather-sealed equipment where possible, rain covers, silica in bags, and wipe salt spray immediately. Keep spare batteries warm in cold conditions to preserve charge.
🖼️ Bringing It All Together
A consistent workflow—research, compose, capture, and process—delivers reliable landscape photography results. Use the checklist below to prepare for any shoot, and refine your approach by reviewing images critically after each session. The combination of strong landscape composition, mastery of exposure and focus techniques, and appropriate post-processing yields images that are both technically correct and emotionally compelling.
Ready to elevate your landscape photography? Download our printable field checklist and start planning your next shoot with confidence.
Final checklist: camera and backup lenses, tripod and head, ND and graduated ND filters, polarizer, remote shutter, spare batteries and cards, lens cleaning kit, weather protection, and a smartphone with planning apps. Arrive early, protect your gear, and be patient with the light. Consistency in preparation and execution produces the breathtaking landscape images you seek.

![[Stunning Images Lighting And Editing] [Studio portrait with dramatic lighting and color grading to demonstrate stunning images]](https://lenslesson.com/wp-content/uploads/2025/11/advanced-stunning-images-lighting-composition-editing.png)
![[Travel Photography Tips Sunset Shot] [Photographer framing a mountain sunrise to demonstrate travel photography tips]](https://lenslesson.com/wp-content/uploads/2025/11/travel-photography-tips-sunset-shot.png)


![[Portrait Photography Lighting Setup] [Portrait photographer adjusting softbox to achieve flattering portrait photography of a smiling subject]](https://lenslesson.com/wp-content/uploads/2025/11/portrait-photography-softbox-lighting-setup.png)
![[Essential Photography Gear Flat Lay] [Flat lay of essential photography gear: camera, lenses, tripod, and camera bag]](https://lenslesson.com/wp-content/uploads/2025/11/photography-gear-essentials-flatlay.png)
