
Camera Basics: Getting Started with Your Camera
camera basics are the foundation of confident photography. Whether you are learning how to use a camera for the first time or refining camera settings for beginners, this guide explains core concepts — including aperture, shutter speed, ISO and the exposure triangle — in clear, practical terms so you can take better photos today.
📝 Step-by-Step Guide: Camera Basics
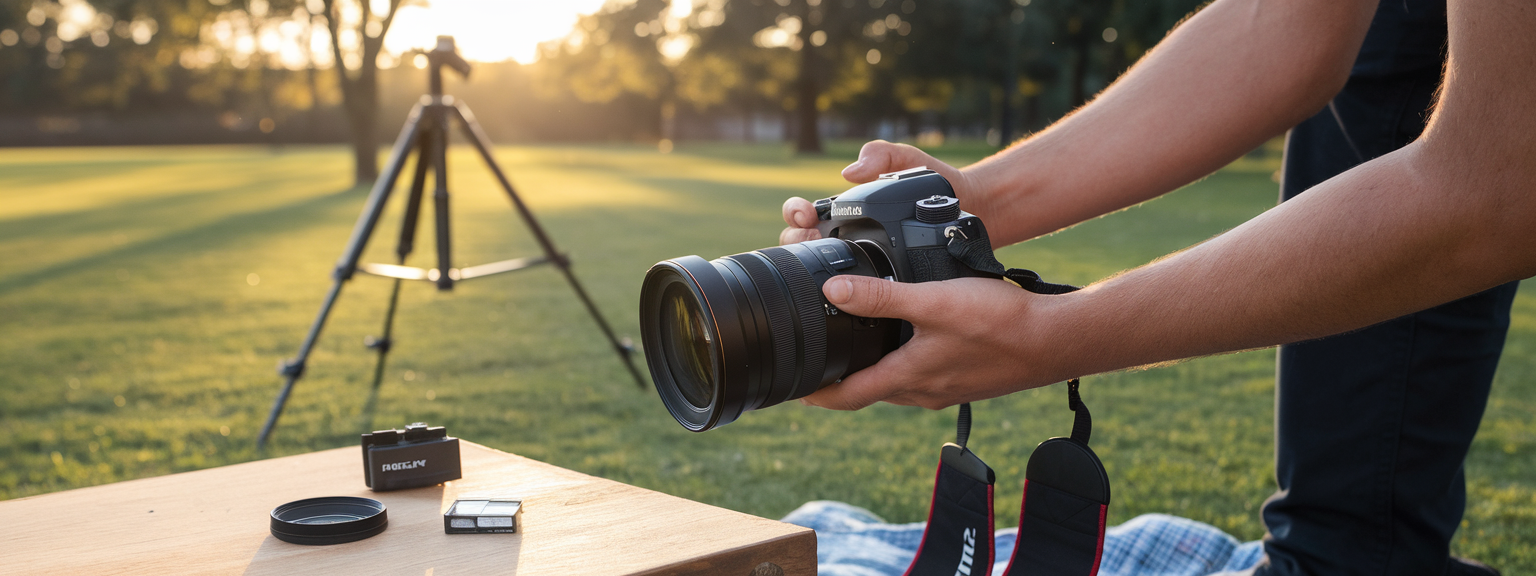
Unbox, Power Up, and Attach the Essentials
Begin by charging the battery fully and inserting a reliable memory card. For most modern cameras choose UHS-I or UHS-II cards and 64GB or larger capacity. Attach the kit or prime lens by aligning mount marks and rotating until it clicks. Keep the lens cap on and use the camera strap for safety while learning how to use a camera.
Familiarize Yourself with Controls and Menu
Power on the camera and set language, date, and time. Identify the mode dial (Auto, P, A/Av, S/Tv, M), shutter release, exposure compensation, ISO button, AF modes, drive modes, and playback. Explore the menu and set image quality to RAW+JPEG. As a result, you retain editing flexibility while learning camera basics.
Start in Semi-Automatic Modes
Use Aperture Priority (A/Av) to control depth of field. Use Shutter Priority (S/Tv) to control motion. Program mode (P) is useful while you become comfortable with exposure combinations. For example, in Aperture Priority at f/2.8 you will see a shallow depth of field, while at f/8 the background will return more detail.
Master the Exposure Triangle: Aperture, Shutter Speed, ISO
Understand how aperture, shutter speed, and ISO form the exposure triangle. Aperture (f-stop) controls depth of field and light. Shutter speed controls motion and blur. ISO adjusts sensor sensitivity; higher ISO increases noise. Therefore, learn how changes to one control require compensation with the others.
Practice Metering and Exposure Compensation
Cameras meter toward middle gray, so bright scenes (snow) often require +EV compensation, and dark scenes (night) may need negative or positive adjustments depending on intent. In semi-automatic modes use exposure compensation to nudge exposure without leaving the mode you are practicing.
Autofocus Modes and Focus Strategy
Choose AF-S/One-Shot for still subjects and AF-C/AI Servo for moving targets. Use single-point AF for precise placement, especially on the eye in portraits. In addition, consider back-button focus to separate focusing from the shutter for better control.
White Balance, RAW Workflow and Bracketing
Use Auto White Balance (AWB) for most conditions, but switch to presets when accurate color is critical. Shoot RAW for maximum flexibility; you can correct white balance in post. Enable bracketing for high-contrast scenes to create HDR merges or to ensure you capture a usable exposure.
Practical Manual Mode Workflow
When moving to Manual mode, select aperture first for desired depth of field, then set shutter speed to control motion and avoid camera shake, and finally raise ISO if required. For example, for portraits choose f/2.8, set shutter speed ≥1/200s, and adjust ISO to yield correct exposure while keeping noise acceptable.
📌 Practical Applications: Camera Basics
Portraits — Isolate the Subject
For outdoor portraits use fast primes such as a 50mm or 85mm and choose aperture f/1.8–f/2.8 to create pleasing background separation. Set shutter speed to 1/200–1/400s and ISO 100–200 in daylight. Indoors increase ISO to 400–1600 depending on light and lens speed. Focus on the nearest eye using single-point AF.
Landscape — Maximize Depth and Sharpness
For landscapes choose aperture f/8–f/11 to balance diffraction and depth of field. Use ISO 100 and a tripod when shutter speeds exceed the reciprocal rule. Consider hyperfocal focusing or focus stacking to keep foreground and background sharp.
Action & Sports — Freeze or Convey Motion
To freeze motion use shutter speeds of 1/500s–1/2000s, open aperture to f/2.8–f/5.6 as needed, and raise ISO to maintain exposure. For panning choose 1/60s–1/125s and move the camera smoothly with the subject to convey speed.
Low Light & Night — Reduce Noise and Preserve Detail
Use fast lenses (f/1.4–f/2.8) and consider a tripod for long exposures. If handheld, apply the reciprocal rule: shutter speed ≥ 1 / (focal length × crop factor). Raise ISO carefully and use noise reduction tools in post if needed.
Macro — Control Shallow Depth Carefully
Macro photography requires careful focus and often higher f-stops (f/5.6–f/16) for acceptable depth of field. Use a tripod, diffused lighting, and consider focus stacking for increased sharpness.
Street Photography — Speed and Discretion
Use 35mm or 50mm primes for flexibility. Set aperture to f/5.6–f/8 and shutter to 1/250–1/500s for quick captures. Practice zone focusing to pre-focus at a distance, and keep ISO in a range that balances noise with shutter speed needs.
Which of these practical scenarios would you like a tailored shot list for — portraits, landscapes, action, or night photography?
Use these camera basics and starting settings to form a baseline. Then adjust aperture, shutter speed, and ISO — the exposure triangle — depending on your creative goal. For example, when you want to emphasize motion you will reduce shutter speed; when you want isolation you will open aperture.
💡 Tips & Tricks: Camera Basics
Learn Two Controls First: Aperture and Shutter Speed
Master depth of field and motion before focusing on ISO. Aperture and shutter speed most directly affect the image’s look. Therefore, practice them in isolation to build instinct for how the exposure triangle behaves.
Carry a Consistent, Small Kit
Limit gear to one body and one or two lenses, for example a 24–70mm and a 50mm prime. A smaller kit reduces decision fatigue and forces creative solutions using camera basics.
Use the Histogram; Not Just the LCD Preview
LCD previews can deceive in bright light. Instead, consult the histogram to verify highlight and shadow distribution. Adjust exposure or bracket if highlights clip.
Practice with One Subject, Many Settings
Select a single subject and shoot it with multiple aperture, shutter, and ISO combinations. Then compare results to quickly internalize the effects of each change.
Customize Buttons and Use Back-Button Focus
Assign focus to a rear button so focusing and shooting are separate actions. This approach improves focus consistency, especially with continuous shooting or moving subjects.
Practice one targeted exercise today: shoot 30 frames varying only aperture to observe depth-of-field changes.
Use RAW and Learn a Basic Editing Workflow
RAW files provide latitude to recover highlights, adjust white balance, and reduce noise. Learn Lightroom or Camera Raw and add selective noise reduction tools when required.
Pre-Plan Shots with a Short List
For any shoot prepare a shot list: wide, medium, tight, detail, motion. This guarantees variety and helps you apply camera settings for beginners into practice.
📸 Sample Scenario
Evening Portrait Session — Full Walkthrough
Scenario: A 30-minute golden-hour portrait session in a park. Goal: three usable portraits — headshot, half-body, and environmental portrait. Arrive early and scout for open shade and backlight. Use an 85mm f/1.8 for headshots and a 35mm f/1.8 for environmental frames.
Baseline Settings and Workflow
Start environmental frames in Aperture Priority at f/4, ISO 100–200. For headshots switch to Manual to maintain consistent exposure as light shifts; try f/2.8, shutter 1/200s, ISO 100–400. Use single-point AF on the eye and evaluate the histogram frequently.
Adapting as Light Changes
As golden hour deepens widen aperture to f/1.8–f/2.0 and raise ISO incrementally to 800–1600 to retain shutter speed. If noise becomes intrusive add a reflector or gentle off-camera flash to keep ISO lower.
✅ Key Do’s for Effective Usage
- Do learn Aperture Priority and Shutter Priority before Manual.
- Do shoot RAW for post-processing flexibility.
- Do use single-point AF on the eye for portraits.
- Do bracket high-contrast scenes for HDR merges.
- Do check the histogram to verify exposure.
- Do use a tripod for long exposures and landscapes.
- Do clean sensors and lenses with proper tools.
- Do back up images immediately after a shoot.
- Do practice in varied lighting to build intuitive exposure control.
- Do customize camera controls for faster access to common settings.
❌ Common Mistakes to Avoid
Relying Only on Auto Mode
Problem: You miss creative control and learn slowly. Fix: Allocate time each shoot to practice semi-auto and Manual modes so you understand how camera settings for beginners evolve into instinct.
Shooting JPEG Only
Problem: Limited recovery in post. Fix: Shoot RAW or RAW+JPEG until you are comfortable with post-processing. RAW aids in adjusting white balance and recovering exposure.
Using ISO as a First Resort
Problem: Excessive noise. Fix: Use faster lenses, add light sources, or use a tripod before increasing ISO. As a result, you preserve image quality while mastering camera basics.
Ignoring Histogram and Clipped Highlights
Problem: Irrecoverable highlights. Fix: Learn to read the histogram and use exposure compensation or bracketing for safety.
🔄 Troubleshooting & FAQs
Photos Are Blurry — Why?
Possible causes include camera shake, incorrect focus, or subject motion. Use the reciprocal rule for handheld shooting. Switch to single-point AF and verify focus at 100% in playback. If using a very wide aperture (f/1.4) consider stopping down to f/2.8 to increase focus tolerance.
Images Too Dark or Too Bright
Check the exposure meter and histogram. Use exposure compensation in semi-auto modes. If highlights clip, reduce exposure or bracket exposures for HDR.
How Do I Reduce Noise in Low Light?
Use wider apertures and slower shutter speeds with a tripod. Increase ISO only as necessary and apply noise reduction in post using tools such as Topaz DeNoise or Lightroom’s Reduce Noise. Proper exposure minimizes noise when you brighten shadows in editing.
AF Hunting or Slow Autofocus Fixes
Ensure contacts are clean and firmware is up to date. Choose AF modes appropriate to motion and lighting. Use focus assist (AF illuminator or continuous AF) for low-contrast scenes.
FAQ — Voice-Search Friendly Questions
Q: What are the best camera settings for beginners? A: Start in Aperture Priority at f/5.6–f/8 for general-purpose, ISO 100–400 outdoors and 400–1600 indoors depending on light. Use single-point AF and shoot RAW.
Q: How do I use a camera to improve my portraits? A: Use 50–135mm focal lengths, wide aperture for background separation, focus on the nearest eye, and use natural or diffused light with reflectors or low-power flash for fill.
Q: What is the exposure triangle and why is it important? A: The exposure triangle — aperture, shutter speed, ISO — determines exposure and creative outcome. Aperture affects depth of field; shutter speed affects motion; ISO affects sensor sensitivity and noise.
Q: How do I choose a lens for beginners? A: Start with a versatile zoom such as 24–70mm (full-frame) or 18–55mm (APS-C), and add a 50mm prime for low-light and portrait practice. Choose lenses by subject and budget.
Q: What are the best AI tools for productivity? A: For general productivity use Notion, Trello or Asana, Zapier or Make for automation, and Slack with AI assistants. For photography-specific tasks use Adobe Sensei (in Lightroom/Photoshop), Luminar Neo, Topaz AI (Denoise, Sharpen, Gigapixel), and Photo Mechanic for fast culling. These AI tools accelerate repetitive tasks, but always verify automated edits to preserve your artistic intent.
🖼️ Bringing It All Together
Structured Practice and Progression
Create a plan: 0–1 month master handling and basic composition; 2–3 months practice themed projects and learn RAW processing; 4–12 months explore advanced techniques such as long exposure, flash, and focus stacking. Consistent practice with core camera basics anchors technical progress.
Ready to move from learning to creating? Try a 30-day practice plan focused on aperture, shutter, and ISO — and share your best shot for feedback.
In summary, camera basics are not merely technical rules; they are tools for storytelling. By internalizing the exposure triangle — aperture, shutter speed, and ISO — and practicing composition and focus strategies, you gain control over how images look and what they communicate. Keep a shooting journal, refine your workflow, and balance gear investments with skill development.
For targeted help, request a tailored 30-day practice plan based on the gear you own and the genres you prefer. I will provide daily mini-assignments and checkpoints to accelerate your learning.
![[Person at a desk planning a business with laptop and notes about turning passion into profit]](https://lenslesson.com/wp-content/uploads/2025/12/turning-passion-into-profit-guide.png "[Turning Passion Into Profit Plan]")
![[Beginner photographer adjusting camera settings while learning how to get started with camera]](https://lenslesson.com/wp-content/uploads/2025/12/getting-started-with-camera-beginner-setup.png "[Getting Started With Camera - Beginner Setup]")
![[Photographer editing a vibrant landscape on a monitor, demonstrating techniques for stunning images]](https://lenslesson.com/wp-content/uploads/2025/12/advanced-stunning-images-editing-workflow.png "[Stunning Images Editing Workflow]")
![[Photographer using a telephoto lens to capture a fast break at a basketball game — Sports Photography]](https://lenslesson.com/wp-content/uploads/2025/12/sports-photography-action-shot-telephoto-basketball.png "[sports-photography-action-shot]")
![[Photographer capturing sunrise landscape during a travel photography trip with a mirrorless camera]](https://lenslesson.com/wp-content/uploads/2025/12/travel-photography-sunrise-shot-essentials.png "[Travel photography sunrise capture]")
![[Close-up of a photographer adjusting camera settings - Photo Tips for sharper shots]](https://lenslesson.com/wp-content/uploads/2025/12/photo-tips-better-photos-smartphone-composition.png "[Photo Tips Sharper Shots]")
![[Photographer capturing a candid moment on a busy city sidewalk — street photography scene]](https://lenslesson.com/wp-content/uploads/2025/12/street-photography-candid-urban-moment.png "[Urban Street Photography Moment]")

