
Getting Started with Camera: A Beginner’s Guide to Better Photography
Photography is one of the most creative and rewarding skills you can develop. Whether you’ve just purchased your first camera or you want to sharpen your travel and portrait shots, this guide will help you with Getting Started with Camera effectively. We will explore the camera basics guide, essential beginner photography tips, step-by-step instructions on how to use a camera, and a deeper look into DSLR settings such as shutter speed, aperture, ISO, and manual mode. By the end, you’ll not only understand the technical foundation but also how to apply it to real-world photography scenarios.
📝 Step-by-Step Guide: Getting Started With Camera
Step 1: Know Your Camera
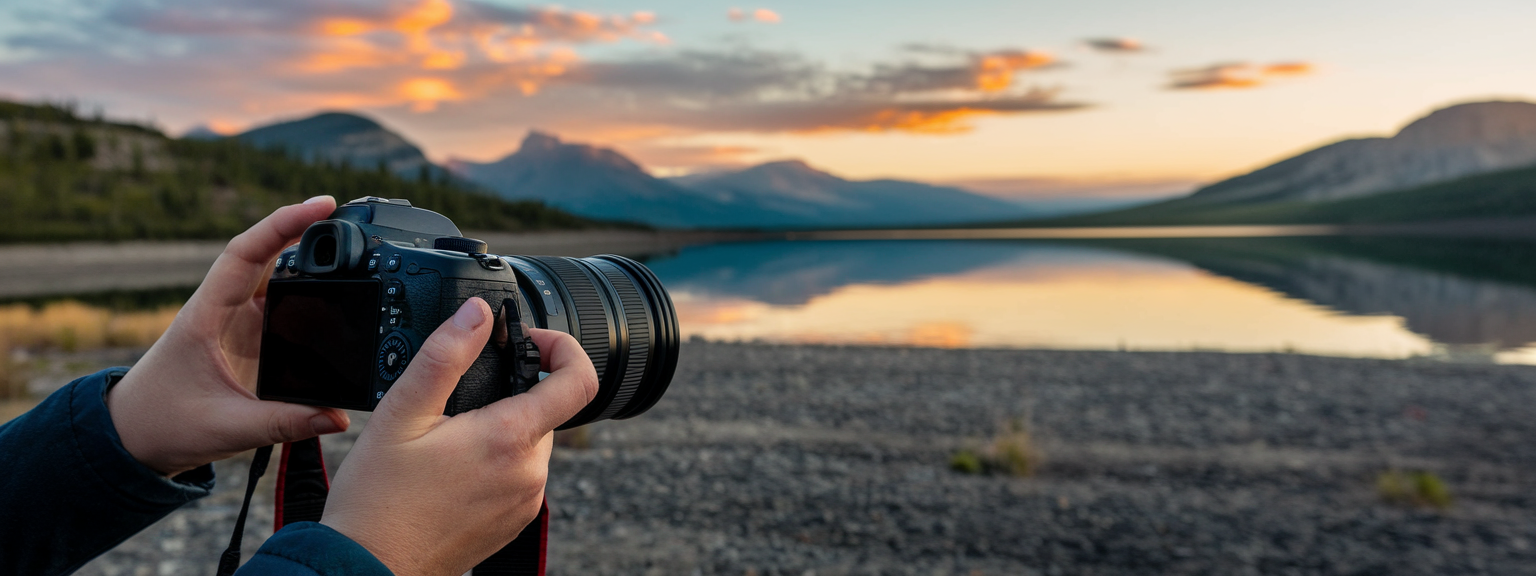
Every camera, whether DSLR, mirrorless, or compact, has essential components you need to understand:
- Shutter Button: Captures the photo.
- Mode Dial: Switches between Auto, Manual, Aperture Priority, and Shutter Priority.
- Lens: Controls the focal length and focus.
- Menu/Settings: Adjusts ISO, white balance, image format, and more.
Reading your camera’s manual is a crucial step. It gives you familiarity with features and prepares you for better control in the field.
Step 2: Understand the Exposure Triangle
The exposure triangle forms the cornerstone of photography. Mastering it allows you to adapt to any lighting situation.
- Shutter Speed: Determines how long light reaches the sensor. Fast speeds freeze action, slow speeds create motion blur.
- Aperture (f-stop): Controls light and depth of field. Lower numbers (f/2.8) blur backgrounds; higher numbers (f/16) keep everything sharp.
- ISO: Adjusts light sensitivity. Low ISO (100) is clean, high ISO (3200+) accommodates low light but adds noise.
Step 3: Transition from Auto to Manual
Begin in Auto mode to get comfortable. Then progress to creative modes:
- Aperture Priority (A/Av): Perfect for portraits and landscapes.
- Shutter Priority (S/Tv): Useful for sports and moving subjects.
- Manual (M): Grants full control over exposure when you’re ready.
Step 4: Learn Composition Techniques
- Rule of Thirds: Position subjects off-center for balance.
- Leading Lines: Guide the eye through natural paths.
- Framing: Use objects like windows or arches to frame your subject.
- Negative Space: Use empty backgrounds to emphasize subjects.
Step 5: Shoot, Review, Improve
Photography is iterative. Take photos, analyze settings, and adjust until you achieve consistent results.
📌 Practical Applications: Getting Started With Camera
1. Portraits
- Use aperture priority with a wide aperture (f/1.8–f/2.8).
- Focus sharply on the subject’s eyes.
- Leverage natural light near windows for softer tones.
2. Landscapes
- Set a small aperture (f/11–f/16) for maximum sharpness.
- Use a tripod and low ISO for clear images.
- Add foreground interest to create depth.
3. Action Photography
- Select shutter priority with fast speeds (1/1000s or faster).
- Use continuous autofocus to lock on moving subjects.
- Increase ISO where light is limited.
4. Low Light/Night Photography
- Shoot in manual mode.
- Use long shutter speeds of 10–30 seconds.
- Keep ISO low to reduce grain, but use a tripod for stability.
💡 Tips & Tricks: Getting Started With Camera
- Shoot in RAW for maximum editing flexibility.
- Prioritize natural light before using flash.
- Declutter backgrounds for stronger compositions.
- Stabilize your camera with proper hand placement or a tripod.
- Try different angles for creative perspectives.
- Learn post-processing—programs like Lightroom add professional polish.
📸 Sample Scenario
You are at the beach and want to capture the sunset. Switch to Aperture Priority mode and set your aperture to f/8 for sharpness. Keep the ISO at 100 for a noise-free image. Let the camera select the shutter speed automatically. Position the horizon along the top or bottom third for a balanced composition. Capture during golden hour for warm tones and soft light. The result—a dramatic, well-composed beach sunset that feels professional.
✅ Key Do’s for Effective Usage
- Do master manual controls.
- Do clean your lens frequently.
- Do practice almost every day.
- Do back up your images regularly.
- Do explore editing techniques.
❌ Common Mistakes to Avoid
- Don’t stay in Auto mode permanently.
- Don’t push ISO too high unless necessary.
- Don’t center every subject without purpose.
- Don’t overlook lighting—it defines your photos.
- Don’t forget spare batteries and cards.
🔄 Troubleshooting & FAQs
Q1: How do I decide between DSLR and Mirrorless?
Both are strong options. DSLRs offer larger lens selections and longer battery life. Mirrorless cameras are lighter and feature modern technology. Choose based on portability and ecosystem.
Q2: Why are my photos blurry?
Blurriness often results from slow shutter speeds or incorrect focus. Increase shutter speed, enable image stabilization, and ensure the correct focus point is selected.
Q3: Should beginners start in Auto mode?
Yes, Auto mode helps you get familiar. But transition to Aperture, Shutter Priority, and Manual modes to expand creative control.
Q4: How do I capture sharp night photos?
Use a tripod, set manual controls, and keep ISO low. Long exposures of 15–30 seconds are usually required for night skies.
Q5: What’s more important—gear or skill?
Skill always outweighs gear. A skilled photographer creates impressive images with even the most basic camera.
🖼️ Bringing It All Together
Getting Started with Camera may seem daunting, but once you understand the basics—exposure triangle, camera modes, and composition—you unlock the freedom to create. Through consistent practice, you develop an instinct for both the technical and creative aspects of photography.
Photography combines technical mastery with artistic creativity. By following this guide and making photography a daily practice, you will gradually transform snapshots into powerful images that tell stories and evoke emotions.
Visit our Photography Content Hub
Smart Resize by SmartLink Basics iPhone or iPad app
“`


![[Sunrise over a mountain valley with wildflowers in the foreground — landscape photography showing golden-hour light and wide-angle composition.]](https://lenslesson.com/wp-content/uploads/2025/12/landscape-photography-breathtaking-sunrise-scene.png "[Breathtaking Landscape Photography Sunrise]")
![[Person at desk using laptop and notebook to level up your skills]](https://lenslesson.com/wp-content/uploads/2025/12/level-up-your-skills-planning-workspace.png "[Level Up Your Skills Workspace]")
![[Person journaling at a sunlit desk capturing daily creative inspiration with a notebook and coffee.]](https://lenslesson.com/wp-content/uploads/2025/12/daily-creative-inspiration-journaling-ideas.png "[Daily Creative Inspiration Journaling]")
![[Photographer editing images on a monitor demonstrating post processing essentials workflow]](https://lenslesson.com/wp-content/uploads/2025/12/post-processing-essentials-overview.png "[Post Processing Essentials Demo]")