
Exploring the World of Macro Photography: A Complete Guide
Macro photography is one of the most captivating fields within the world of visual art. By magnifying details that are often invisible to the naked eye, photographers uncover hidden textures, structures, and shapes in nature and everyday objects. Whether you are exploring close-up photography of insects, creating artistic macro shots of jewelry, or experimenting with depth of field and the bokeh effect, this guide will provide the foundational knowledge and advanced photography tips you need.
📝 Step-by-Step Guide: Mastering Macro Photography
Step 1: Choose the Right Equipment
Selecting the right equipment is crucial in macro photography. While smartphones with macro attachments can capture impressive images, DSLRs and mirrorless cameras paired with dedicated macro lenses provide superior results. Look for lenses with 1:1 lens magnification for life-sized reproductions. A tripod ensures stability and a ring flash or diffused light helps manage close-range illumination.
Step 2: Understand Depth of Field
One of the most important considerations in macro photography is managing depth of field. At very close distances, depth of field becomes extremely shallow. Adjusting aperture values allows you to highlight specific details or maintain a balanced sharpness across your subject. Wide apertures produce a beautiful bokeh effect, while smaller apertures retain more overall clarity.
Step 3: Composition Techniques
Composition is central to impactful macro shots. Pay close attention to background elements, as clutter can overpower fine details. Consider applying the rule of thirds, exploring symmetry, or using negative space. By deliberately framing your subject, you elevate its visual impact.
Step 4: Focus Techniques
Autofocus is often unreliable in close-up photography due to thin focus planes. Manual focus provides improved control and accuracy. In advanced cases, focus stacking — capturing multiple frames at varying focus points and merging them in post-processing — ensures full subject sharpness.
Step 5: Post-Processing
Post-processing enhances detail, sharpness, and contrast. Cropping helps refine focus on subjects, while selective color adjustment can emphasize texture without appearing unnatural. However, avoid overediting as it can distort the realism of natural macro shots.
📌 Practical Applications: Creative Uses of Macro Photography
- Nature Photography: Documenting insects, plants, and natural textures with fine detail.
- Product Photography: Ideal for jewelry, watches, and cosmetics where detail focus is key.
- Food Photography: Revealing textures of ingredients, from sugar crystals to melting chocolate.
- Scientific Documentation: Recording biological or mineral details for analysis.
- Creative Abstracts: Everyday objects transformed into artistic compositions.
💡 Tips & Tricks: Enhancing Macro Photography Skills
Control Your Light
Use diffused natural light for even tones. Reflectors or softboxes help illuminate details without harsh shadows. Controlled light introduces clarity while retaining natural aesthetics.
Ensure Stability
Unsteady hands easily blur close-up photography. Use a tripod, remote shutter, or self-timer to achieve frame-to-frame consistency.
Experiment with Bokeh
Background blur isolates your subject beautifully. Wide apertures transform ordinary images into artistic bokeh effect displays.
📸 Sample Scenario
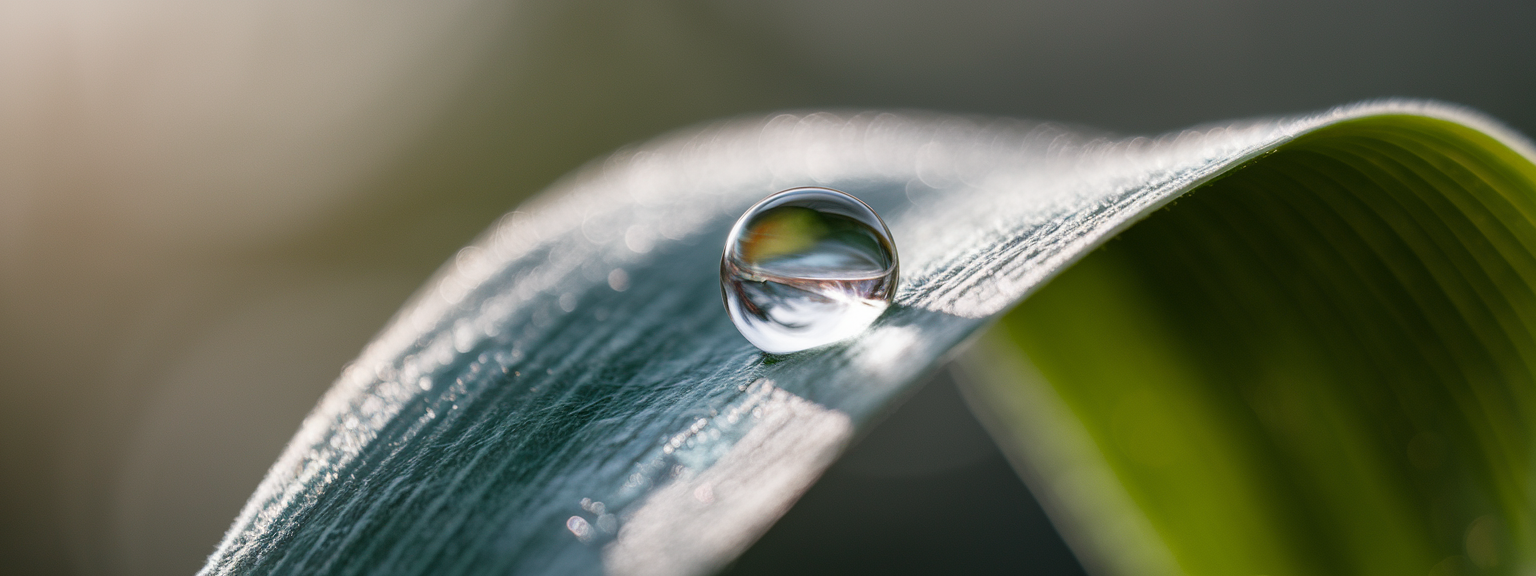
Imagine capturing a dewdrop resting at the tip of a leaf during sunrise. With a 100mm macro lens on a tripod, settings of f/5.6, ISO 200, and shutter speed 1/160s provide sharp detail. Manual focus ensures precision on the droplet, while a reflector softens shadows. The blurred backdrop offers clean separation, highlighting the subtle textures of the leaf.
✅ Key Do’s for Effective Usage
- Use manual focus consistently for precision.
- Experiment with magnifications across different lenses.
- Take time and work patiently with moving subjects.
- Maintain uncluttered backgrounds for stronger subject emphasis.
- Test various lighting options for optimal effect.
❌ Common Mistakes to Avoid
- Overdependence on autofocus when depth of field is minimal.
- Overlooking stability when holding cameras by hand.
- Excessive flash use creating unwanted glare.
- Lack of background awareness causing visual distraction.
- Overprocessing images until textures appear artificial.
🔄 Troubleshooting & FAQs
Why are my macro photos always blurry?
Blurriness often results from insufficient stability or incorrect focusing. Use a tripod, switch to manual focus, and increase shutter speed. If necessary, apply focus stacking for full coverage.
What type of lens is best for macro photography?
A 90–105mm macro lens provides balance between working distance and magnification. Shorter lenses like 60mm excel in controlled studio environments, while longer 150–200mm are ideal for photographing insects or shy subjects.
How do I achieve better backgrounds?
Separate your subject from the background by increasing distance. A wider aperture will enhance the bokeh effect, creating soft, non-distracting surroundings.
Can smartphones take quality macro photos?
Yes, with clip-on macro lenses and proper lighting. Ensure stability for sharpness, as smartphones amplify tiny vibrations at close distances.
Should I use natural light or artificial setups?
Natural light often provides softness, but artificial lights allow repeatable results. Many professional macro photographers integrate both methods depending on environmental conditions.
🖼️ Bringing It All Together
Macro photography offers an opportunity to explore intricate beauty in both the natural world and everyday objects. With mastery over equipment, depth of field, and creative composition, you can capture striking imagery that speaks through detail alone.
By applying these methods, refining your focus, and embracing experimentation, your journey into macro photography will not only improve your technical expertise but also enhance the way you appreciate subtle details in everyday life.
Visit our Photography Content Hub
Smart Resize by SmartLink Basics iPhone or iPad app
“`
![[Person at a desk planning a business with laptop and notes about turning passion into profit]](https://lenslesson.com/wp-content/uploads/2025/12/turning-passion-into-profit-guide.png "[Turning Passion Into Profit Plan]")
![[Beginner photographer adjusting camera settings while learning how to get started with camera]](https://lenslesson.com/wp-content/uploads/2025/12/getting-started-with-camera-beginner-setup.png "[Getting Started With Camera - Beginner Setup]")
![[Photographer editing a vibrant landscape on a monitor, demonstrating techniques for stunning images]](https://lenslesson.com/wp-content/uploads/2025/12/advanced-stunning-images-editing-workflow.png "[Stunning Images Editing Workflow]")
![[Photographer using a telephoto lens to capture a fast break at a basketball game — Sports Photography]](https://lenslesson.com/wp-content/uploads/2025/12/sports-photography-action-shot-telephoto-basketball.png "[sports-photography-action-shot]")
![[Photographer capturing sunrise landscape during a travel photography trip with a mirrorless camera]](https://lenslesson.com/wp-content/uploads/2025/12/travel-photography-sunrise-shot-essentials.png "[Travel photography sunrise capture]")
![[Close-up of a photographer adjusting camera settings - Photo Tips for sharper shots]](https://lenslesson.com/wp-content/uploads/2025/12/photo-tips-better-photos-smartphone-composition.png "[Photo Tips Sharper Shots]")
![[Photographer capturing a candid moment on a busy city sidewalk — street photography scene]](https://lenslesson.com/wp-content/uploads/2025/12/street-photography-candid-urban-moment.png "[Urban Street Photography Moment]")

