
Getting Started with Camera: Beginner’s Guide to Photography Basics
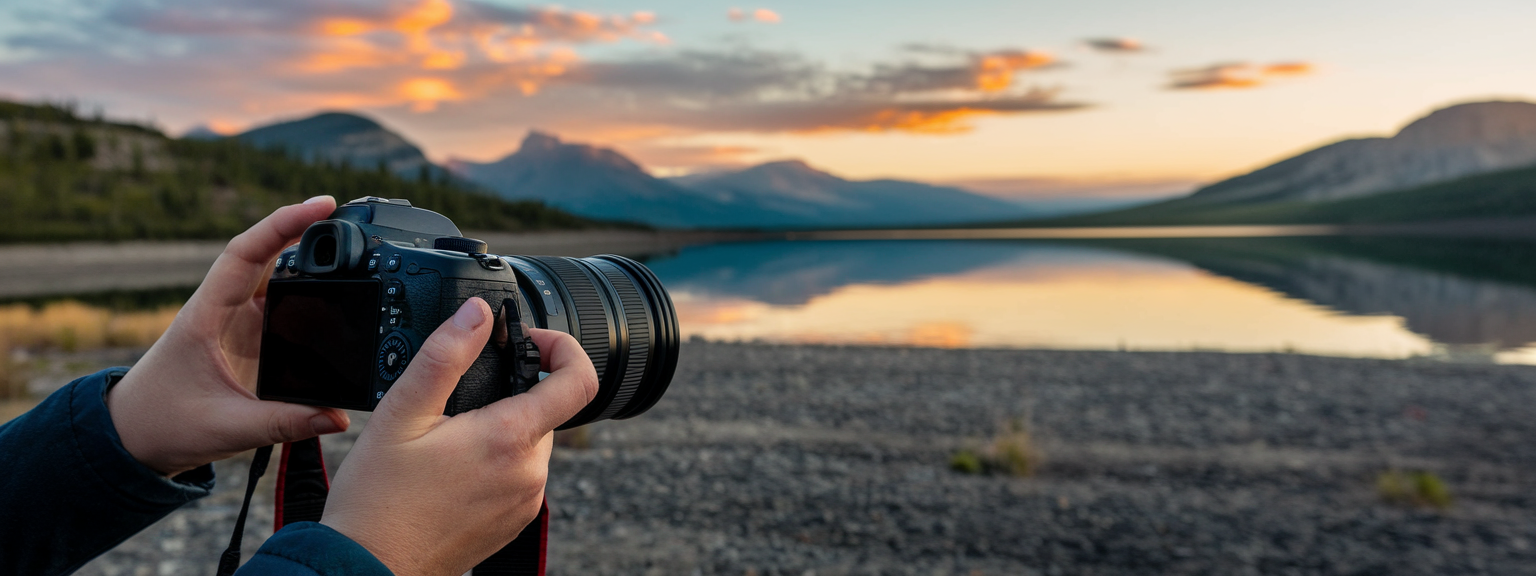
Photography is one of the most rewarding creative hobbies you can explore. Whether your goal is to capture family events, enjoy an artistic outlet, or pursue a career, the first step is getting started with camera basics. Many beginners find concepts like aperture, shutter speed, ISO, and camera modes intimidating. However, understanding them step-by-step will help you use your camera with confidence and take your skills to the next level.
📝 Step-by-Step Guide: Getting Started with Camera
Unboxing and Familiarizing with the Camera
Start by studying the essential components of your device. Explore the on/off switch, mode dial, shutter button, lens release, and menu buttons. Becoming familiar with these will help you feel comfortable with your gear.
- Locate the viewfinder or LCD screen.
- Understand modes such as Auto, Program, Aperture Priority, Shutter Priority, and Manual.
- Read your camera’s manual to understand unique features of your model.
The Exposure Triangle
Every photo depends on light. The exposure triangle is made of three elements:
- Aperture: Controls how wide the lens opens. Wide apertures (f/1.8) allow more light, blur backgrounds, and narrow apertures (f/16) keep more of the scene sharp.
- Shutter Speed: Determines how long the shutter stays open. Fast speeds (1/1000s) freeze action, while slow speeds (1/10s) create motion blur.
- ISO: Sensor sensitivity to light. Low ISO values (100–200) produce clean images, high ISO (1600+) increase brightness but introduce grain.
Camera Modes
Understanding when to use each mode is crucial for creative freedom:
- Auto: All decisions made by camera.
- Program (P): Semi-automatic with some flexibility.
- Aperture Priority: You control aperture, camera selects shutter speed.
- Shutter Priority: You control shutter, camera balances aperture.
- Manual: Full creative control over all settings.
Composition Basics
Exposure sets the technical foundation, but composition turns a photo into art. Learn simple rules first:
- Apply the Rule of Thirds by aligning subjects along gridlines.
- Use Leading Lines like roads or fences to guide viewer’s eyes.
- Frame your subject naturally with doorways, windows, or trees.
📌 Practical Applications: Getting Started with Camera
Applying Basics to Real-Life Photography
Each concept you learn translates into specific types of photography:
- Travel: Wide aperture for portraits, narrow for landscapes.
- Sports: Fast shutter speeds to freeze play.
- Night Photography: Long exposures with tripod plus higher ISO.
- Portraits: Wide aperture (f/1.8–2.8) for background blur.
- Street Photography: Aperture Priority with f/5.6 for balance.
💡 Tips & Tricks: Getting Started with Camera
- Carry extra batteries and memory cards.
- Use exposure compensation when needed.
- Experiment with different lighting conditions.
- Shoot RAW for better editing flexibility.
- Hold your camera properly with two hands for stability.
📸 Sample Scenario
Scenario: Portrait at Sunset
- Switch to Aperture Priority.
- Set aperture to f/2.8 for background blur.
- Start with ISO 200 and increase if light fades.
- Position subject backlit by the sun.
- Tap focus on the eyes; adjust exposure compensation to brighten face.
This creates a warm, glowing portrait.
✅ Key Do’s for Effective Usage
- Experiment with different shutter and aperture blends.
- Back up your images regularly.
- Regularly clean your lens.
- Use both hands for a secure hold.
- Practice with moving and still subjects alike.
❌ Common Mistakes to Avoid
- Over-relying on Auto mode.
- Shooting at high ISO in bright light.
- Ignoring the background.
- Not formatting memory cards properly.
- Forget to account for lighting variations.
🔄 Troubleshooting & FAQs
Why are my photos blurry?
Blurry shots may result from slow shutter speed, camera shake, or incorrect focus. Increase shutter speed, use a tripod, and confirm focus on your subject.
Why do indoor photos look yellow?
This is a white balance issue. Adjust WB to incandescent for indoor lighting or use auto white balance for simplicity.
Should I shoot RAW or JPEG?
RAW offers more editing flexibility but requires more space. JPEG is smaller but less flexible. Use RAW when editing is important.
Is DSLR better than mirrorless?
Both have benefits. DSLRs generally offer longer battery life and optical viewfinders. Mirrorless cameras are lighter and often more portable with advanced features.
Do I need expensive gear to begin?
No. Excellent results come from understanding techniques, not just expensive gear. Start with an entry-level DSLR or mirrorless and focus on skills.
🖼️ Bringing It All Together
Getting started with camera basics is less overwhelming when broken down into exposure, camera modes, and composition rules. As you combine these elements with consistent practice, your confidence and creativity will expand steadily.
Your camera is more than just a device; it’s a storytelling tool. Every click takes you closer to becoming the photographer you want to be.
Visit our Photography Content Hub
Smart Resize by SmartLink Basics iPhone or iPad app
“`
![[Beginner photographer adjusting camera settings while learning how to get started with camera]](https://lenslesson.com/wp-content/uploads/2025/12/getting-started-with-camera-beginner-setup.png "[Getting Started With Camera - Beginner Setup]")
![[Photographer editing a vibrant landscape on a monitor, demonstrating techniques for stunning images]](https://lenslesson.com/wp-content/uploads/2025/12/advanced-stunning-images-editing-workflow.png "[Stunning Images Editing Workflow]")
![[Photographer using a telephoto lens to capture a fast break at a basketball game — Sports Photography]](https://lenslesson.com/wp-content/uploads/2025/12/sports-photography-action-shot-telephoto-basketball.png "[sports-photography-action-shot]")
![[Photographer capturing sunrise landscape during a travel photography trip with a mirrorless camera]](https://lenslesson.com/wp-content/uploads/2025/12/travel-photography-sunrise-shot-essentials.png "[Travel photography sunrise capture]")
![[Close-up of a photographer adjusting camera settings - Photo Tips for sharper shots]](https://lenslesson.com/wp-content/uploads/2025/12/photo-tips-better-photos-smartphone-composition.png "[Photo Tips Sharper Shots]")
![[Photographer capturing a candid moment on a busy city sidewalk — street photography scene]](https://lenslesson.com/wp-content/uploads/2025/12/street-photography-candid-urban-moment.png "[Urban Street Photography Moment]")


