
Exploring the World of Macro Photography: A Beginner’s Guide
Macro photography is more than just taking enlarged close-ups; it is an artistic method of revealing fine details that are often invisible to the naked eye. By mastering macro photography, photographers can showcase textures, colors, and patterns in extraordinary ways. From capturing the delicate veins of a butterfly’s wing to highlighting water droplets balancing on a leaf, macro shots open a fascinating world of detail and creativity. This beginner’s guide will provide you with the essential tools, techniques, and strategies to master close-up photography with confidence and precision.
📝 Step-by-Step Guide: Macro Photography
Understanding Macro Photography
A true macro image is defined as one with a 1:1 reproduction ratio. This means the subject appears life-size on the camera’s sensor. Many standard lenses allow close focusing but do not achieve true macro magnification, therefore it is crucial to recognize this difference when choosing equipment for detailed photography.
Choosing the Right Lens for Macro
Your choice of lens significantly affects image clarity and magnification. Beginners often start with affordable solutions, but dedicated macro lenses are the most reliable choice for long-term use.
- Dedicated Macro Lenses: Offer 1:1 true macro reproduction and exceptional sharpness.
- Extension Tubes: Attach between lens and camera body to allow closer focusing distances.
- Reverse Lens Technique: A budget-friendly but less convenient way to achieve high magnification.
- Close-Up Filters: Affordable screw-on filters, though they may compromise edge sharpness.
A 90–105mm lens for macro photography is often recommended for a good balance between affordability, image quality, and working distance.
Camera Settings for Macro Shots
- Aperture: Use f/8–f/16 for higher depth of field, or f/2.8–f/4 for soft backgrounds and bokeh.
- Shutter Speed: At least 1/200s when handheld to reduce blur from hand movements.
- ISO: Keep low (100–400) for maximum clarity; increase only if absolutely necessary.
- Focus Mode: Manual focus is more precise than autofocus for close-up photography.
Mastering Lighting in Macro Photography
Lighting plays a critical role in capturing detail. Natural morning or evening light provides beautiful softness, while midday may produce harsh highlights unless diffused. External flashes, ring lights, and reflectors can control shadows and add depth.
Using Stabilization Tools
Because even small shakes are exaggerated in macro photography, stability is essential. A tripod with a macro focusing rail delivers smoother camera movements. Additionally, using a remote shutter release or self-timer further reduces the risk of vibrations.
Starting With Still Subjects
Beginners should practice on objects like coins, flowers, or everyday textures. These subjects allow controlled experiments with composition, exposure, and focus techniques without the added challenge of movement.
Progressing to Live Subjects
Once comfortable with still life, move to challenging subjects such as insects, small amphibians, or moving droplets. This requires patience, fast reflexes, and mastery of settings for adaptability.
📌 Practical Applications: Macro Photography
Nature and Wildlife
Some of the most captivating macro shots come from the natural world. Insects, plant structures, and natural textures such as ice crystals or pollen grains offer incredible detail when captured through close-up photography.
Scientific and Educational Uses
Macro photography plays a key role in science education and research. From capturing cells and microbes under controlled environments to documenting minerals and medical samples, these images help explain complex details in a visually accessible way.
Commercial and Product Photography
Products such as jewelry, watches, miniatures, and cosmetics benefit from clear detail shots. Macro techniques highlight finishing details that are crucial for brand presentation and marketing.
Creative and Abstract Approaches
Beyond science or commercial use, macro photography is an excellent avenue for abstract art. Close-ups of fabric fibers, textures, or household objects can transform into impressive compositions with unique perspectives.
💡 Tips & Tricks: Macro Photography
- Always focus on the eyes of insects or animals to bring life to the frame.
- Consider focus stacking multiple images for extended depth of field.
- Shoot in RAW format for extensive editing flexibility.
- Vary your shooting angles to add interest and engagement.
- Control distracting backgrounds by using distance and clean backdrops.
- Patience is essential—wait for the right moment, especially for moving subjects.
📸 Sample Scenario
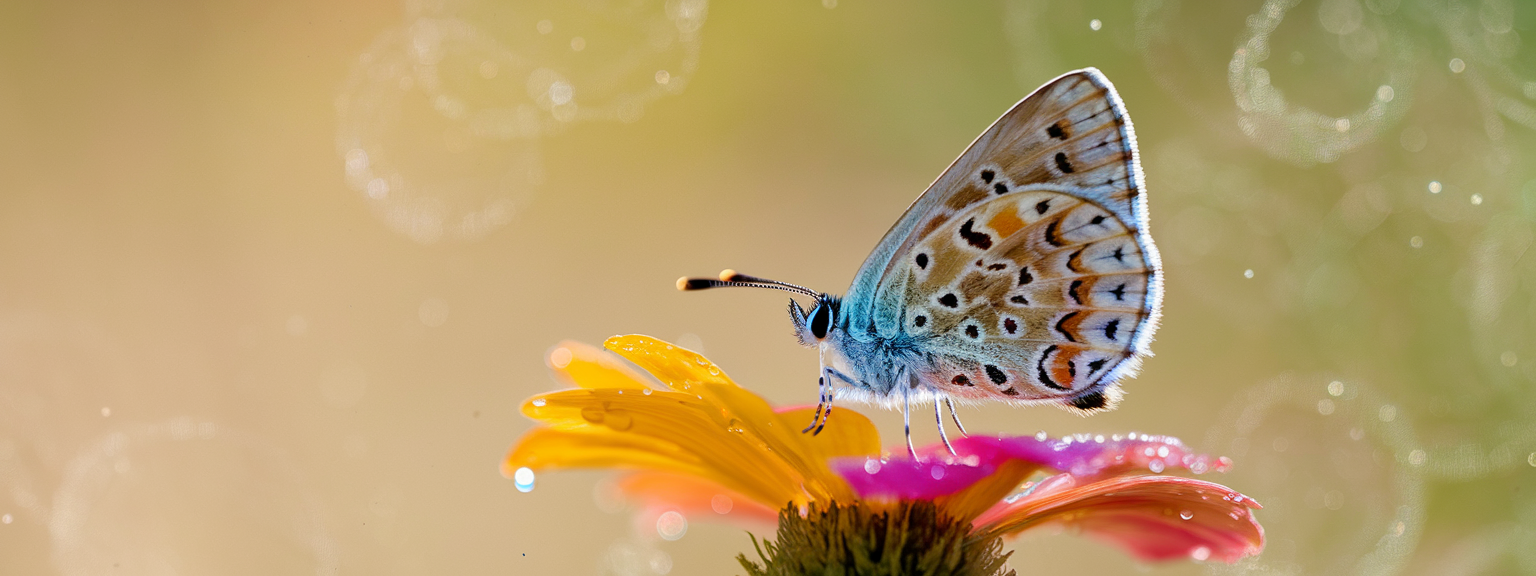
Imagine a butterfly perched gently on a flower in your backyard. You set up a 100mm macro lens, stabilize the camera on a tripod, and adjust exposure for morning light. By focusing manually on the butterfly’s eye at f/8 with 1/250s shutter speed, the result is a crystal-clear capture where wing patterns and textures become beautifully detailed. This transition from a casual moment to a polished macro image demonstrates the power of the technique.
✅ Key Do’s for Effective Usage
- Use manual focus for precise results.
- Stabilize equipment with a tripod or monopod.
- Shoot during golden hours for better natural lighting.
- Diffuse harsh direct light with reflectors.
- Begin practicing with still subjects before moving to live ones.
❌ Common Mistakes to Avoid
- Avoid relying solely on autofocus in close-up shots.
- Do not overlook background distractions that clutter the frame.
- Resist the temptation to over-edit or oversaturate colors.
- Never shoot handheld at low shutter speeds without stabilization.
- Do not use extra-wide apertures blindly, as details may be lost.
🔄 Troubleshooting & FAQs
What lens is best for macro photography?
For beginners, a 90–105mm dedicated macro lens offers affordability, excellent image quality, and an ideal working distance.
How can I capture sharp macro shots without blur?
Use a tripod, fast shutter speeds, and a remote trigger where possible. Lighting solutions such as ring flashes can also help freeze the subject sharply.
Can I use my smartphone for close-up photography?
Yes, smartphones can produce decent macro shots with clip-on lenses. While they will not match DSLR clarity, they are a great starting point for casual experiments.
What type of lighting works best for macro photography?
Soft, diffused natural light—such as that found on overcast days—is ideal. Indoors, ring lights or diffused flashes are effective alternatives.
How can I achieve more depth of field in macro shots?
Smaller apertures (f/11–f/16) provide more depth. For extreme close-ups, use focus stacking by combining multiple exposures at different focus planes.
🖼️ Bringing It All Together
Macro photography is a rewarding discipline that reveals beauty in small subjects and details. From scientific documentation to artistic expression, close-up photography provides countless creative opportunities. Building fundamental skills with lenses, lighting, and stabilization will help unlock your ability to create extraordinary shots.
By mastering patience, technical knowledge, and creativity, you can turn everyday objects into extraordinary works of art. This progression from beginner to advanced macro photography opens remarkable possibilities for nature shots, product detail, and artistic experimentation.
Visit our Photography Content Hub
Smart Resize by SmartLink Basics iPhone or iPad app
“`
![[Person at a desk planning a business with laptop and notes about turning passion into profit]](https://lenslesson.com/wp-content/uploads/2025/12/turning-passion-into-profit-guide.png "[Turning Passion Into Profit Plan]")
![[Beginner photographer adjusting camera settings while learning how to get started with camera]](https://lenslesson.com/wp-content/uploads/2025/12/getting-started-with-camera-beginner-setup.png "[Getting Started With Camera - Beginner Setup]")
![[Photographer editing a vibrant landscape on a monitor, demonstrating techniques for stunning images]](https://lenslesson.com/wp-content/uploads/2025/12/advanced-stunning-images-editing-workflow.png "[Stunning Images Editing Workflow]")
![[Photographer using a telephoto lens to capture a fast break at a basketball game — Sports Photography]](https://lenslesson.com/wp-content/uploads/2025/12/sports-photography-action-shot-telephoto-basketball.png "[sports-photography-action-shot]")
![[Photographer capturing sunrise landscape during a travel photography trip with a mirrorless camera]](https://lenslesson.com/wp-content/uploads/2025/12/travel-photography-sunrise-shot-essentials.png "[Travel photography sunrise capture]")
![[Close-up of a photographer adjusting camera settings - Photo Tips for sharper shots]](https://lenslesson.com/wp-content/uploads/2025/12/photo-tips-better-photos-smartphone-composition.png "[Photo Tips Sharper Shots]")
![[Photographer capturing a candid moment on a busy city sidewalk — street photography scene]](https://lenslesson.com/wp-content/uploads/2025/12/street-photography-candid-urban-moment.png "[Urban Street Photography Moment]")

