Master Harsh Lighting Photography: Essential Tips for Stunning Outdoor Shots

📝 Step-by-Step Guide: Master Harsh Lighting Photography
Understanding the Nature of Harsh Lighting
Harsh Lighting Photography can seem intimidating at first, as it often deals with bright light sources and strong contrasts. However, by understanding how natural light works, you can begin to manage shadows and create images that are both dynamic and visually pleasing. When the sun is high, outdoor photography tips become crucial since you may be dealing with hard shadows and overexposed highlights. Therefore, it is important to learn about the behavior of bright light and explore photography techniques that allow you to capture details even in challenging conditions.
When you understand the characteristics of harsh lighting, you can plan your photo session better. For example, during the golden hour, the sunlight softens and creates a more natural, warm effect, making it easier to maintain control over exposure settings. In addition, studying how light interacts with various subjects leads to improvements in image composition.
Preparation and Equipment Essentials
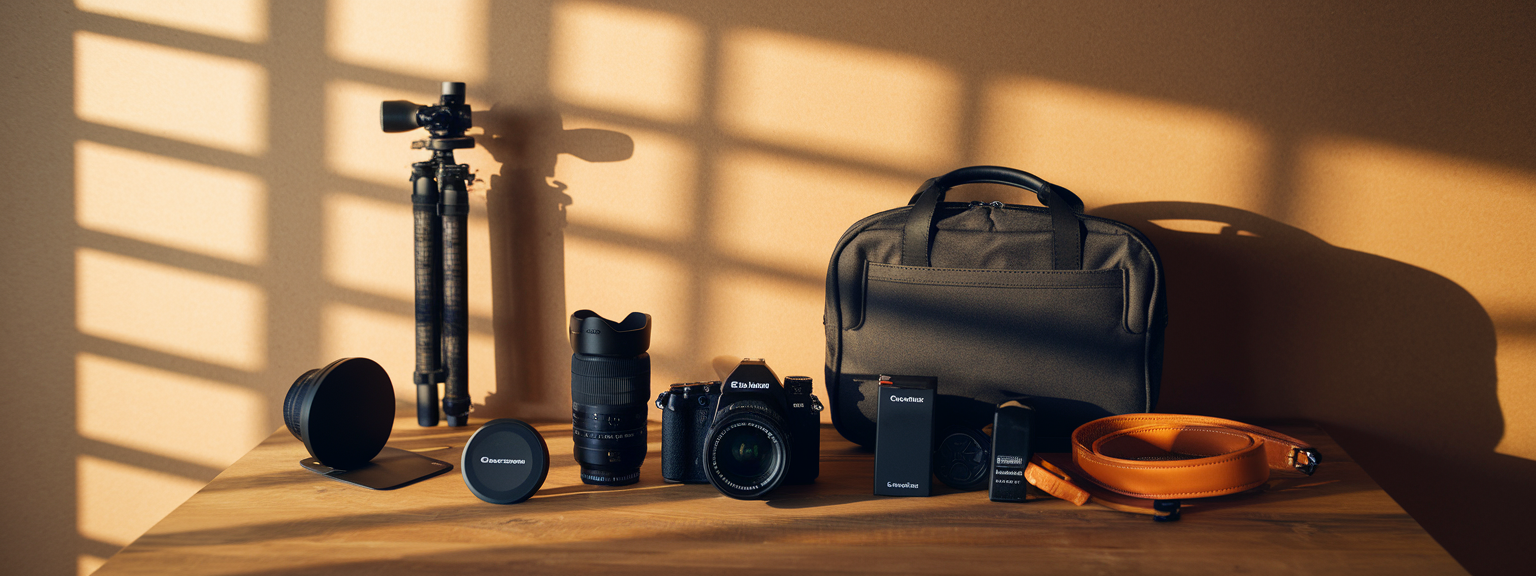
Before you step outdoors, it is vital to gather the right equipment. A DSLR or mirrorless camera with manual control settings is highly recommended for mastering Harsh Lighting Photography. Moreover, investing in a reliable tripod, a set of reflectors, and diffusers can significantly improve your control over shadows. This preparation not only helps you achieve balanced exposure settings but also ensures that you have the necessary tools for managing shadows and controlling bright light.
- Camera with manual mode
- Reflectors and diffusers
- Sturdy tripod
- Extra batteries and memory cards
In addition, it is advisable to check the weather forecast and the direction of sunlight. This helps in determining the best time to shoot, which might be during early morning or late afternoon when the angle of light is softer.
Shooting Techniques Under Harsh Conditions
When you venture into outdoor settings, your photography techniques play a crucial role in enhancing your images. First and foremost, experiment with different shutter speeds and aperture settings to manage exposure. This allows you to capture fine details in both the highlights and shadows. Additionally, consider using the camera’s histogram to avoid overexposure. In particular, when managing shadows, you may need to use exposure compensation to adjust for the extreme contrast between light and dark.
Moreover, pay attention to the reflective surfaces in your scene. They can intensify bright light and create unwanted glares. Therefore, altering your angle or repositioning can help maintain a balanced composition.
Post-Processing Techniques for Harsh Lighting Photography
After capturing your images, the editing phase is just as important. Using post-processing software, you can adjust exposure settings, fine-tune contrast and brightness, and bring out details in shadow areas. In addition, techniques like dodging and burning can help emphasize key areas in the image and reduce the impact of harsh shadows. As a result, even photographs taken in bright light can be transformed into stunning works of art.
Furthermore, it is beneficial to apply selective adjustments on specific regions of the image. For example, brighten shadow areas or tone down highlights to create balanced light distribution. This step ensures that the final image is not only visually appealing but also retains the natural ambiance of outdoor photography.
📌 Practical Applications: Master Harsh Lighting Photography
Leveraging Golden Hour for Optimal Light
One of the most rewarding times to practice Harsh Lighting Photography is during the golden hour. In this period, the light becomes softer and warmer, making it considerably easier to manage shadows. Additionally, this time provides a natural opportunity for outdoor photography tips that effectively balance exposure. By planning your shoots during these favorable conditions, you mitigate the overwhelming effects of bright light while still capturing the essence of your subject matter.
Furthermore, the gradual change in light allows you to practice various photography techniques. This includes capturing silhouettes and experimenting with backlighting. Transition words like “therefore” and “furthermore” help you appreciate the importance of timing and natural transitions in outdoor settings.
Fine-Tuning Exposure Settings
When dealing with outdoor scenes, managing harsh light effectively requires precise control over exposure settings. Therefore, use manual mode for total control over aperture, shutter speed, and ISO. By doing so, you prevent overexposed areas and preserve details in the shadows. Notably, exposure settings become even more critical when shooting in bright conditions where harsh lighting is predominant.
Moreover, exploring the benefits of high dynamic range (HDR) can also be advantageous. This method merges multiple exposures, ensuring both bright light and dim shadow areas are well-represented in the final composite.
Strategies for Effective Shadow Control
Managing shadows is one of the telltale challenges of Harsh Lighting Photography. When shooting outdoors, it is crucial to carefully analyze where the shadows fall in your composition. Techniques such as repositioning your subject or using reflectors can minimize the impact of unwanted dark areas. Additionally, utilizing diffusers can soften the incoming light, resulting in smoother transitions between areas of bright light and deep shadows.
In addition, you may also consider shooting from different perspectives. This helps in reducing hard-edged shadows and creating a more balanced aesthetic. Therefore, continual experimentation with angles can dramatically improve the overall quality of your final image.
💡 Tips & Tricks: Master Harsh Lighting Photography
Utilize Reflectors and Diffusers
Reflectors and diffusers are indispensable tools in the arsenal of any photographer facing harsh lighting conditions. Reflectors bounce light back onto the subject, thereby reducing deep shadows and softening the overall image. On the other hand, diffusers scatter and soften direct sunlight, ensuring that even when bright light is present, the image retains a natural feel. In addition, using these tools not only improves image composition but also reinforces effective outdoor photography tips.
Experiment with Angles and Perspectives
Changing your shooting angle is a creative way to deal with extreme light. For instance, try shooting from a lower angle to capture interesting shadow patterns, or find a high vantage point to minimize the intensity of bright light. As a result, experimenting with different perspectives can transform an otherwise mundane scene into an extraordinary composition. Therefore, always be ready to move and explore diverse viewpoints.
Harness the Power of Natural Shadows
While harsh lighting may appear challenging, it provides the opportunity to integrate dramatic shadows into your narrative. By learning to balance hard light with soft shadow control, you can emphasize textures and depth in your images. Moreover, understanding how to use light and shadow enhances both outdoor photography tips and photography techniques that can elevate your portfolio.
Stay Mindful of Image Composition
Even when battling harsh light, keeping a strong sense of image composition remains essential. Utilize leading lines, rule-of-thirds, and symmetry to direct your viewers’ attention effectively. In addition, consider how the interplay of highlights and shadows contributes to the overall story of your image. Therefore, combining creative composition with technical adjustments helps achieve visually stunning outcomes.
📸 Sample Scenario
Imagine setting out on a crisp autumn morning with the intention of capturing the beauty of an urban park. The bright sun overhead casts pronounced shadows, and the crisp light highlights every texture from the leaves to the architectural elements in the background. In this scenario, Harsh Lighting Photography becomes a tool to create high-contrast images that vividly portray both the vibrancy of nature and the geometry of urban design.
To start, you set your camera to manual mode, carefully adjusting your exposure settings and ISO to ensure that the bright light does not wash out the details. You utilize a reflector to bounce soft light onto a model positioned near a stone bench, thereby softening the strong shadows without compromising the depth of the scene. Additionally, by experimenting with different angles, you capture both the direct brightness and the delicate shadow play on the surrounding trees.
In this sample scenario, employing outdoor photography tips like timing your shoot during the golden hour or leveraging diffusers adds creative versatility. The result is a series of images where bright light, shadow control, and image composition work together to tell a dynamic story.
✅ Key Do’s for Effective Usage
Following best practices is essential to mastering Harsh Lighting Photography. Below are some key do’s to ensure your images turn out stunning:
- Always shoot in manual mode to have full control of your exposure settings.
- Utilize outdoor photography tips such as shooting during the golden hour for softer natural light.
- Experiment with reflectors and diffusers to manage both bright light and harsh shadows.
- Review your camera’s histogram frequently to avoid overexposure.
- Employ creative composition techniques to highlight the interplay of light and shadow.
- Backup your images and experiment during post-processing to reach the best possible outcome.
Remember, every time you face strong sunlight, it provides an opportunity to enhance your understanding of exposure settings and photography techniques. With persistence and creativity, your portfolio will reflect a unique mastery of Harsh Lighting Photography.
❌ Common Mistakes to Avoid
While it is exciting to experiment with challenging lighting conditions, there are several pitfalls you should avoid in order to produce high-quality images. Below are common mistakes many photographers make:
- Relying solely on auto settings instead of embracing manual controls, which can lead to overexposed highlights or underexposed shadows.
- Ignoring the impact of direct sunlight by not using diffusers or reflectors, resulting in harsh, unflattering images.
- Neglecting to check the histogram, thereby losing critical details in both the highlights and shadows.
- Focusing too narrowly on one area of the composition and missing the opportunity to incorporate balanced ambient light.
- Skipping proper pre-shoot planning such as verifying weather conditions and the direction of sunlight.
Therefore, by avoiding these common mistakes, you can harness the full potential of Harsh Lighting Photography while applying trusted outdoor photography tips to ensure every shot is balanced and impactful.
🔄 Troubleshooting & FAQs
What adjustments can I make if my photos appear too washed out?
If your photos look overly bright or washed out, consider reducing the exposure settings on your camera. You can also experiment with the histogram to ensure highlights are not clipped. Additionally, use reflectors or diffusers to soften the incoming light for clearer details.
How do I balance bright light with shadow areas in my pictures?
Balancing bright light with shadows involves managing exposure locally. This can be done by using exposure compensation, adjusting shutter speed and ISO manually, or employing high dynamic range (HDR) techniques. Furthermore, selective post-processing can help bring out details in the shadowed areas.
Can I shoot in auto mode and still capture good images in harsh lighting?
Although some modern cameras perform well in auto mode, switching to manual mode generally provides better control over exposure settings, ensuring that bright light does not dominate the image. Therefore, for challenging scenes, manual adjustments are often recommended over auto mode.
Which photography techniques work best during the golden hour?
During the golden hour, techniques such as backlighting, silhouette photography, and soft-focus shots yield exceptional results. In addition, incorporating outdoor photography tips like positioning subjects against the sun can create dramatic effects with pleasing shadow control.
What are some quick solutions if my camera’s histogram shows clipped highlights?
If you notice clipped highlights, quickly lower your exposure or use exposure compensation to bring down the brightness. Additionally, repositioning your subject or using a diffuser can help mitigate the effect, preserving important details in bright areas.
🖼️ Bringing It All Together
In conclusion, mastering Harsh Lighting Photography can transform your outdoor shots into compelling visual narratives. By understanding the nature of bright light, preparing with the right equipment, and applying proven photography techniques, you can successfully manage shadows and exposure. Each step from planning to post-processing plays a pivotal role in creating images that are both artistically vibrant and technically sound.
Moreover, always remember that practice is key. Embrace outdoor photography tips, experiment with various exposure settings, and continuously refine your approach to managing harsh light. As a result, every challenging lighting scenario becomes an opportunity to grow as a photographer.
By confidently applying these techniques, you will not only learn how to work with Harsh Lighting Photography but also master the art of creative image composition. The integration of exposure settings, shadow control, and innovative photography techniques ensures that your images capture the nuanced beauty of every scene.
Now is the time to experiment and refine your skills. With careful planning, hands-on practice, and dedication, you will soon see the difference in your work. Embrace each challenge as a learning opportunity and continue sharing your progress with fellow photography enthusiasts.

![[Getting Started With Camera - Beginner Setup] [Beginner photographer adjusting camera settings while learning how to get started with camera]](https://lenslesson.com/wp-content/uploads/2025/12/getting-started-with-camera-beginner-setup.png)
![[Stunning Images Editing Workflow] [Photographer editing a vibrant landscape on a monitor, demonstrating techniques for stunning images]](https://lenslesson.com/wp-content/uploads/2025/12/advanced-stunning-images-editing-workflow.png)
![[sports-photography-action-shot] [Photographer using a telephoto lens to capture a fast break at a basketball game — Sports Photography]](https://lenslesson.com/wp-content/uploads/2025/12/sports-photography-action-shot-telephoto-basketball.png)
![[Travel photography sunrise capture] [Photographer capturing sunrise landscape during a travel photography trip with a mirrorless camera]](https://lenslesson.com/wp-content/uploads/2025/12/travel-photography-sunrise-shot-essentials.png)
![[Photo Tips Sharper Shots] [Close-up of a photographer adjusting camera settings - Photo Tips for sharper shots]](https://lenslesson.com/wp-content/uploads/2025/12/photo-tips-better-photos-smartphone-composition.png)
![[Urban Street Photography Moment] [Photographer capturing a candid moment on a busy city sidewalk — street photography scene]](https://lenslesson.com/wp-content/uploads/2025/12/street-photography-candid-urban-moment.png)


