Master Portrait Lighting: 10 Budget-Friendly Tips for Stunning Results

📝 Step-by-Step Guide: Master Portrait Lighting Techniques
Portrait photography has evolved tremendously and mastering portrait lighting on a budget is a challenge that many photographers face. In this comprehensive guide, we dive deep into Master Portrait Lighting techniques, combining both natural light photography and artificial light techniques to help you create visually stunning portraits without breaking the bank. By following these detailed steps, you will incorporate DIY lighting solutions along with natural and artificial sources to produce eye-catching portraits. Moreover, we will focus on practical tips like softbox setup, color temperature adjustment, and bounce lighting to ensure your portraits capture the perfect mood.
Step 1: Assess Your Environment
Before you begin, inspect your shooting location. Evaluate the natural light available during different times of the day. This initial step is crucial for Master Portrait Lighting because it lets you plan when to shoot to utilize the soft, diffused light available during golden hour or overcast conditions. Additionally, consider available surfaces for bounce lighting which can be an affordable and creative solution to enhance your lighting setup without expensive gear.
Step 2: Choose Your Lighting Equipment
A critical aspect of Master Portrait Lighting is to work with equipment that meets your budget. Use common household items as reflectors and diffusers. Consider investing in a softbox or even DIY alternatives made from white sheets and cardboard to simulate a soft light source. If natural light is not sufficient, explore artificial light techniques with cost-effective LED panels. These solutions allow you to maintain excellent portrait photography techniques without overspending.
Step 3: Experiment with Angles and Positions
Once you have your setting, adjust your subject’s pose and the light source positioning. Experiment with different angles to capture shadows and highlights. By fine-tuning the position and quality of your light, you can actually master portrait lighting while ensuring that the color temperature adjustment provides a balanced and natural effect. In addition, shifting the light source can emphasize facial features or create dramatic effects that add depth to your portrait.
Step 4: Incorporate Bounce Lighting
Bounce lighting is a budget-friendly solution that enhances Master Portrait Lighting by reducing harsh shadows. Position a reflector in front of your subject to bounce natural light back onto their face. You can use white foam boards or even silver car reflectors to achieve this effect. This adjustment not only saves you money but also adds a soft, flattering glow to your portraits.
Step 5: Fine-Tune Your Camera Settings
For Master Portrait Lighting, setting your camera correctly is as important as your lighting setup. Adjust the ISO, aperture, and shutter speed based on the incident light. Lower ISO settings reduce noise, while wider apertures produce a pleasing depth of field. Meanwhile, adjusting the shutter speed can help capture movements in sync with the light. Always check your histogram to ensure that your exposure is balanced and that vital details are preserved.
📌 Practical Applications: Master Portrait Lighting Methods
In this section, we explore how to adapt Master Portrait Lighting to real-life shooting situations. In addition, budget-friendly portrait tips can transform your photographic style even in challenging indoor or outdoor environments. For example, when shooting at home, use available windows as natural light sources, and when outside, consider how overcast conditions create the ideal soft light for capturing detailed and emotional portraits. This method not only enhances your natural light photography skills but also introduces you to creative compositions with artificial light techniques when necessary.
DIY Lighting Solutions at Home
Creating a studio environment at home is simpler than you might think. Start by using lamps with daylight bulbs to simulate balanced lighting. Arrange multiple light sources to cover different angles, and use diffusers, such as thin fabrics, to soften the light. With these DIY lighting solutions, you are well on your way to mastering portrait photography techniques without enormous investments.
Outdoor Applications and Natural Light Tricks
Outdoor portrait shooting is particularly well-suited for Master Portrait Lighting. The key is timing. Shooting during the golden hour provides warm, diffused light that naturally enhances skin tones and adds dramatic shadows. In addition, make strategic use of the available background and ambient light. Techniques such as bounce lighting with natural reflectors, like light-colored walls or even sand, can further elevate your results.
Integrating Artificial Light Techniques
When natural light falls short, your mastery over portrait lighting techniques must include artificial lighting methods. Utilize LED panels or inexpensive studio strobes to emulate the effects of natural light. Experiment with color temperature adjustment to match or enhance the ambient conditions. With these techniques, you ensure that every portrait, regardless of location, resonates with professional quality while staying budget friendly.
💡 Tips & Tricks: Master Portrait Lighting for Photographers
Enhancing your photography skills using Master Portrait Lighting techniques requires a combination of creativity and technical know-how. Here, we provide additional insights into maintaining the best balance between natural and artificial lighting. Utilize secondary methods such as DIY lighting solutions and budget-friendly portrait tips to bring out the best in every shot. Furthermore, ensuring proper light diffusion and bounce lighting will help you to avoid common pitfalls often faced by those new to portrait lighting.
Leverage Softbox Setup
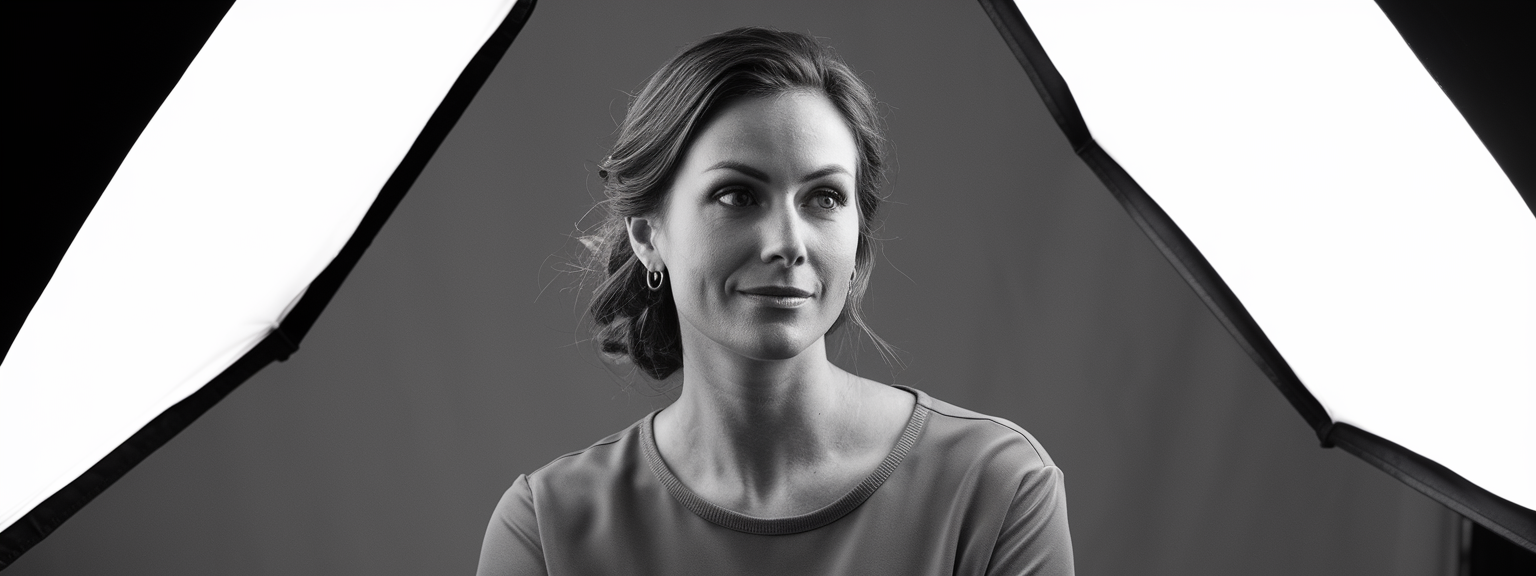
Implementing a softbox setup can drastically improve your Master Portrait Lighting, as it creates a soft, uniform lighting effect that minimizes harsh shadows and reflections. For example, a softbox paired with gentle flash can create the illusion of natural light, making your portrait photography techniques appear more professional. If you are on a tight budget, homemade softboxes using reflective materials also work wonders.
Adjust Color Temperature for Correct Mood
One must pay close attention to color temperature in order to master portrait lighting effectively. A slight imbalance can throw off the entire mood of the portrait. Therefore, using gels or adjusting camera settings can help you find the right balance. Experiment with both warm and cool tones to see which combination best enhances the subject’s features. This kind of DIY lighting solution is ideal for both natural light photography and controlled studio setups.
Explore Various Lighting Ratios
Different subjects and settings call for different lighting ratios. Try out different configurations of key and fill lights to change the mood and effect in your images. As you experiment, you will notice that even subtle adjustments in the lighting ratio can greatly influence the overall quality of your portrait. In addition, pay attention to shadows and highlights that accentuate your subject’s features.
📸 Sample Scenario
Imagine you are a freelance photographer preparing for a portrait session in a modest studio space. The room boasts ample natural light, yet the lighting conditions are inconsistent throughout the day. By applying Master Portrait Lighting techniques, you can create a cohesive look regardless of fluctuations. For instance, during midday when the sunlight is harsh, you might deploy bounce lighting by positioning a reflector near a white wall. As a result, the subject gets evenly diffused light that softens any harsh edges. Moreover, you can combine a low-cost LED fill light to balance shadows, ensuring your portrait maintains both detail and depth.
In another scenario, consider an outdoor shoot at dawn. With natural light just beginning to bloom, you adjust your softbox setup to harness the warm tones available. You fine-tune your camera settings accordingly and utilize a combination of artistic angles, bounce lighting off natural surfaces, and artificial accents when necessary to emphasize the subject’s facial features. This practical application of Master Portrait Lighting not only highlights your skills in natural light photography but also demonstrates your capability in adapting budget-friendly portrait tips to diverse environments.
✅ Key Do’s for Effective Usage
- Do experiment with both natural and artificial light sources to find the optimal blend for Master Portrait Lighting.
- Do create DIY lighting solutions to complement your setup, such as homemade reflectors or diffusers.
- Do pay attention to color temperature adjustment to ensure the mood of the portrait is preserved.
- Do fine-tune your camera settings to accurately capture the subtle details in your portrait photography techniques.
- Do employ bounce lighting to alleviate harsh shadows and create a well-balanced illumination.
- Do consider the direction and quality of the light, ensuring that every shot embodies the essence of budget-friendly portrait tips.
❌ Common Mistakes to Avoid
- Do not rely solely on one light source; otherwise, you risk creating overly dramatic shadows that detract from your subject.
- Do not ignore the importance of white balance, as incorrect color temperature adjustment can ruin the natural ambiance of your portrait.
- Do not overexpose or underexpose your images; balancing light levels is key to successful Master Portrait Lighting.
- Do not neglect the use of diffusers and reflectors, which are essential for softening harsh light and providing even illumination.
- Do not overlook experimenting with DIY lighting setups; sometimes the best portrait photography techniques come from creative, budget-friendly ideas.
🔄 Troubleshooting & FAQs
Even seasoned photographers encounter challenges when mastering portrait lighting. Below are some frequently asked questions along with practical solutions:
Q: What is the best method to balance natural and artificial light?
A: The key is to assess the available natural light and then supplement it with affordable artificial lighting, like LED panels. Adjust the exposure settings manually so that both light sources complement each other. This practical approach aligns well with Master Portrait Lighting techniques.
Q: How can I use DIY lighting solutions for effective portrait photography?
A: Start by using common household items such as white foam boards and lamps fitted with daylight bulbs. Experiment with diffusers and reflectors to mimic a studio softbox setup. These cost-efficient methods are perfect for enhancing your Master Portrait Lighting approach, especially for budget-friendly portrait tips.
Q: What should I do if my subject appears too shadowed?
A: If you find excessive shadows, consider repositioning your light source or adding a reflector to bounce light back onto your subject’s face. In addition, carefully check your camera’s exposure settings to ensure shadows aren’t overly emphasized.
Q: Can I achieve Master Portrait Lighting with a limited budget?
A: Absolutely. Many effective techniques rely on creative positioning, precise adjustments, and the smart use of natural light. Embracing DIY lighting solutions and simple setups like softbox alternatives can allow you to achieve stunning results without a hefty investment.
Q: How often should I experiment with different lighting ratios?
A: Regular experimentation can sharpen your skills significantly. It is beneficial to try various lighting configurations every session, as minor adjustments can considerably impact the overall outcome. This practice helps you refine your mastery of portrait lighting techniques over time.
🖼️ Bringing It All Together
Master Portrait Lighting is not just a technical skill but an art form that combines creativity with resourcefulness. This tutorial has walked you through step-by-step guides, practical applications, and essential tips & tricks that enable you to harness natural light photography, softbox setup skills, and color temperature adjustment to create stunning portraits. As you apply these budget-friendly portrait tips along with effective DIY lighting solutions, you will notice a significant improvement in your compositions, depth, and overall photo quality. This comprehensive approach ensures that every portrait you capture tells a unique visual story.
By integrating both modern and DIY methods, you have equipped yourself with versatile techniques that work in any situation. Continue to experiment with angles, lighting ratios, and equipment setups to keep refining your protocols. Remember, mastering portrait photography techniques is an ongoing journey where each session brings new learning opportunities and creative breakthroughs.

![[Stunning Images Editing Workflow] [Photographer editing a vibrant landscape on a monitor, demonstrating techniques for stunning images]](https://lenslesson.com/wp-content/uploads/2025/12/advanced-stunning-images-editing-workflow.png)
![[sports-photography-action-shot] [Photographer using a telephoto lens to capture a fast break at a basketball game — Sports Photography]](https://lenslesson.com/wp-content/uploads/2025/12/sports-photography-action-shot-telephoto-basketball.png)
![[Travel photography sunrise capture] [Photographer capturing sunrise landscape during a travel photography trip with a mirrorless camera]](https://lenslesson.com/wp-content/uploads/2025/12/travel-photography-sunrise-shot-essentials.png)
![[Photo Tips Sharper Shots] [Close-up of a photographer adjusting camera settings - Photo Tips for sharper shots]](https://lenslesson.com/wp-content/uploads/2025/12/photo-tips-better-photos-smartphone-composition.png)
![[Urban Street Photography Moment] [Photographer capturing a candid moment on a busy city sidewalk — street photography scene]](https://lenslesson.com/wp-content/uploads/2025/12/street-photography-candid-urban-moment.png)


